Removing and Installing a Fan Tray
3-20 Chassis Setup
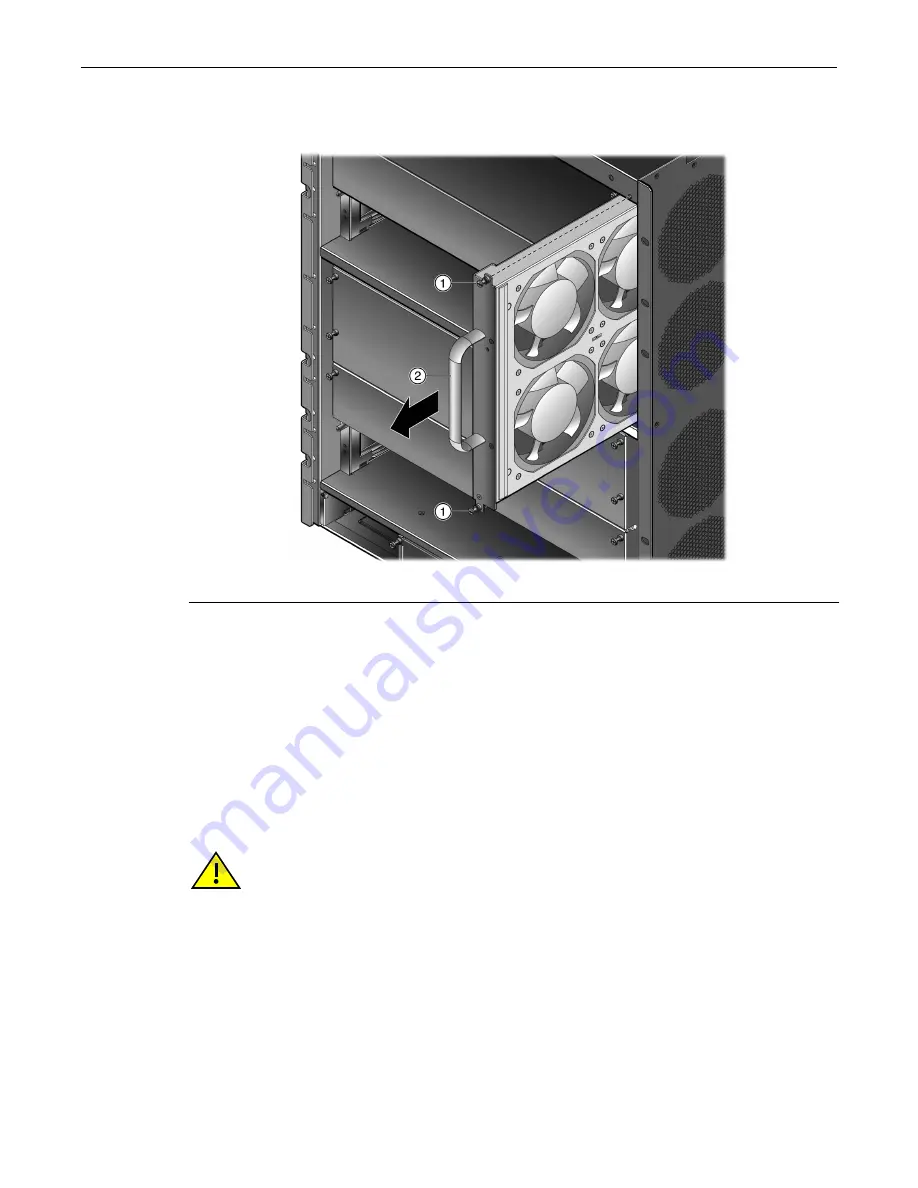
3.
Slowly
slide
the
fan
tray
out
of
its
slot
in
the
chassis.
See
Figure 3-14 Removing the Fan Tray
Installing a Fan Tray
To
install
a
fan
tray:
1.
Attach
the
anti
‐
static
wrist
strap
as
described
in
before
handling
the
fan
tray.
2.
Hold
the
handle
of
the
fan
tray
with
one
hand
and
the
bottom
of
the
fan
tray
with
the
other
hand.
You
should
hold
the
fan
so
that
the
STATUS
LED
label
on
the
faceplate
is
right
‐
side
up.
3.
Line
up
the
top
and
bottom
of
the
fan
tray
with
the
slot
guides
on
the
chassis.
4.
Slide
the
fan
tray
into
the
chassis
until
the
faceplate
of
the
tray
is
flush
with
the
face
of
the
S8
chassis.
If
there
is
any
strong
resistance,
remove
the
fan
tray
and
reinsert
it.
5.
Tighten
the
two
captive
screws
to
secure
the
fan
tray
to
the
S8
chassis.
1
Captive screw (2)
2
Fan tray handle
Caution:
In the following step, ensure that you do not force the fan assembly into place as it may
damage the self-aligning power/control connector in the chassis.
Precaución:
En el siguiente paso, tenga cuidado de no colocar de manera forzada el sistema de
ventilación, porque puede dañar el conector de control de corriente con autoalineación del chasis.
Summary of Contents for S4-Chassis
Page 2: ......
Page 12: ...x...
Page 16: ...xiv...
Page 20: ...Getting Help xviii About This Guide...
Page 28: ...Features 1 8 Introduction...
Page 62: ...Completing the Installation 3 32 Chassis Setup...