background image


Product Manual  

EcoFlex LED Neon 


EnvironmentalLights.com • P: 888.880.1880 • 11235 West Bernardo Ct., Suite 102, San Diego, CA 92127


© Environmental Lights 


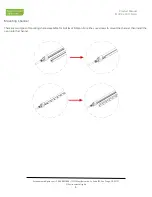
Assembling Connectors 

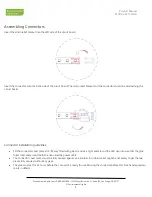
Insert the strain relief bracket into the LED side of the circuit board. 


Insert the connector onto the back side of the circuit board. The strain relief bracket and the connector should be sandwiching the 
circuit board.  


Connector installation guidelines: 


Fill the connector cover pieces 1/3-1/2 way filled with glue to ensure a tight seal around the LED neon. Ensure that the glue 
forms total seal around both the neon and the power cable.  


The connector cover pieces must be fully secured against one another. A rubber mallet might be necessary to get the two 
pieces fully secured without any gaps. 


The glue must set for 24 hours before the connector is ready for use. Moving the connector before this time has elapsed can 
result in defects.   


Summary of Contents for LN-ECO 10m Series

Page 1: ...one end EcoFlex LED Neon is UL Listed and saves time and money on installation It runs on 24 volts DC and its silicone casing provides protection and excellent diffusion for a hotspot free appearance...

Page 2: ...3 years limited Warnings and Caution Warning Before making any cuts or performing installation maintenance be sure all electricity is disconnected Operate LED Neon lighting according to instructions o...

Page 3: ...al Lights 3 Assembly and Installation 1 Be sure to mount the LED Neon correctly as illustrated by figures 1 4 2 LED Neon can be cut every six LEDs at specific cut points Look for the black lines on th...

Page 4: ...nto the tail end of the arrow found on the circuit board as shown below Inserting the connector into the wrong side could possibly damage the neon Always check the functionality after inserting a conn...

Page 5: ...d be sandwiching the circuit board Connector installation guidelines Fill the connector cover pieces 1 3 1 2 way filled with glue to ensure a tight seal around the LED neon Ensure that the glue forms...

Page 6: ...Product Manual EcoFlex LED Neon EnvironmentalLights com P 888 880 1880 11235 West Bernardo Ct Suite 102 San Diego CA 92127 Environmental Lights 6 Front Exit Connectors Bottom Exit Connectors End Caps...

Page 7: ...Product Manual EcoFlex LED Neon EnvironmentalLights com P 888 880 1880 11235 West Bernardo Ct Suite 102 San Diego CA 92127 Environmental Lights 7 Interconnect Sets Top Anchors Mounting Clips...

Page 8: ...888 880 1880 11235 West Bernardo Ct Suite 102 San Diego CA 92127 Environmental Lights 8 Mounting Channel There are two types of mounting channel available for EcoFlex LED Neon For either use screws to...

Reviews: