background image


11235 West Bernardo Court, Suite 102 

San Diego, CA   92127 

888-880-1880 

Fax:  707-281-0567 

EnvironmentalLights.com 


 Copyright EnvironmentalLights.com 


All Rights Reserved 8/26/15 

SLESA-UE7 Quick Start Guide 

You will need to install Easy Stand Alone Pro (ESA Pro) or Easy Stand Alone 2 (ESA 2) 
software onto your computer in order to use the SLESA-UE7. Both ESA Pro and ESA2 are 
compatible with the SLESA-UE7 and will allow you to create DMX lighting shows. ESA 2 
works well for simple programming and is easier to get started with. ESA Pro was designed for 
the SLESA-UE7 and provides more control, taking full advantage of its features. Install the 
software by inserting the included CD or download and run the .exe file from Nicolaudie. 
 

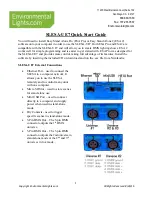
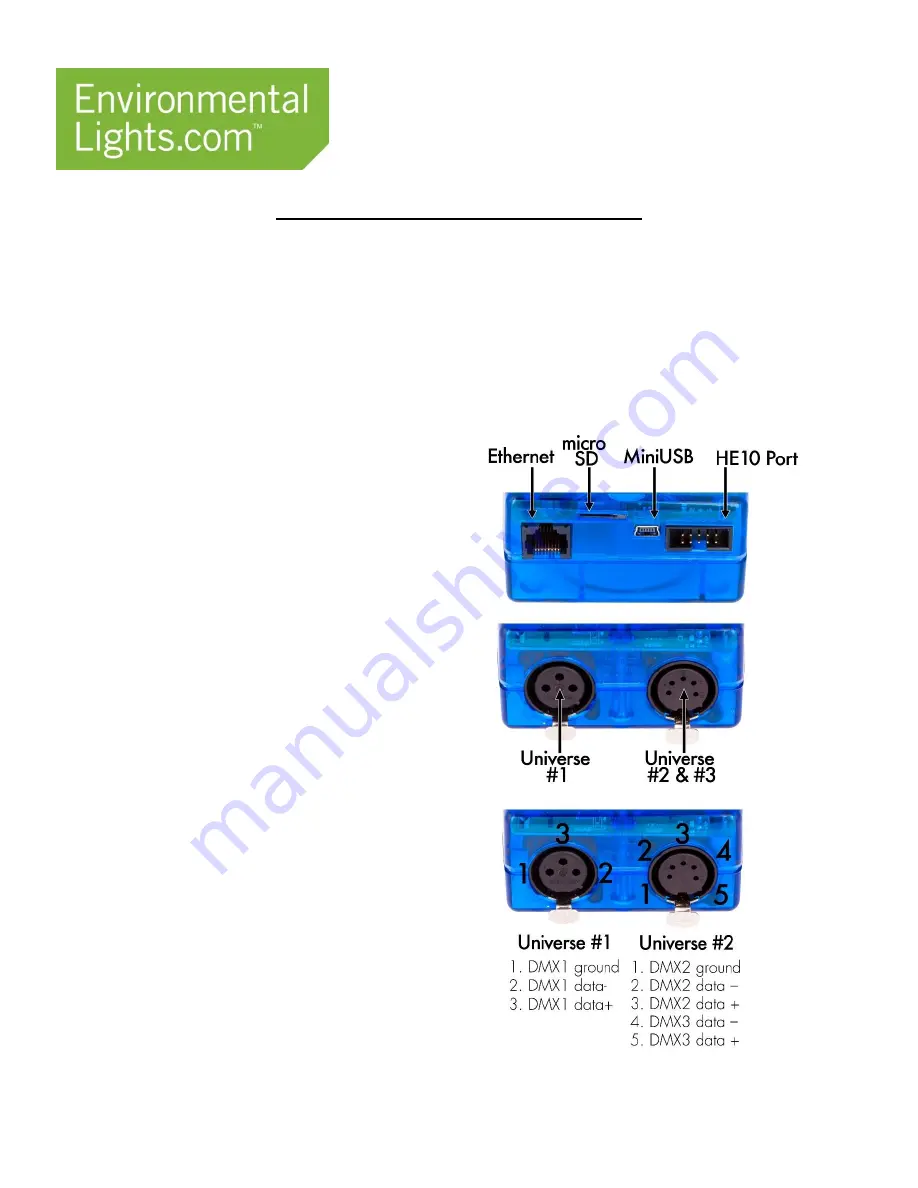
SLESA-UE7 External Connections 


Ethernet Port – used to connect the 
SLESA to a computer network. It 
allows you to use the SLESA 
remotely and to control many units 
with one computer. 


Micro SD Slot – used to store scenes 
for stand-alone use. 


Mini USB Port – used to connect 
directly to a computer and supply 
power when used in stand-alone 
mode. 


Dry Contacts –used to trigger 
specific scenes in stand-alone mode. 


3-Pin DMX Out – The 3-pin DMX 
connector outputs the 1

st

 DMX 

universe. 


5-Pin DMX Out – The 5-pin DMX 
connector outputs the 2nd universe in 
stand-alone mode or the 2

nd

 and 3

rd


universes in live mode. 


Summary of Contents for SLESA-UE7

Page 1: ...E7 and provides more control taking full advantage of its features Install the software by inserting the included CD or download and run the exe file from Nicolaudie SLESA UE7 External Connections Eth...

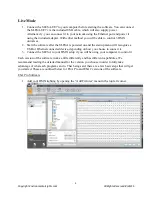
Page 2: ...and the startup menu will recognize a USB or Ethernet connected device depending on how you choose to connect it 3 Connect the SLESA to your DMX setup if you will be using your computer to control it...

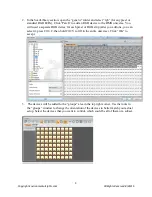
Page 3: ...d a separate RGB device for each pixel or RGB strip after you add one you can select it press Ctrl C then hold Ctrl V to fill in the entire universe Click OK to accept 3 The devices will be added to t...

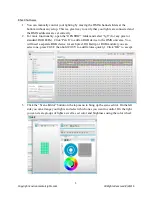
Page 4: ...w 5 Drag an effect from the effects tab on the left to the timeline This will bring up the effect window where you can select effect types and adjust parameters Hit the play button to have the effect...

Page 5: ...nd select rgb for any pixel or standard RGB LEDs Click Patch to add an RGB device to the DMX universe You will need a separate RGB device for each pixel RGB strip or RGB module you can select one pres...

Page 6: ...15 4 Select the Effects tab in the editor and click on the FX button to bring up effects Drag the effect window on the left over the lights that you want to apply the effect to 5 Click on the Editor t...

Page 7: ...7 Copyright EnvironmentalLights com All Rights Reserved 8 26 15 6 Click on the Live tab to access your saved scenes which appear as blue boxes Click on any of them to run that saved scene...

Page 8: ...uttons to cycle through scenes and pages of scenes ESA 2 1 Click on the Stand Alone tab it only appears when you have a connected device 2 Click write memory to write all current scenes to the device...

Reviews: