Copyright EnvironmentalLights.com
All Rights Reserved 10/8/18
3
Wiring
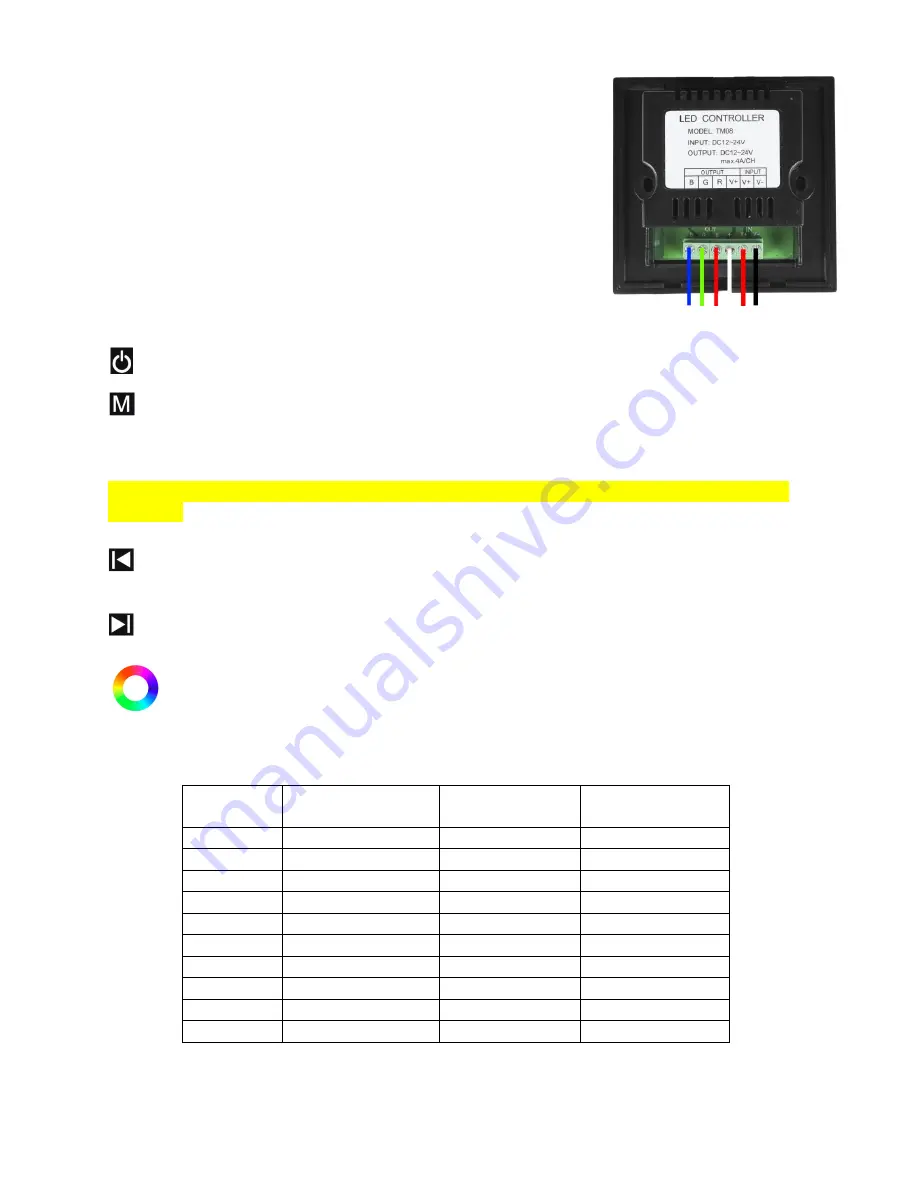
This unit is extremely easy to wire. Simply apply 12 or 24 VDC
(based on the requirements of the LEDs you are powering) to the
terminal blocks labeled INPUT V+ and V-. Next apply the leads of
the RGB strip to the terminal blocks labeled OUTPUT V+, R
(red), G (green), and B (blue). A maximum load of up to 4A of
LED strip or modules can be connected to each OUTPUT port.
Operation
Turn the controller on or off using this power button.
The mode button allows you to access preset color functions. Once a mode is activated,
pressing this button again will access the next mode in series. The pre-set modes are listed
below. Once the last mode is reached, pressing the M button again will cause you to cycle back
to the beginning of the list.
To turn the beeping function on or off, press the M button for several seconds, until you hear a
long beep.
This button allows you to increase the speed of modes 8-10, and increase the brightness at
all other times. There are 24 levels of speed and brightness available.
This button allows you to decrease the speed of modes 8-10, and decrease the brightness at
all other times. There are 24 levels of speed and brightness available.
The touch wheel allows you to easily select the perfect color, with 64 distinct touch
points.
Modes
Mode
Number
Function
Brightness
Adjustable?
Speed
Adjustable?
1
Static Red
Yes
N/A
2
Static Green
Yes
N/A
3
Static Blue
Yes
N/A
4
Static Yellow
Yes
N/A
5
Static Purple
Yes
N/A
6
Static Cyan
Yes
N/A
7
Static White
Yes
N/A
8
7 Color Step
No
Yes
9
3 Color Fade
No
Yes
10
7 Color Fade
No
Yes


