background image


D4K Pro® User Manual


www.envisiontec.com 

D4K_UserManual_v1.3_EN.docx, 2021-02-12 

Page 48 of 52 


12.2.6 

Cleaning the PWA 2000 / Washing Containers 

Time needed: 

Approximately fifteen minutes 

Maintenance frequency: 

Weekly 

Overview: 

The PWA 2000 needs to be emptied when the bottom of the container is no longer visible. The 99% IPA will collect 

particles of uncured material over time. If using plastic washing containers instead of the PWA 2000, the dirty bath will need to be 

emptied when the bottom of the container is no longer visible. 

Step-by-step: 

Check your local protocol for safe handling of 99% IPA.  

If using the PWA-2000: 

1.  Remove the washing compartment from the PWA 2000.  

2.  Pour the IPA from the pour spout into an IPA recycling container.  

3.  Wipe down the interior of the washing compartment with a clean paper towel.  

If using plastic washing containers: 

1.  Remove the used IPA from the dirtier bath.  

2.  Wipe the container clean using a paper towel. 
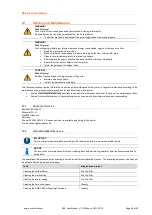
12.2.7 

Cleaning Dust 

Time needed: 

Approximately five minutes 

Maintenance frequency: 

Weekly 

Overview:

 Dust may accumulate on, near, or inside of the printer. Dust can build up on fans and vent holes. High levels of dust 

accumulation can cause the printer to overheat.  


IMPORTANT 

To protect the internal hardware, the printer automatically shuts down if it reaches the maximum internal 

temperature of 49 C/120 F. 

Step-by-step: 

1.  Look around the vent holes on the left and right sides of the printer’s casing for signs of buildup.  

2.  Listen to the fan for inconsistency, stress, or obstructions when the printer is powered on.  

3.  To remove dust, power down the printer, disconnect the power cable and then wipe the vents and fan with a microfiber 

cloth.  

4.  After the printer has been cleaned, look down through the safety glass under the material tray to make sure that there 

isn’t any dust or debris on the lens. 
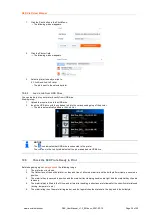
12.2.8 

Power Cycling 

Time needed:


Approximately five minutes 

Maintenance frequency:

 Weekly 

Overview:

 It is recommended to power cycle the printer under any of the following conditions: 


the printer is running slowly 


the printer was recently updated, or 


the printer has not been powered down in a week. 
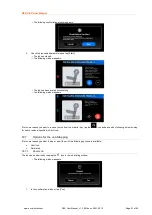
12.2.9 

Cleaning the Touch Screen 

Time needed

Approximately five minutes 

Maintenance frequency

Monthly 

Overview

:

 Sticky spots on the touch screen can make it difficult to press buttons or navigate the interface effectively. 

Step-by-step

1.  Spray the lens cleaner onto a clean paper towel. 

2.  Gently wipe the surface of the touch screen. 


IMPORTANT 

Always stand away from the printer when spraying to avoid contaminating the material and material tray. 

12.2.10  Greasing the Z-slide 

Time needed

Approximately one hour 

Maintenance frequency

: Annually 


Summary of Contents for D4K PRO

Page 1: ...EnvisionTEC GmbH Brüsseler Str 51 45968 Gladbeck Germany Instruction Manual Original Instructions D4K PRO Version 1 3 Keep for further reference ...

Page 2: ...el 11 3 8 Personnel Qualification 12 3 9 Personal Protective Equipment 12 3 10 Interventions in Emergency Situations 12 3 10 1 Shutdown in Case of an Emergency 12 3 10 2 First aid measures and medical attendance 12 4 Technical Data 13 4 1 Mechanical Data 13 4 2 Power Requirements 13 4 3 Network Requirements 13 4 4 Intended Environmental Conditions 14 4 4 1 Environmental Conditions for Printers 14 ...

Page 3: ... Fi Tab 30 8 6 Move Calibration Tab 31 8 6 1 Move 31 8 6 2 Home Calibration 31 8 6 3 Mask Generation 31 8 7 Job Settings Tab 32 8 7 1 Manual Debris Removal 33 Job List Menu 34 8 8 Envision One RP 34 9 Calibration 35 9 1 Home Position Calibration 35 9 1 1 Verify Home Position Calibration 36 9 2 Use the Grey Mask 36 10 Start a Print 37 10 1 Check Z axis 37 10 2 Fill in the Photopolymer 37 10 3 Creat...

Page 4: ...g the D4K Pro Material 47 12 2 4 Cleaning the Printer Casing 47 12 2 5 Cleaning the Hard Drive Space 47 12 2 6 Cleaning the PWA 2000 Washing Containers 48 12 2 7 Cleaning Dust 48 12 2 8 Power Cycling 48 12 2 9 Cleaning the Touch Screen 48 12 2 10 Greasing the Z slide 48 12 2 11 Checking the Safety Equipment 49 12 2 12 Filtering the Material 49 12 3 Auxiliary Materials and Consumables 49 12 4 Addit...

Page 5: ...e entrusted or made available to third parties with the prior written consent of EnvisionTEC GmbH EnvisionTEC Inc or authorized distributors All documents are protected within the sense of copyright law No part of this documentation may be reproduced utilized or transmitted without specific prior consent Infringements are an offence resulting in obligatory compensatory damages All industrial right...

Page 6: ...s section Updated Starter Kit section Updated Positioning the Printer section Updated Plug Play section Updated Install the Build Platform section Updated Software Update section Updated Software Recovery section Updated Fill in the Photopolymer section Updated Create the Print Job in Envision One RP section Updated Start the Print section Updated Remove the Build Platform from the Printer section...

Page 7: ...ant information on safe and efficient handling of the printer NOTICE The operation of the Envision One RP Software is described in the Envision One RP Software Manual This document forms an elementary part of the system includes important notes tolerances for calibration tasks if applicable and must be paid close attention to both when starting up the printer and during the operation Keep the hard...

Page 8: ...ig all 2 6 Representation of Safety Symbols Safety instructions are indicated by a pictogram and a signal word The signal word describes the severity of the risk Pictogram Signal Word Description DANGER Indicates a hazardous situation which if not avoided will result in death or serious injury WARNING Indicates a hazardous situation which if not avoided could result in death or serious injury CAUT...

Page 9: ...ifications or changes will result in the warranty being null and void Therefore do not make any alterations or complements to the printer without previous consultation and written confirmation of the manufacturer Spare and wear parts as well as auxiliary materials The use of spare and wear parts from third party manufacturers can lead to risks Only use original parts or parts released by the manuf...

Page 10: ... the printer set up by trained and authorized service personnel only UV radiation hazard WARNING Never look directly into the projectors beam Looking into the projector with unprotected eyes may cause injury Use protective goggles Particular hazards can be caused by Incomplete covers or broken parts Improper assembly incorrect wiring defective parts etc UV radiation can damage the skin Wear safety...

Page 11: ...thing eye protection P302 P352 If on skin Wash with water and soap P305 P351 P338 If in eyes Rinse cautiously with water for several minutes Remove contact lenses if present and easy to do Continue rinsing P308 P313 If exposed or concerned Get medical advice attention P404 Store in a closed container P405 Store locked up P501 Dispose of contents and container in accordance with local regulation IM...

Page 12: ...ructions regarding personal protective equipment in the relevant Material Safety Data Sheets supplied For reasons of accident prevention make sure that all operators wear suitable protective clothing protective gloves safety boots laboratory coats safety goggles dust mask during post processing 3 10 Interventions in Emergency Situations An intervention in emergency situations includes individually...

Page 13: ...ficient clean electrical socket that fluctuates no more than 3 EU 5 from its baseline WARNING Risk of injury Risk of damage to the printer Failure to use the grounding devices may lead to damage or injuries Connect ground wire before using Only use the grounding adapters of the plug socket type targeted for the country of intended use of the printer Grounding of electrical receptacles is an import...

Page 14: ...ust allow heat generated from the system to dissipate at 0 03 m min airflow Keep the printer away from water sources such as sinks tubs wash stations etc Do not place the printer near polishing stations Protect the printer s internal components from dust 4 4 2 Storage Conditions for Photopolymers Photopolymers should be stored under the following conditions at room temperature dry in closed bottle...

Page 15: ...ply cord with adaptor Spare material tray Rubber spatula USB drive X Acto knife 3mm allen key 5 3 Positioning the Printer IMPORTANT Risk of damage to the printer Incorrect positioning of the printer can cause damage to the printer and and or to the built parts Please follow the guidelines In order to obtain the best possible results take the following factors into account when positioning the prin...

Page 16: ...ction and the function of the printer It should be read when actually at the printer in order to get familiar with the printer in an optimal way 6 1 Construction of the Printer Figures below give an overview of the most important printer components and show their position on the printer 6 1 1 Front View Figure 2 Front view of the printer 6 1 2 Print area Figure 3 Print area ...

Page 17: ...ing Material Tray and Cleaning the Material Tray sections of this User Manual 6 2 2 Build platform Also known as Build Plate Build tray Printbed it is the surface of the D4K Pro printer on which the 3D printed part is formed For more information refer to the Install the Build Platform and Cleaning the Build Platform sections of this User Manual 6 2 3 RFID Tag Reader The software is written utilizi...

Page 18: ... storage external hard drive a backup computer etc 7 1 2 Switch the Printer On WARNING Risk of injury Risk of injury from crushing caused by moving printer parts The printer may only be operated by instructed and specially trained personnel The printer may only be operated if the protecting devices are working properly To switch the printer on press the power button on the front of the printer and...

Page 19: ...ke sure the build platform is tightened down securely before building Failure to do so will cause the build platform to be uneven and can cause build failures 7 3 Install the Tilting Material tray To insert the material tray 1 Open the printer door 2 Release the front and back tilt tray clips 3 Note the tilt tray is labeled front this label must be towards you when the tilt tray is in the printer ...

Page 20: ...teps 1 Enter the WI FI tab by tapping Settings Wi Fi on the screen of the Control Software 2 On the left part of the screen select the required Wi Fi name and tap it 3 Tap Connect 4 In the Password field type a password for the selected Wi Fi 5 Tap OK NOTICE The list of available WI FIs refreshes automatically each time you enter the Wi Fi tab 7 6 Set the Ad Hoc AdHoc is a type of on demand device...

Page 21: ... least 8 characters long and must not contain the space 7 7 Connect to the Printer via VNC Clients WARNING Risk of injury Improper use of the remote printer control over local network using VNC software may lead to damage or injuries Use the remote printer control with great attention Do not use the remote printer control without an operator being next to printer The printer owner is responsible f...

Page 22: ...eed working on the printer 7 7 2 Supported Clients for Linux VNC Viewer Step by step 1 Download the VNC Viewer and open it 2 Put the IP address in the VNC Server box 3 Tap Connect The control screen appears 4 Proceed working on the printer 7 7 3 Supported Clients for Android bVNC Free Step by step 1 Put the connection name and the IP address into the boxes marked below 2 Tap Connect The control sc...

Page 23: ...f necessary it is possible to set a password for VNC client To do this tap the VNC Password tab on the screen of the Control Soft after entering service mode In the same dialog screen you can reset an already set password Set a Password To set a password take the following steps 1 Enter your password in the Password field 2 Tap SAVE 3 Restart the printer to apply new settings Reset a Password To r...

Page 24: ...inter itself gives further information about the printer or the LAN connection allows the user to switch the printer off electronically To exit the Settings Menu tap the icon on the left part of the screen To enter the main screen tap the icon on top left corner of the screen 8 1 Ethernet Tab This tab allows for setting the Network on D4K Pro printer Tap Settings Ethernet to open the tab For detai...

Page 25: ...ngs Tab The Printer Settings tab provides information about the printer allows for changing the printer name selecting units of measurement and updating the software version Tap Settings Printer Settings to open the tab 8 3 1 Printer Name This option allows for changing the name of a printer 1 Tap Settings Printer Settings Printer Name 2 Enter the required name of the printer into the correspondin...

Page 26: ...ge For more in depth information on the printer tap Details D4KCS ver the version of control software set on the printer DlpcsCore ver the version of the DLPCS Core Control Board ver the version of control board HW version the version of firmware set on the printer To return to About Printer tab tap OK 8 3 3 Software Update The Software Update tab provides information about the current versions of...

Page 27: ...e versions 2 Tap Start The following message appears The Experience Improvement message appears asking if you allow the data collection to improve the experience with our product 3 Tap OK to allow data collection or Skip to skip this step For more information see the Usage Analytics The process of printer updating starts After successful printer update the following screen appears 4 To apply chang...

Page 28: ...evious version of Control Software The following message appears 3 Tap Recover to confirm the Software recovery The process of software recovery starts After successful software recovery the screen with the Reboot button appears 4 To apply changes reboot the printer It will reboot automatically in 30 seconds To reboot the printer manually tap Reboot 8 3 5 Download Log Report The Download Log Repor...

Page 29: ...issue has occurred on the printer you can download the log report with all printer information to the USB drive and send it to Service and Support thus speeding up the process of addressing the issue In case such issue is detected the following Error message appears 1 Tap Log Report The following message appears 2 Make sure the USB drive is connected to the printer and tap Download The report has ...

Page 30: ...is parameter shows the average duration of the job in hours 8 3 7 Units The Units tab allows for selecting the units of measurement for the motion parameters 1 Tap Settings Printer Settings Units 2 Select Inches or Millimeters by tapping the corresponding field The units of measurement are changed 8 3 8 Usage Analytics Collecting statistics and sending it automatically will help EnvisionTEC improv...

Page 31: ...ld platform between Zero position and Home position for Calibrate the Home Position 8 6 2 Home Calibration Tap Settings Move Calibration Home Calibration to open the tab For detailed information see the section Calibrate the Home Position of this User Manual 8 6 3 Mask Generation Required equipment USB Light sensor UV protection glasses Step by step 1 Insert the empty material tray to the material...

Page 32: ...its projection power or just tap Next to move to the next box 7 Place the USB light sensor in the center of the light spot that is projected and tap Next to start adjustment of projection power The Next button becomes Pause button The projection power is being adjusted The red Pause button becomes active allowing to pause the adjustment of the current box 8 Repeat step 7 for each of the remaining ...

Page 33: ... material tray to make cleaning the material tray easier o Yes the material tray is automatically exposed after the job has failed o No the material tray is not exposed automatically when the job has failed In this case you can manually perform the material tray exposure after the completion of the build process Use DLP Table function of DLP table application o Yes the DLP table is used o No the D...

Page 34: ... printed yet Complete if the job has been printed successfully Failed if the job has corrupted or failed due to material mismatch Aborted if the job has been aborted manually or cancelled due to hardware issues projector board does not respond etc Invalid if a problem is detected when transferring the job file from Envision One RP to D4K Pro Control Software 8 8 Envision One RP The Envision One RP...

Page 35: ...ry D4K printer The file is also available to download by contacting EnvisionTEC support or an authorized distributor 1 Download the stl file to the computer where the Envision One RP software is installed 2 Open the Envision One RP software and select a buildstyle See the Envision One RP User Guide provided with the printer for details 3 Import the stl file into the Envision One RP software 4 Prin...

Page 36: ...tapping Move the required number of steps 19 Tap Save The build platform holder starts moving up to the top of the Z axis The new home position is set 9 1 1 Verify Home Position Calibration 1 Once the calibration is done print the Home Position Calibration Cubes stl job file again 2 Following the instructions in Step 12 of Calibrate the Home Position measure the heights of the calibration cubes ag...

Page 37: ...ory as described in EN 13779 NOTICE The execution of job preparatory activities including date and performing operator shall be documented for reasons of traceability 10 1 Check Z axis First make sure the printer has its Z axis slide activated 1 Tap Settings Move Calibration Move on the main screen 2 Tap the up and down arrow icons and make sure the building platform moves along the Z axis If the ...

Page 38: ...ess 3 Add a model 4 Orient a model and add supports as needed or use the Magic Print feature 5 Save the build job to a USB or transfer directly to the printer For more detailed information refer to the Envision One RP User Guide provided with your printer 10 4 Load a Job File To load a job to the printer 1 Enter Run into the Windows search field or use Windows R hotkey on your computer keyboard Th...

Page 39: ...ist NOTICE The icon indicates that USB drive is connected to the printer The icon in the Job list indicates that the job was added via USB drive 10 5 Check the D4K Pro Is Ready to Print Before beginning a print always check the following things 1 The printer door is closed 2 The flat surface of the build platform is clean and free of all cured material and the build platform clamp is secured in po...

Page 40: ...it is checked if the used build style matches the material tag of the printer If this is not the case the job will not start IMPORTANT If you stop the job and move the build platform unless it is done using the Pause Job button your build will not line back up properly and will likely result in a failed build Proceed with attention To start a job 1 From the Home screen select the Job List 2 Select...

Page 41: ...ing window appears If for some reason you want to remove the job from the material tray tap the icon and proceed by following a step by step for debris removal specified in Abort Job 10 7 Options for the Job Stopping If for some reason you want to stop or abort the print the following options are available Abort Job Delete Job 10 7 1 Abort Job The job can be aborted by tapping the icon in the job ...

Page 42: ...hole material tray area has been exposed 2 Now you can remove debris from the material tray by simply taking off the thin film of exposed material and following the procedure for Filtering Material 10 7 2 Delete Job To delete the job from the Job list 1 Enter the Job List by tapping the Job List on the main screen 2 Select the job you want to delete from the list of jobs by tapping it The followin...

Page 43: ...omes free from the printer 11 3 Remove Parts from the Build Platform WARNING Risk of injury People could be injured As handling chemicals puts you at risk of coming into contact with corrosive chemicals being burnt inhaling poisonous vapors etc always put on suitable protective clothing gloves protective goggles etc before working with construction substances Take utmost care to avoid getting any ...

Page 44: ...your PWA 2000 if ordered REFERENCE For information on cleaning of the parts consult the cookbook or Instruction of Use provided by your manufacturer or distributor 11 6 Cure the Printed Part The PCA 2000 Parts Curing Apparatus is the recommended curing unit for the D4K Pro To get the information on how to cure a printed model with PCA 2000 check the corresponding PCA 2000 Technical Guide provided ...

Page 45: ...d maintenance of the printer A regular maintenance according to the maintenance plan is an essential precondition for an efficient use of the printer Section Operational Maintenance describes the operational maintenance and how to carry out the maintenance tasks Section Auxiliary Materials and Consumables gives an overview of all auxiliary materials and consumables 12 1 Customer Service EnvisionTE...

Page 46: ... the platform before taking the material tray out of the printer Failure to do so can result in material dripping on the projector causing failed builds and ruined equipment IMPORTANT Always clean the material tray each time you need to change the material for printing parts on the printer IMPORTANT Risk of damage to the printer Do not pour material from your material tray into the bottle it came ...

Page 47: ...4 Cleaning the Printer Casing Time needed Approximately two minutes Maintenance frequency Print by Print Overview The printer s metal casing protects the internal components from damage To avoid spilling material on the casing always hold a paper towel under the build platform and the material tray while installing or removing Once spilled the material cures to the casing and it is difficult to re...

Page 48: ...l hardware the printer automatically shuts down if it reaches the maximum internal temperature of 49 C 120 F Step by step 1 Look around the vent holes on the left and right sides of the printer s casing for signs of buildup 2 Listen to the fan for inconsistency stress or obstructions when the printer is powered on 3 To remove dust power down the printer disconnect the power cable and then wipe the...

Page 49: ...terial It is recommended to filter the material after each failed build Use a paint strainer and run your material through it The paper paint strainers are the most suitable as they can be discarded after each use Do not use a paint strainer that requires cleaning as cleaning solutions can contaminate and ruin material 12 3 Auxiliary Materials and Consumables Materials have varying shelf lives bet...

Page 50: ...Generate job in Envision One RP and save it in to the folder 5 Make sure that the printer is on and plugged into the network 6 Locate the printer in the local network 7 Copy job to printer 8 Install the build platform in the printer Refer to section Install the Build Platform for details 9 Insert the material tray to the printer Refer to section Install the Tilting Material Tray for details 10 Fil...

Page 51: ...ners of the material tray with dry Q tips 4 Replace with new material and rebuild parts To avoid future contamination Do not place any chemical near material tray or resin Do not post clean the part near the material tray and do not clean the build platform with any chemicals but only dry paper towels Partial build failure This could be several things or a combination of the following Damaged scra...

Page 52: ...4K_UserManual_v1 3_EN docx 2021 02 12 Page 52 of 52 Error message Control software is expired and the system cannot be updated It means that your Envision One RP license is expired Contact Service Support to extend the Envision One RP license ...

Reviews: