to
make
sure
the
battery
is
fully
charged
at
the
first
time
.
On
chargi
ng
the
Power
indicating lamp of the device is in high
light blue color, the desktop icon of the battery keep
rolling which shows it is connected to the device.
1.2.
6
Switch input methods
The device support handwriting, number, letter, pinyin etc.
switching
as
follow
s
:
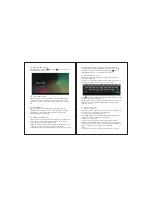
Click any text input area of the working program interface, it
will pop input keyboard interface, as shown below:
Press , then it will pop Input Method switch interface.Select
the input method you want here.
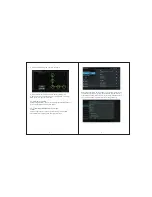
[Noted] After newly install input method, you should
choose
Settings>Language & input>K
e
yboard
& I
n
put
m
ethods
then you can use.
1.2.
7
Use T-Flash card
● Insert T-FLASH card
Insert the T-Flash card into the slot in direction of the devices
bottom shell until you hear a sound of click.
● Browse files in the memory card
In this MID device,you can view and use the needed files in
catologue of M
e
nu
>File manager> SD Card.
● Remove T-Flash card
Close all open files from the T-Flash, then enter MENU>
S
e
ttings
>TF card and & device storage, click Unmount SD
card ,System will prompt that TF card was removed safely. Tap
with your fingertips to the pop-up T-Flash Card
[Note]
1. Do not insert the TF card by force, this card can only be
3
2
1.2.2 Unlock the screen
Please press and drag the icon to the , then the LCD will
unlocked automatically.
1.2.3 Lock the screen
When the device is in the ON mode, press the POWER key
shortly, the system will lock the screen and enter the save
power mode. Then the screen is OFF but the system will still
r
un
.
1.2.4 Switch OFF
When the device is in the ON mode, press and hold the
POWER key for 3 seconds, the screen will display the power
off interface, choose the power off item to confirm, the
system will shut automatically.
1.2.
5
Battery charging
Insert the micro port of the battery adaptor into 220V AC slot
on the device, and connect the other side with the power
socket. Then,you can charge the device.
[Note] This device is not recommended to use USB interface
to charge, please use the special power adapter for
charging.You should charge the battery for at least
8
-
12
hours


