23
EN
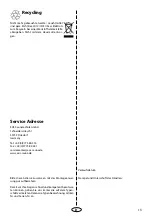
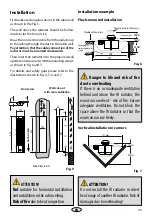
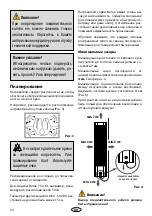
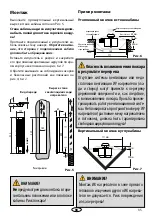
171 mm
15 mm
90 mm
Fig. 7
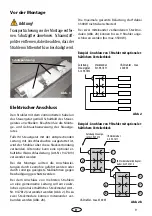
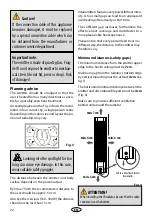
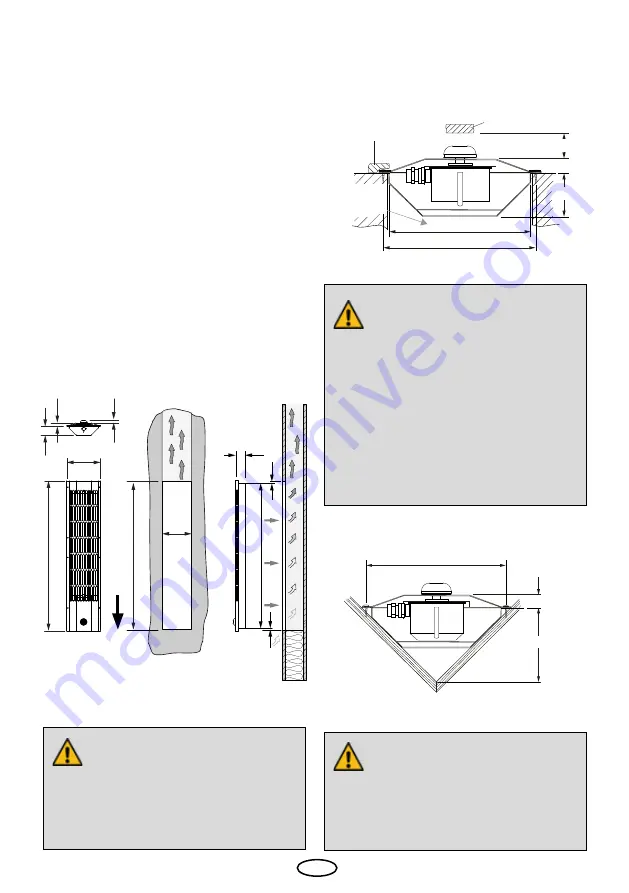
Vertical installation in corners
Holzschutz
160
171
eventuelle Holzleiste
Gerät muss
hinterlüftet sein
15 mm
50 mm
40 mm
Mindestabstand
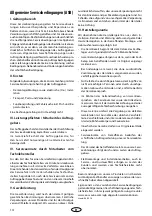
Fig. 6
Wooden rail if necessary
Protective guard rail if necessary
Area behind the
radiator must be well
aerated
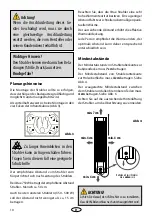
First make a rectangular cut-out in the cabin wall
as shown in the Fig. 5.
The wall above the radiator should be hollow
inside to let the hot air rise.
Draw the connection cable from the radiator up
to the ceiling through the duct in the cabin wall.
Pay attention that the cable connection of the
radiator must be oriented downwards
Then insert the radiator into the prepared wall
aperture and secure it with the mounting screws
as shown in Fig 6 and 7.
For details and safety gaps please refer to the
illustrations shown in Fig. 4, 5, 6 and 7.
Installation
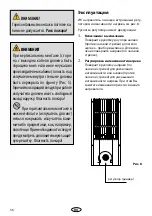
Fig. 5
Front view
nach un
ten
Dimensions in mm
185
835
165
825
50
15
15
5
805
65
5
ATTENTION!
Not
suitable for horizontal installation
and installation in the cabin ceiling.
Risk of fire
due to heat congestion.
Wall cut-out
with rear ventilation
Flush-mounted installation
Installation example
ATTENTION!
Do not install the IR radiator in direct
heat range of another IR radiator. Risk of
damages due to overheating!
Danger to life and risk of fire
due to overheating
If there is no or inadequate ventilation
behind and above the IR radiator, the
wood can overheat - risk of fire. Ensure
adequate ventilation. Do not block the
space above the IR radiator so that the
warm air can rise freely.

