background image

7

Step 6: Turn on the UPS

Press the ON/Mute button on the front panel for two seconds to power on the UPS.

Note: The battery charges fully during the first five hours of normal operation. Do not
expect full battery run capability during this initial charge period.

Step 7: Install software

For optimal computer system protection, install UPS monitoring software to fully configure UPS
shutdown. Please follow steps below to download and install monitoring software:

1. Go to the website

http://www.power-software-download.com

2. Click ViewPower software icon and then choose your required OS to download the software.
3. Follow the on-screen instructions to install the software.
4. When your computer restarts, the monitoring software will appear as an orange plug icon

located in the system tray, near the clock.

2-4 Battery Replacement

NOTICE: This UPS is equipped with internal batteries and user can replace the batteries
without shutting down the UPS or connected loads.(hot-swappable battery design)
Replacement is a safe procedure, isolated from electrical hazards.

CAUTION!!

Consider all warnings, cautions, and notes before replacing batteries.

Note:

Upon battery disconnection, equipment is not protected from power outages.

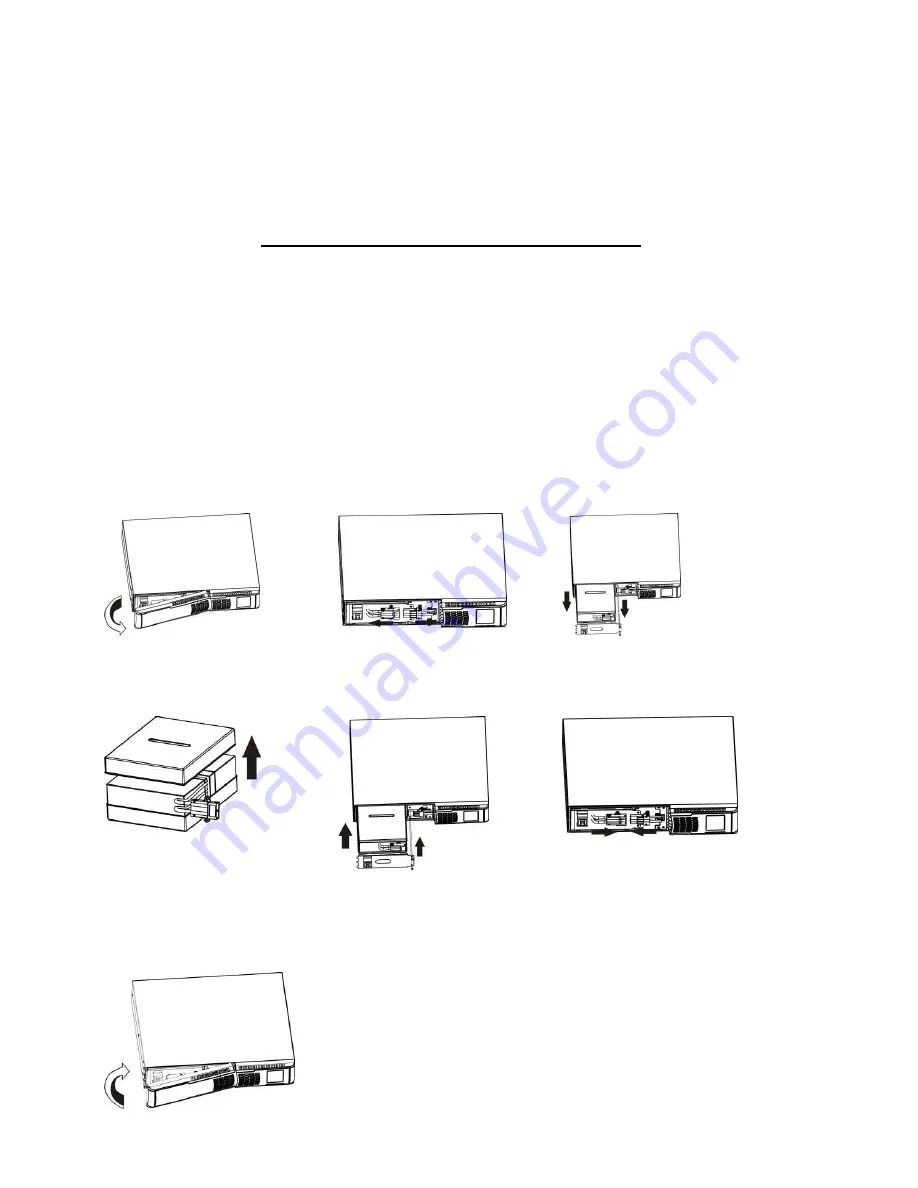
Step 1

Step 2

Step 3

Remove front panel.

Disconnect battery wires.

Pull out the battery box by
removing two screws on the
front panel.

Step 4

Step 5

Step 7

Remove the top cover of
battery box and replace the
inside batteries.

After replacing the
batteries, put the battery
box back to original location

and screw it tightly.

Re-connect the battery wires.

Step 8

Put the front panel back to the unit.

Summary of Contents for Otima 1.1K

Page 1: ...Model EOTL 800 1 1K 1 5K 2K 2 5K 3K VA Interactive UPS Pure Sine Wave Uninterruptible Power Supply System User Manual ...

Page 2: ...etup 4 2 1 Rear Panel View 4 2 2 Install The UPS 5 2 3 Setup The UPS 6 2 4 Battery Replacement 7 3 Operations 8 3 1 Button Operation 8 3 2 LCD Panel 8 3 3 Audible Alarm 9 3 4 LCD Display Wordings Index 10 3 5 UPS Setting 10 3 6 Operating Mode Description 12 3 7 Faults Reference Code 12 3 8 Warning Indicator 13 4 Troubleshooting 14 5 Storage And Maintenance 16 6 Specifications 17 ...

Page 3: ...ver them Do not connect domestic appliances such as hair dryers to UPS output sockets The UPS can be operated by any individuals with no previous experience Connect the UPS system only to an earthed shockproof outlet which must be easily accessible and close to the UPS system Please use only VDE tested CE marked mains cable e g the mains cable of your computer to connect the UPS system to the buil...

Page 4: ...s must be kept well away from the batteries Caution risk of electric shock The battery circuit is not isolated from the input voltage Hazardous voltages may occur between the battery terminals and the ground Before touching please verify that no voltage is present Batteries may cause electric shock and have a high short circuit current Please take the precautionary measures specified below and any...

Page 5: ...uture use 2 1 Rear Panel View 800 1 1K 1 5K 2K 2 5K 3K 1 Programmable outlets connect to non critical loads 2 Output receptacles connect to mission critical loads 3 AC input 4 Input circuit breaker 5 Network Fax Modem surge protection 6 Emergency power off function connector EPO 7 USB communication port 8 RS 232 communication port 9 SNMP intelligent slot 10 Output circuit breaker ...

Page 6: ...ut connecting battery wires Before install the UPS please follow below steps to re connect battery wires first Step 1 Step 2 Step 3 Remove front panel Re connect battery wires Put the front panel back to the unit Rack mount Installation Step 1 Step 2 Tower Installation Step 1 Step 2 Step 3 ...

Page 7: ...one end to the USB RS 232 port and the other to the communication port of your PC With the monitoring software installed you can schedule UPS shutdown start up and monitor UPS status through PC The UPS is equipped with intelligent slot perfect for either SNMP or AS400 card When installing either SNMP or AS400 card in the UPS it will provide advanced communication and monitoring options PS USB port...

Page 8: ...e monitoring software will appear as an orange plug icon located in the system tray near the clock 2 4 Battery Replacement NOTICE This UPS is equipped with internal batteries and user can replace the batteries without shutting down the UPS or connected loads hot swappable battery design Replacement is a safe procedure isolated from electrical hazards CAUTION Consider all warnings cautions and note...

Page 9: ...R Button Turn off the UPS Press and hold this button at least 2 seconds to turn off the UPS Confirm selection key Press this button to confirm selection in UPS setting mode SELECT Button Switch LCD message Press this button to change the LCD message for input voltage input frequency battery voltage output voltage and output frequency Setting mode Press and hold this button for 5 seconds to enter U...

Page 10: ...d level by 0 25 26 50 51 75 and 76 100 Indicates overload Indicates the load or the UPS output is short circuited UPS status Indicates that programmable management outlets are working Indicates that the UPS alarm is disabled Indicates the UPS powers the output directly from the mains Indicates the battery charger is working Indicates the UPS is working in boost mode Indicates the UPS is working in...

Page 11: ...t voltage setting programmable outlets enable disable programmable outlets setting LCD display direction and exit 01 Output voltage setting Interface Setting For 208 220 230 240 VAC models you may choose the following output voltage 208 presents output voltage is 208Vac 220 presents output voltage is 220Vac 230 presents output voltage is 230Vac 240 presents output voltage is 240Vac 02 Programmable...

Page 12: ...ng the backup time limits in minutes from 0 999 for programmable outlets which connect to non critical devices on battery mode 04 LCD display direction setting Interface Setting RAC the LCD display is horizontal TOE the LCD display is vertical 00 Exit setting ...

Page 13: ... but higher than low loss point the boost AVR will be activated Battery mode When the input voltage is beyond the acceptable range or power failure and alarm is sounding every 4 seconds UPS will backup power from battery Standby mode UPS is powered off and no output supply power but still can charge batteries 3 7 Faults Reference Code Fault event Fault code Icon Fault event Fault code Icon Bus sta...

Page 14: ...every second Battery is not connected Sounding every second Overcharge Sounding every second Site wiring fault Sounding every second EPO enable Sounding every second Fan Failure Sounding every second Over temperature Sounding every second Charger failure Sounding every second Battery Fault Sounding every second ...

Page 15: ...d The external or internal battery is incorrectly connected Check if all batteries are connected well Fault code is shown as 27 and the icon is lighting on LCD display and alarm is continuously sounding Battery voltage is too high or the charger is fault Contact your dealer Fault code is shown as 28 and the icon is lighting on LCD display and alarm is continuously sounding Battery voltage is too l...

Page 16: ... are not fully charged Charge the batteries for at least 5 hours and then check capacity If the problem still persists consult your dealer Battery backup time is shorter than nominal value Batteries defect Contact your dealer to replace the battery The icon and the warning code flashing on LCD display and alarm is sounding every second Fan is locked or not working Check fans and notify dealer ...

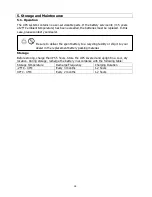
Page 17: ...dealer Storage Before storing charge the UPS 5 hours Store the UPS covered and upright in a cool dry location During storage recharge the battery in accordance with the following table Storage Temperature Recharge Frequency Charging Duration 25 C 40 C Every 3 months 1 2 hours 40 C 45 C Every 2 months 1 2 hours Be sure to deliver the spent battery to a recycling facility or ship it to your dealer i...

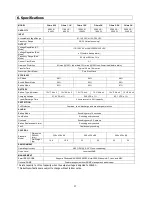
Page 18: ...4 12 V 9 Ah x4 12 V 7 Ah x6 12 V 9 Ah x6 Charging Voltage 27 4 VDC 1 54 8 VDC 1 82 1 VDC 1 Typical Recharge Time 4 hours recover to 90 capacity PROTECTION Full Protection Overload short discharge and overcharge protection ALARM Battery Mode Sounding every 10 seconds Low Battery Sounding every second Overload Sounding every 0 5 second Battery Replacement Alarm Sounding every second Fault Continuous...

Reviews: