background image

Instructions for use

Epec 4W30

32

(C)  Epec Oy

Seinäjoki Finland

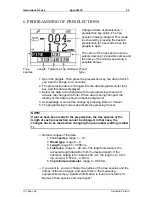
7.18  Statistics (26)

  This setting indicates whether the pieces are to be recorded

according to the average diameter or the top diameter in the
statistics.

  0 = top diameter, 1 = average diameter.

NOTE!
If this setting is changed, the statistics should be emptied in order to get
all pieces recorded in the same way.

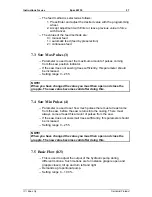
7.19  Diameter Limit (27)

  This setting is used to determine whether the diameter limit concerns

the diameter at the centre of the piece or at the top.

  0 = top, 1 = centre.

7.20  Preselection Extender Button (28)

  The programming of a certain preselection key to a preselection

extender button.

  Detailed information is found in enclosure "4. Enabling the extended

preselection".

7.21  Factory Settings (29)

  Not necessary in normal use.

  Locked if the text "Lock" is displayed (factory settings cannot be set).

  The factory settings set the preselections and program the

preselection keys and set part of the special settings. After the factory
settings the parameter values must be checked and corrected.

  Detailed information is found in enclosure "1. Factory settings".

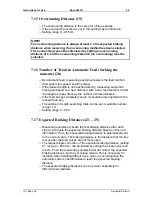
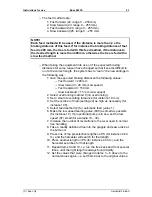
7.22  Butt End Reverse (30)

  Setting of the butt end reverse distance. The butt end reverse is used

when a new tree is taken into the grapple. When a tree is in the
grapple, part of the butt end of a tree leaves unreachable to the
knives, so reverse can be used to delimb this part of a tree.

  The butt end reverse is in use when automatic feed (feed by

preselection) is selected. The reverse can be interrupted by pressing
the keys "Feed forward" or "Feed backward".

Summary of Contents for 4W30

Page 1: ...INSTRUCTIONS FOR USE Epec 4W30 MEASURING EQUIPMENT NOTE Read this manual and observe all safety instructions Sein joki Finland Version 1 25 Keto 2L 10 9 2001...

Page 2: ......

Page 3: ...ations 15 3 5 1 Handling of a Dropped Tree 15 3 5 2 Handling of a Branched Tree 16 3 5 3 Handling of a Tree Lying on the Ground 16 4 GRAPPLE FUNCTIONS 18 4 1 Knives Open 18 4 2 Tracks Open 18 4 3 Back...

Page 4: ...eter Measurement 16 29 7 13 Language 17 29 7 14 Diameter in Use 18 29 7 15 Overrunning Distance 19 30 7 16 Number of Trials in Automatic Feed Seeking the measure 20 30 7 17 Expected Braking Distances...

Page 5: ...ng Works 40 9 2 The Length Search Does Not Work 40 9 3 The Displayed Length is Not Correct 40 9 4 The Diameter is Not Displayed 41 9 5 Displayed Diameter is Not Correct 41 9 6 Prevented Oversawing Doe...

Page 6: ...Instructions for use Epec 4W30 5 C Epec Oy Sein joki Finland OTHER ENCLOSURES Connection Diagrams 3 pages Head Module mounting instructions 1 page Terms of Warranty 1 page...

Page 7: ...e design and manufacture of these systems We have paid special attention to the reliability and accuracy of the function in exacting conditions and in spite of equipment versatility easy operation The...

Page 8: ...twork is fast data transmission bus and it has high error immunity The preselection keyboard is either integrated into the levers or installed very close to the control levers of the machine The prese...

Page 9: ...eel the cursor is transferred in the display and adjustment values are changed Cursor A rectangular frame that is moved in the display by means of the programming wheel Display window A graphical wind...

Page 10: ...justment key is concerned the adjustment is not accepted but the old value will still remain valid The Cancel key is also used for moving the cursor between the upper menu and the display keys Activat...

Page 11: ...heel and the Enter and Cancel keys as well as the information seen in the graphical display NOTE Operator can select whether the measuring equipment uses the metric system millimetres centimetres metr...

Page 12: ...e square i e the lower edge and the right edge of the key are thicker than the other edges The Cancel key is used for switching between the upper menu and the other display keys Cancel is also used fo...

Page 13: ...displays The arrows indicate the displays that appear when pressing the Enter key at the display key in question Main display Settings Test Calibration Printout NOTE The printout window has no displa...

Page 14: ...ter starts to feed the tree to the length of the preselection in question observing the crosscutting tolerance and the desired top minimum diameter of the piece If the diameter falls below the top min...

Page 15: ...e range calibration of diameter before the diameter is displayed if diameter is used Measuring equipment will not calculate the volume nor accept preselections if the diameter is not displayed Thus me...

Page 16: ...istance is the distance that the tree moves after the control of the feed valves has stopped If there does not come enough pulses from the length sensors when feeding during the slip prevention time f...

Page 17: ...the butt end and feed normally 5 Take the butt end of the other branch into the grapple 6 Saw a disk at the butt end and feed normally 3 5 3 Handling of a Tree Lying on the Ground 1 Open the grapple...

Page 18: ...Instructions for use Epec 4W30 17 C Epec Oy Sein joki Finland...

Page 19: ...and when the key is pressed once more the back knife opens If the back knife is opened with Back knife key it will be closed only when pressing the Back knife key or the Grapple closed key If the bac...

Page 20: ...after the first length pulse the equipment gives a short control Knives open When approaching the selected length the feed outputs are switched off step by step First pump 2 is released and the upper...

Page 21: ...is in the upper position a short press less than 1 5 seconds results in opening of the grapple only as long as the key is pressed and then it is closed again This makes the transfer of the grapple to...

Page 22: ...ressure during sawing K50 4 13 Tilt Up Down The tilt function can be connected to operate in three different ways 1 Tilt up and Tilt down operate with the same key i e when the tilt is in its lower po...

Page 23: ...connected to the measuring equipment NOTE The printouts can be taken if printer is connected and it was in on line mode during the start up of the measuring equipment NOTE The grapple must be in open...

Page 24: ...ation Data Detailed calibration data of length and diameter 5 4 Piece Printout Printout when sawing of the running number of the diameter class of the piece the top diameter volume and length Printing...

Page 25: ...ng the job number setting number 1 Number ranges of the data 1 Tree species range 1 12 2 Wood type range 0 9 3 Length range 50 3000 cm 4 Tolerance range 0 99 mm The length tolerance is the accepted le...

Page 26: ...are needed the number of preselections can be increased to 22 This can be done by programming one preselection key as a preselection extender button When this button is pushed the extended preselectio...

Page 27: ...he purchase contract number the parcel number or a job number given by the principal Exiting without damaging the statistics is done by pressing Cancel Job number can be a number between 0 32767 7 2 F...

Page 28: ...have changed the value you must then open and close the grapple The new value becomes valid after doing this 7 4 Saw Min Pulses 4 Parameter is used to set how much pulses there must at least come from...

Page 29: ...parameter is used to set a suitable pump angle output during the feed i e the pump output can be limited If the output is too small the feed is slow Feed rate should be adjusted first to a lower valu...

Page 30: ...Press Enter and adjust the desired value with the programming wheel 3 Accept adjustment with Enter or leave previous value in force with Cancel 7 12 Advance Distance of the Diameter Measurement 16 Th...

Page 31: ...trials indicates If the feed has got completely stuck it should be interrupted with the manual feed key The number of length searching trials can be set A suitable number is appr 10 Setting range 0 25...

Page 32: ...ow speed Fast backward 150 mm Slow backward 15 mm Low speed 2 Select overrunning method 0 no overrunning 3 Set a small crosscutting tolerance for instance 10 mm 4 Set the number of trials setting 20 a...

Page 33: ...in enclosure 4 Enabling the extended preselection 7 21 Factory Settings 29 Not necessary in normal use Locked if the text Lock is displayed factory settings cannot be set The factory settings set the...

Page 34: ...displayed in the printout window 0 not in use 1 in use 7 24 Length of Opening Pulse K32 The opening pulse is used for setting the duration of the opening control of the delimbing knives at the beginni...

Page 35: ...pulse Because of the automatic regulation this value should not be adjusted manually when the machine is searching with search pulses The suitable pre set value is 10 7 30 Low Speed Feeding Pulse K38...

Page 36: ...led to the urea valve Setting is used to accurate the urea feed starting position The setting range is 0 50 7 35 Reverse Pumps K44 The setting of how many pumps are used in reversing It is possible to...

Page 37: ...e delay between the closing of the delimbing knives and the closing of the tracks Tree will not be placed properly to the grapple if tracks delay is too short The setting range is 0 1 seconds 7 39 Sel...

Page 38: ...in use it is activated simultaneously with the function fast feed backward i e when valve Feed backward 2 is controlled to open 0 function not in use 1 function in use 7 41 Additional Pressure During...

Page 39: ...gramming wheel and press Enter 5 Now rotate the programming wheel until the measured length is displayed and press Enter NOTE The most accurate result is achieved by measuring a larger lot of finished...

Page 40: ...yed the reason can be a change of the diameter range These actions should be carried out in the right order and when necessary the key Grapple open or Grapple closed should be pressed to the bottom du...

Page 41: ...nces at a time i e it does not manage to stop at the correct length Installation fault the outputs Feed forward 1 and Feed backward have not been connected to the lowermost direction valve of the grap...

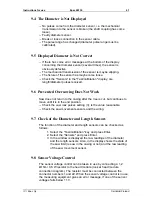
Page 42: ...to the casing after the tree is cut but continues to move until it is in the end position Check the saw max pulses setting 3 is the value reasonable Check the saw movement sensors and the wiring 9 7...

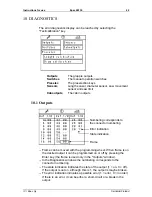
Page 43: ...gramming wheel When frame is on the desired output it can be programmed on or off by pressing the Enter key the frame is used only in the Outputs window In the Diagnostics windows the numbering corres...

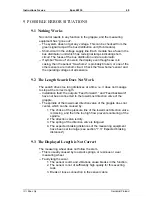
Page 44: ...Back knife closed 16 Saw motor 26 Delimbing knives closed 42 Tracks open 28 Additional pressure during sawing 44 Back knife 30 In reserve NOTE If you want to check possible faults in the outputs switc...

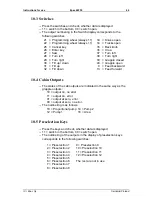
Page 45: ...wn 13 Feed forward 10 4 Cabin Outputs The states of the cab outputs are indicated in the same way as the grapple outputs 10 output on no error 11 output on error 01 output at zero error 00 output at z...

Page 46: ...Instructions for use Epec 4W30 45 C Epec Oy Sein joki Finland...

Page 47: ...he cables when coupled so that the plug connectors are not subject to torsion Ensure that the plug connectors have been pressed to the very bottom The preselection keyboard is attached to the control...

Page 48: ...Instructions for use Epec 4W30 47 C Epec Oy Sein joki Finland...

Page 49: ...L is the raw reading of the length sensor If the reading does not change or if it changes only 1 when the sensor is rotated the sensor or its connection is defective Disturbance diam A Disturbance di...

Page 50: ...e is broken Check the voltages and the connections CAN bus disturbance There is no connection to the cabin module nor to the head module Check the voltages and the connections Error 2 Error in the che...

Page 51: ...ulse value Error 61 Calibration trial with too small pulse value Error 62 Calibration trial of the diameter sensor with negative pulse value The signal wires A and B of the diameter sensor maybe cross...

Page 52: ...Instructions for use Epec 4W30 51 C Epec Oy Sein joki Finland...

Page 53: ...bus and RS 232 Enclosure class IP 20 Operating voltage 12 24 VDC Current consumption230 mA 24 V 350 mA 12 V without load and sensors Load Outputs 3 A Total load 15 A Max Temperature range 25 C 50 C Th...

Page 54: ...Instructions for use Epec 4W30 53 C Epec Oy Sein joki Finland...

Page 55: ...if necessary when you make factory settings The factory settings are done as follows 1 Go to service mode 2 Select Factory settings 29 from the Settings display 3 Press PS 1 to bottom and hold it dow...

Page 56: ...Instructions for use Epec 4W30 55 C Epec Oy Sein joki Finland...

Page 57: ...Enter 5 Then close the grapple and set the millimetre reading corresponding to that position and press Enter 6 Handle 5 20 pipes of different diameters in the grapple set the diameter of each pipe in...

Page 58: ...cture below The extra keys Millimeter reading corresponding to the position Grapple closed Curve points from between Transfer of the thin end of the diameter curve top Transfer of the thick end of the...

Page 59: ...wnwards at the maximum end This inclination is necessary when a check of the volume measurement has revealed a deviation NOTE If an error in the result of the measuring equipment is found in the contr...

Page 60: ...Instructions for use Epec 4W30 59 C Epec Oy Sein joki Finland...

Page 61: ...or 4 seconds then 2 additional function keys appear in the display see picture in enclosure 2 4 Select Names key and press Enter Now you come to write mode 5 Select the desired tree species or wood ty...

Page 62: ...Instructions for use Epec 4W30 61 C Epec Oy Sein joki Finland...

Page 63: ...o normal preselection button and another button can be programmed as extender button THE FUNCTION OF THE EXTENDER BUTTON When pushed the extender button changes the preselection page If for example PS...

Page 64: ......

Page 65: ...W 3 0 H U B 1 2 3 4 C A N X C 2 X C 3 1 2 3 4 C A N C A N C A N 1 1 2 3 4 1 2 3 4 1 2 3 4 2 3 4 2 3 X C 1 X C 9 X C 8 1 1 X C 1 X C 2 X C 5 X C 8 X C 9 X C 6 X C 7 X C 4 X C 5 2 4 V R S 2 3 2 6 V 1 0...

Page 66: ......

Page 67: ...1 4 2 4 3 4 4 4 5 4 6 4 7 4 8 X 6 8 7 6 5 3 2 1 4 C A N A B X C 2 A B Z A B 1 2 k o h m 0 6 W H e a d M o d u l e N O T E O p t i o n a l T o t e r m i n a l 2 2 F E E D F O R W A R D 1 G N D F E E D...

Page 68: ......

Page 69: ...4 8 X 6 8 7 6 5 3 2 1 4 C A N 1 0 0 V C U 2 4 V 3 4 5 6 7 8 5 V 2 1 9 1 0 1 1 1 2 E p e c 4 W S y s t e m E P E C 1 2 3 4 5 6 7 8 9 1 0 1 1 1 2 C a b i n M o d u l e B L A C K V I O L E T G R E Y P I...

Page 70: ......

Page 71: ...ecommend to use the soft rubber elements to avoid the opening of the module connectors during use The soft rubber is taped to module casing cover If necessary you can carve notches for cables to the s...

Page 72: ......

Page 73: ...nt for the function of the device and mentioned in the user s instructions nor any defects due to neglecting them Such steps are among other things setting of calibration and operation values 5 The ma...

Reviews: