background image

17

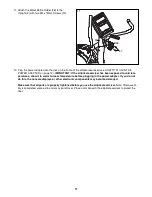
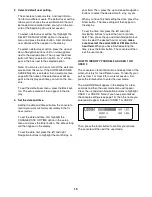
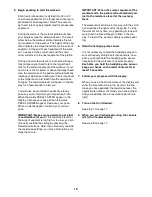
6. Measure your heart rate if desired.

If there are sheets

of clear plastic on

the metal con-

tacts on the hand-

grip pulse sensor,

remove the plas-

tic.

To measure

your heart rate,

hold the handgrip

pulse sensor with

your palms resting

against the metal

contacts.

Avoid

moving your hands or gripping the contacts

too tightly.

When your pulse is detected, one, two, or three

dashes will appear in the display, and then your

heart rate will appear. For the most accurate heart

rate reading, hold the contacts for at least 15 sec-

onds. Note: If you continue to hold the handgrip

pulse sensor, the display will show your heart rate

for up to 30 seconds.

If the display does not show your heart rate, make

sure that your hands are positioned as described.

Be careful not to move your hands excessively or

to squeeze the metal contacts too tightly. For opti-

mal performance, clean the metal contacts using a

soft cloth;

never use alcohol, abrasives, or

chemicals to clean the contacts.

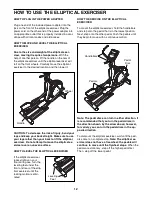
7. Turn on the fan if desired.

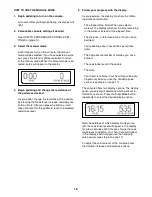
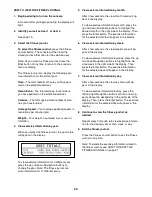
The fan has high and low speed settings. Press the

Fan button repeatedly to select a fan speed or to

turn off the fan.

Pivot the fan louvers above the display upward or

downward to direct the airflow from the fan.

Note: If the pedals do not move for about thirty

seconds, the fan will turn off automatically.

8. When you are finished exercising, the console

will turn off automatically.

If the pedals do not move for several seconds, a

tone will sound and the console will pause.

If the pedals do not move for several minutes and

the buttons are not pressed, the console will turn

off and the display will be reset.

HOW TO USE A PRESET WORKOUT

1. Begin pedaling to turn on the console.

A moment after you begin pedaling, the display will

light.

2. Select the workout menu.

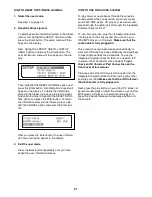
To select the workout menu, press the Intensity

Workouts button. The workout menu will then ap-

pear in the display.

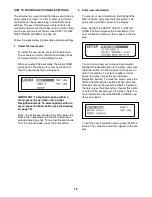
3. Select a preset workout.

To select one of the twenty preset workouts, first

press the left and right Navigation buttons to high-

light the PRESET WORKOUTS option, and then

press the Enter button.

Then, press the left and right or the up and down

Navigation buttons until the name of the desired

preset workout appears in the display. Then, press

the Enter button. Note: To return to a previous

menu, press the Back button. To return to the man-

ual mode, press the Intensity Workouts button.

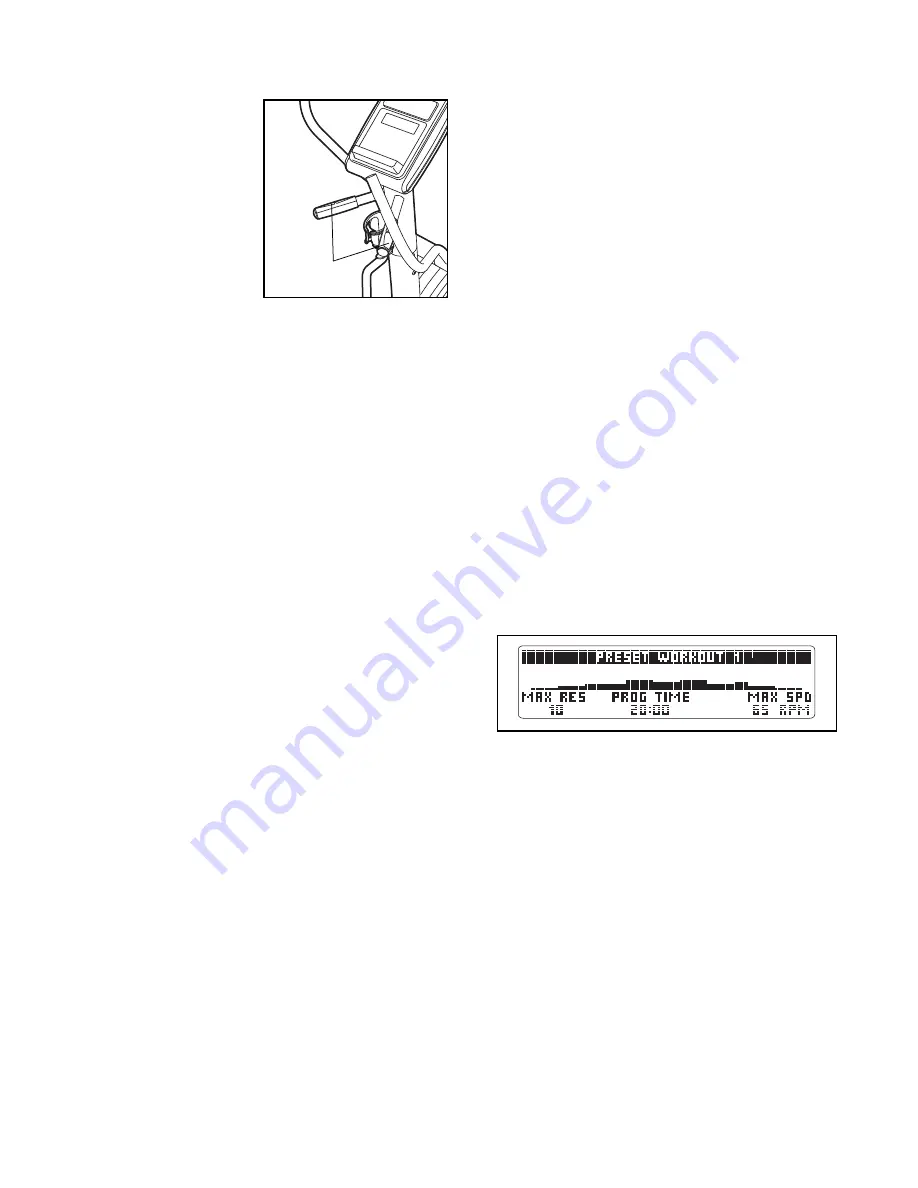
When you select a preset workout, the display will

show the name of the workout and the workout

time. A profile of the resistance levels for the work-

out will also appear in the display.

4. Begin pedaling to start the workout.

Each preset workout is divided into 20, 30, or 45

one-minute segments. One resistance level and

one target rpm (pace) are programmed for each

segment. Note: The same resistance and/or target

rpm may be programmed for consecutive seg-

ments.

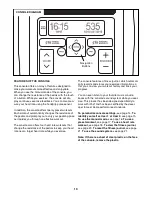
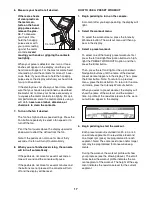
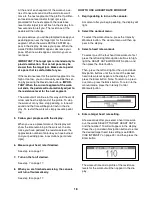
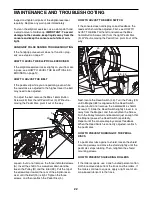
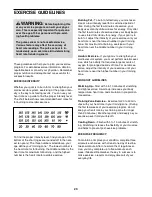
During the workout, the workout profile will show

your progress (see the drawing above). The small

arrow below the workout profile indicates the cur-

rent segment of the workout. The height of the seg-

ment indicates the resistance level for the current

segment.

Contacts

Summary of Contents for EL 2980

Page 1: ...for reference QUESTIONS As a manufacturer we are commit ted to providing complete customer satisfaction If you have questions or if parts are damaged or missing PLEASE DO NOT CONTACT THE STORE please...

Page 2: ...RT LIST 24 EXPLODED DRAWING 25 ORDERING REPLACEMENT PARTS Back Cover LIMITED WARRANTY Back Cover WARNING DECAL PLACEMENT This drawing shows the location s of the warn ing decal s If a decal is missing...

Page 3: ...floor or carpet Make sure that there is enough clearance around the elliptical exerciser to mount dismount and use it 5 Inspect and properly tighten all parts regu larly Replace any worn parts immedi...

Page 4: ...uct model number and serial number before con tacting us The model number and the location of the serial number decal are shown on the front cover of this manual To avoid a registration fee for any se...

Page 5: ...two persons Place all parts of the elliptical exerciser in a cleared area and remove the packing materials Do not dispose of the packing materials until assembly is completed In addition to the includ...

Page 6: ...Wire Harness 77 Next pull the upper end of the wire tie upward out of the top of the Upright Then untie and discard the wire tie Tip Use an elastic band or a piece of tape to prevent the end of the W...

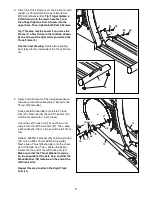
Page 7: ...sides of two Wave Washers 78 and to two Thrust Washers 66 Slide a Weld Spacer 68 onto the left Crank Arm 37 Next identify the Left Track Arm 12 which is marked with a Left sticker Orient the Left Tra...

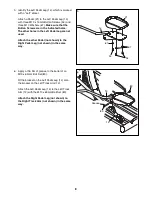
Page 8: ...l Leg are not used Attach the other Pedal not shown to the Right Pedal Leg not shown in the same way 5 21 67 67 54 54 14 6 Apply a thin film of grease to the barrel of an M10 x 65mm Bolt Set 80 Fit th...

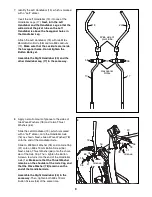
Page 9: ...f two Wave Washers 78 and to two Thrust Washers 66 Slide the Left Handlebar 19 which is marked with a Left sticker onto the Handlebar Axle 16 as shown Next slide a Wave Washer 78 onto the end of the H...

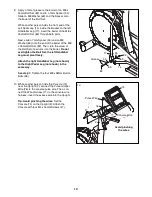
Page 10: ...few turns into the barrel Do not overtighten the Bolt Set the left Handlebar Leg must pivot freely Attach the right Handlebar Leg not shown to the Right Pedal Leg not shown in the same way See step 7...

Page 11: ...iptical exerciser has been exposed to cold tem peratures allow it to warm to room temperature before plugging in the power adapter If you do not do this the console displays or other electronic compon...

Page 12: ...ven surface HOW TO LEVEL THE ELLIPTICAL EXERCISER If the elliptical exerciser rocks slightly on your floor during use turn the leveling feet under the front and rear of the ellip tical exerciser until...

Page 13: ...ar a target heart rate while you exercise The console features a fitness journal which automati cally records and stores your exercise information so that you can view your workout history and track y...

Page 14: ...user mode at any time press the Back button repeatedly until the manual mode is selected see page 16 To re enter the user mode from the manual mode press the Enter button 2 Enter user information To...

Page 15: ...HANGE DATE OR TIME option in the setup menu and press the Enter button The date setting will then appear in the display To set the date first press the left and right Navigation buttons to highlight t...

Page 16: ...w ing workout information The elapsed time Note When you select a workout the display will show the time remaining in the workout instead of the elapsed time The distance in total revolutions that you...

Page 17: ...nd and the console will pause If the pedals do not move for several minutes and the buttons are not pressed the console will turn off and the display will be reset HOW TO USE A PRESET WORKOUT 1 Begin...

Page 18: ...kout the display will show the time remaining in the workout the dis tance you have pedaled the resistance level the approximate number of calories you have burned and your pedaling pace in revolution...

Page 19: ...rds appear maintain your current pace IMPORTANT Make sure to pedal at a pace that is comfortable for you If the resistance level for the current segment is too high or too low you can manually overrid...

Page 20: ...View exercise information by month After a few seconds the view month menu will ap pear in the display To view exercise information by month press the up and down Navigation buttons to highlight the d...

Page 21: ...nformation menus HOW TO USE THE SOUND SYSTEM To play music or audio books through the console s sound system while you exercise you must connect your iPod MP3 player CD player or personal audio player...

Page 22: ...ser until the Belt 15 is tight Tighten the three screws and then reattach the Pedal Disc 5 HOW TO ADJUST THE REED SWITCH If the console does not display correct feedback the reed switch should be adju...

Page 23: ...goal is to strengthen your cardiovascular system you must perform aerobic exer cise which is activity that requires large amounts of oxygen for prolonged periods of time For aerobic ex ercise adjust t...

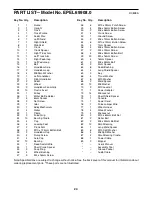
Page 24: ...ew 51 4 Crank Screw 52 1 Ground Screw 53 2 M6 x 12mm Button Screw 54 6 M10 x 13mm Button Screw 55 4 7mm Spacer 56 4 M8 x 19mm Button Screw 57 2 M4 x 19mm Screw 58 4 M8 x 38mm Button Bolt 59 20 M5 x 16...

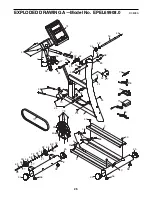
Page 25: ...3 24 40 40 40 24 4 57 2 47 33 33 85 48 85 85 50 46 46 22 72 46 22 46 50 40 24 24 24 8 24 42 16 45 45 48 43 38 27 27 27 27 35 35 35 34 52 47 70 70 69 69 69 69 48 85 24 30 29 79 71 75 88 36 36 36 EXPLO...

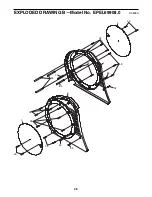
Page 26: ...26 49 5 59 59 59 59 7 64 73 6 59 59 59 59 5 49 64 53 53 EXPLODED DRAWING B Model No EPEL69908 0 R0808A...

Page 27: ...83 31 60 83 83 83 62 60 41 56 66 42 41 56 66 58 61 28 65 72 63 63 63 41 56 66 41 56 66 44 67 54 34 34 34 34 34 34 34 34 55 55 55 55 78 72 72 78 78 78 84 68 68 87 87 83 83 87 87 83 83 72 72 82 82 82 82...

Page 28: ...minimal handling charge For in home service the customer will be responsible for a minimal trip charge This warranty does not extend to any damage to a product caused by or attributable to freight dam...

Reviews: