22
MAINTENANCE AND TROUBLESHOOTING
Inspect and tighten all parts of the elliptical exerciser
regularly. Replace any worn parts immediately.
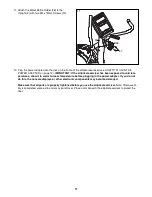
To clean the elliptical exerciser, use a damp cloth and
a small amount of mild soap.
IMPORTANT: To avoid
damage to the console, keep liquids away from the
console and keep the console out of direct sun-
light.
HANDGRIP PULSE SENSOR TROUBLESHOOTING
If the handgrip pulse sensor does not function prop-
erly, see step 6 on page 17.
HOW TO LEVEL THE ELLIPTICAL EXERCISER
If the elliptical exerciser rocks slightly on your floor dur-
ing use, see HOW TO LEVEL THE ELLIPTICAL EX-
ERCISER on page 12.
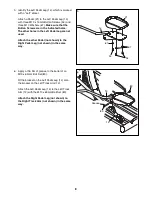
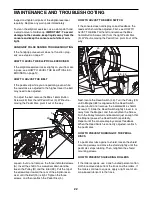
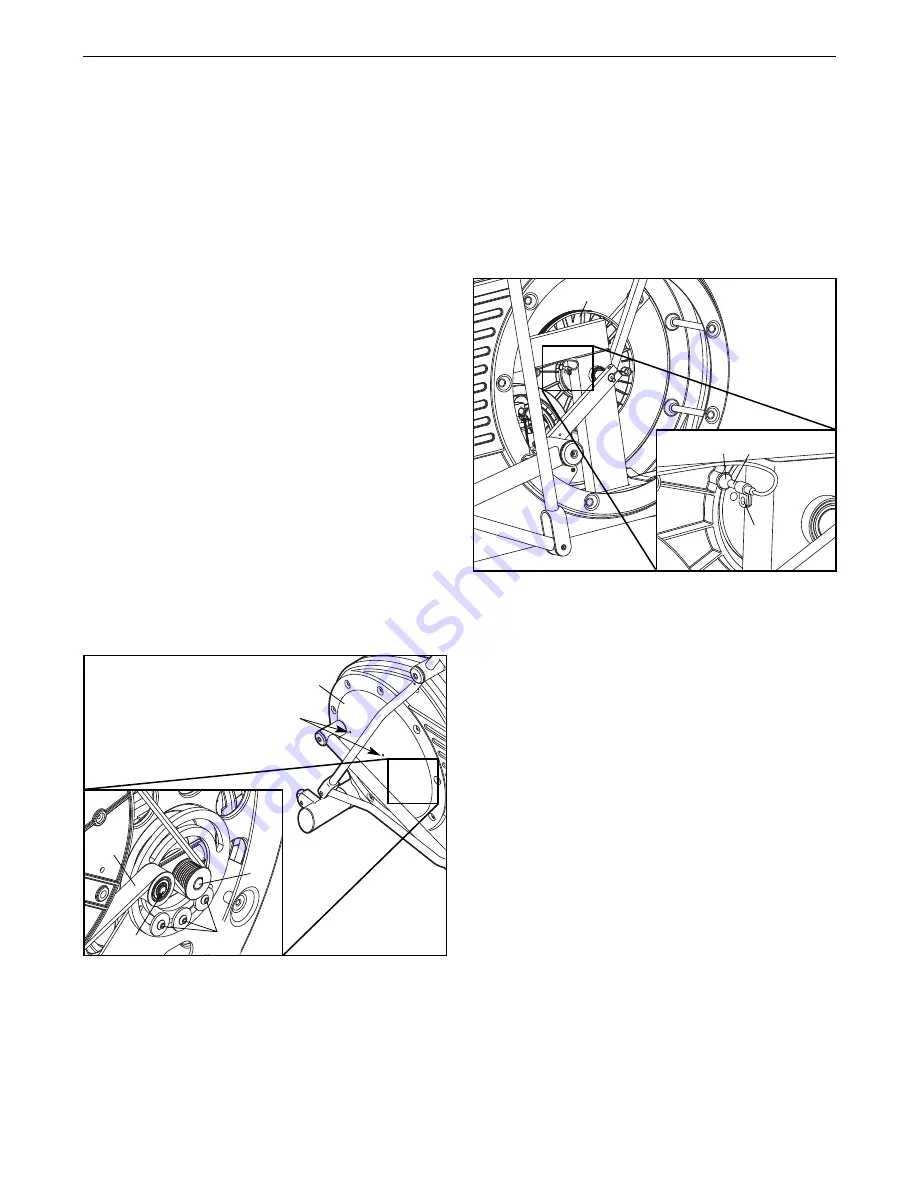
HOW TO ADJUST THE BELT
If the pedals slip while you are pedaling, even while
the resistance is adjusted to the highest level, the belt
may need to be adjusted.
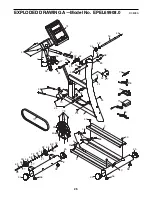
To adjust the belt, remove the M6 x 16mm Button
Screws (49) from the left Pedal Disc (5). Without re-
moving the Pedal Disc, pivot it out of the way.
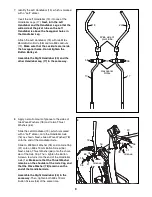
Loosen, but do not remove, the three indicated screws
(A). Insert the shaft of a screwdriver downward be-
tween the Pulley (B) and the Idler (29). Pull the top of
the screwdriver toward the rear of the elliptical exer-
ciser until the Belt (15) is tight. Tighten the three
screws, and then reattach the Pedal Disc (5).
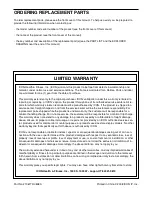
HOW TO ADJUST THE REED SWITCH
If the console does not display correct feedback, the
reed switch should be adjusted. First, see HOW TO
AJUST THE BELT at the left and remove the M6 x
16mm Button Screws (49) from the right Pedal Disc
(5). Without removing the Pedal Disc, pivot it out of the
way.
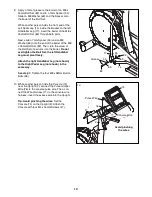
Next, locate the Reed Switch (43). Turn the Pulley (25)
until a Magnet (89) is aligned with the Reed Switch.
Loosen, but do not remove, the indicated M4 x 16mm
Screw (47). Slide the Reed Switch slightly closer to or
away from the Magnet, and then retighten the Screw.
Turn the Pulley forward and backward just enough that
the Magnet passes the Reed Switch repeatedly.
Repeat until the console displays correct feedback.
When the Reed Switch is correctly adjusted, reattach
the pedal disc.
HOW TO PREVENT RUBBING OF THE PEDAL
DISCS
If a pedal disc rubs against a shield, loosen the shield
mounting screws and move the shield slightly until the
pedal disc stops rubbing. Then, retighten the shield
mounting screws.
HOW TO PREVENT SQUEAKING ROLLERS
If the rollers squeak, use a one hundred percent cotton
cloth to remove debris from the track and the rollers. If
the rollers continue to squeak, apply a light coat of sili-
cone-based lubricant to the track.
49
5
15
B
29
A
89 43
47
25


