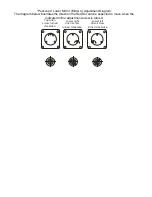
54. Move the lens carriage back to position 1 to verify that the alignment has not changed. If it
has moved, complete steps 49 through 53 again, until there is little change in the red dot
position when you move from the front to the back.
55. Move the X-axis rail to the rear of the engraver.
56. Check to see if the Red Dot pointer is on the target. Adjust as necessary to move the Red
Dot image to the center of the target.
57. Move the lens carriage to the right, watching the position of the Red Dot, if it moves off of
the target, stop; move the lens carriage back and adjust so the red dot is in the center of the
target. Otherwise move the lens carriage to the far right hand side of the engraver, and
adjust so that the Red dot is in the center of the alignment target.
58. One last time, with the Target in place and the Red Dot pointer on, move the lens carriage
to the outer limits of the table, making sure that the Red Dot image stays in the center of the
target.
59. You have now completed the Updating your FiberMark Optics.
If you have any questions please call Epilog’s Technical Support
Phone
303.215.9171
Fax
303.531.7594
E-Mail:


