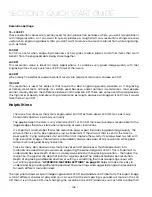
Resolution Settings:
75 – 200 DPI
These resolution values are typically used for non-production purposes where you want to experiment
with image location, or if you want to quickly produce a rough draft. Low resolution settings are also
useful when engraving products that you don’t want to remove too much material from while engraving,
such as fabric.
300 DPI
300 DPI is useful when engraving materials such as glass, marble, plastic and other items that don’t
benefit from the engraved dots being close together.
400 DPI
This resolution value is ideal for many applications. It combines very good image quality with fast
engraving times. Many users like 400 DPI for all of their work.
600 DPI
When really fine detail or overall excellent results are required, most users choose 600 DPI.
1200 DPI
This resolution is used for projects that require the best engraving quality possible, or if engraving
extremely small fonts. Although it’s seldom used because, under normal circumstances, most people
cannot visually discern the difference between 1200 and 600 DPI. There are some users that appreciate
this high level of quality and are willing to take twice as long to produce an image at 1200 DPI as it would
take them at 600 DPI.
Helpful Hints
• There are four times as many dots engraved at 600 DPI as there are at 300 DPI. Twice as many
horizontally and twice as many vertically.
• The gap between the dots is very small at 600 DPI. At 300 DPI the lesser overlap is responsible for the
jagged edges that are visible when engraving at lower resolutions.
• It’s important to remember that while resolution plays a part in producing good image quality, the
artwork that is sent to be engraved is just as important. If the artwork that is sent to the laser is
poor quality, trying to engrave it at 600 DPI will not improve the quality. It’s always best to start with
high resolution images. Poor artwork will probably always look poor at any resolution, while good
artwork will look good at any resolution.
• Twice as many dots and twice as many lines at 600 DPI produces a much deeper burn into
materials like wood than you would see engraving the same image at 300 DPI. This is important to
understand because depth of burn is closely associated with engraving resolution – the higher the
resolution, the greater the depth of burn for a given speed. The relationship between resolution,
depth of engraving and Speed and Power setting is something that most people figure out with
just a little experience.
“APPENDIX B: MATERIAL SETTINGS” on page 211
helps to make this easy to
understand by providing different Speed and Power settings and suggested engraving resolutions
for each different material listed.
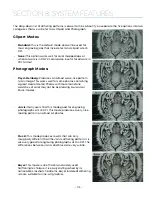
The next photo shows a clipart image engraved at 300 DPI (top) and at 600 DPI (bottom). This clipart image
is full of different shades of gray and you can see that the dot spacing is spread out more on the 300
DPI than it is on the 600 DPI. Just changing the resolution to 600 DPI produces so much dot overlap that
- 106 -
SECTION 7: QUICK START GUIDE
Summary of Contents for Fusion Pro 32
Page 2: ......
Page 6: ......
Page 14: ...Fusion Pro 48 8 SECTION 1 SAFETY ...
Page 15: ... 9 SECTION 1 SAFETY ...
Page 18: ......
Page 28: ......
Page 60: ......
Page 98: ......
Page 108: ......
Page 132: ......
Page 162: ......
Page 184: ......
Page 202: ......
Page 214: ......
Page 216: ......
Page 242: ......


