SECTION 12: ENGRAVING MATERIALS
CO2 Laser Materials/Techniques
Your Epilog Laser system is very versatile. It can mark and cut many different materials. Following is
information regarding some of the materials the laser will mark and cut. Check the Epilog website (www.
epiloglaser.com) periodically for new laser applications, tips and techniques to use with your laser.
For specific information regarding materials not mentioned below, please contact your local
Epilog representative. See “Contacting Technical Support” on page 201.
3D Engraving
Earlier in the manual we discussed dot patterns and how those patterns are used to create raster images.
3D mode looks at the dots and the dot patterns in a very different way than basic raster engraving mode,
especially when using grayscale images.
In 3D mode, instead of looking at the dots and determining where to fire the laser based on the dot
spacing, we look at the dots and determine how much laser power (wattage) to apply to each dot. In
basic raster engraving mode, every dot is fired at the same laser output. In 3D mode we have the ability
to adjust the laser output for every dot.
An additional aspect of 3D mode is that, unlike basic mode, the laser fires continuously between most
dots – even if it is engraving from a 10% fill pattern to a 30% fill pattern. This is by design so there is a
gradual change in the depth of engraving when the artwork transitions from one shade of gray to
another. The only time that this is not true is when the artwork changes from 100% black to 100% white (or
visa versa). Because we adjust the way the laser fires in 3D mode we also have to adjust the artwork that
is used to create good 3D images, and this is where 3D engraving can get difficult.
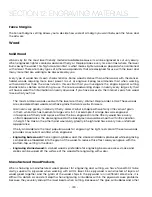
Since we’re going to vary the laser power output for every dot, we want artwork that
will produce more than one level of gray. We want artwork that gradually blends
from one shade of gray to another. You need an object that looks something like
this circle to create a 3D image.
Engraving this circle in 3D mode will create a dome with center being the high point
(because it’s a light shade of gray) and the outside edge being deep (because it’s
a darker shade of gray).
- 179 -
Summary of Contents for Fusion Pro 32
Page 2: ......
Page 6: ......
Page 14: ...Fusion Pro 48 8 SECTION 1 SAFETY ...
Page 15: ... 9 SECTION 1 SAFETY ...
Page 18: ......
Page 28: ......
Page 60: ......
Page 98: ......
Page 108: ......
Page 132: ......
Page 162: ......
Page 184: ......
Page 202: ......
Page 214: ......
Page 216: ......
Page 242: ......


