Epilog Laser Tube Upgrade
Mini / Helix
Revision Date: 9/27/2013
pg. 16 of 17
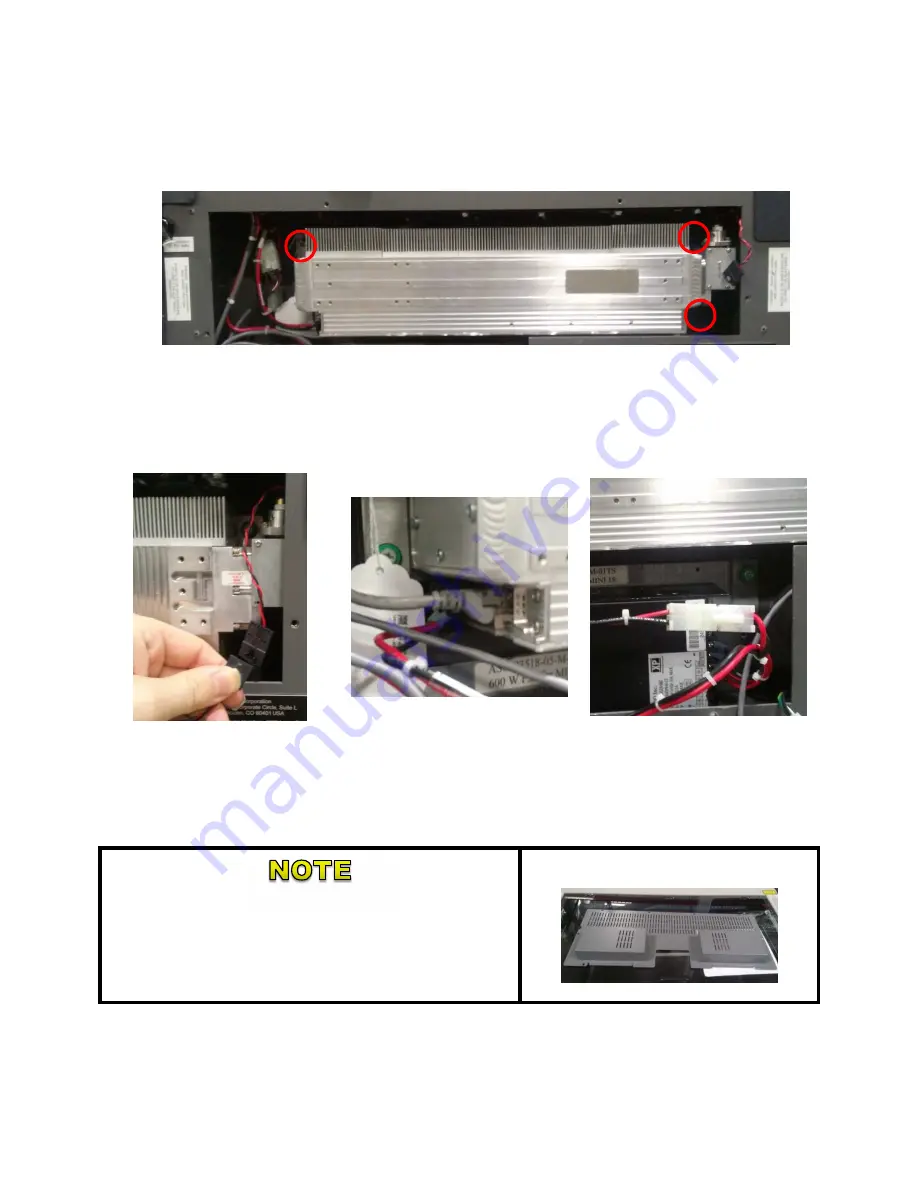
Step 3:
Tighten the three green thumb screws to hold the laser in place.
Step 4:
Reconnect the Red and Black power wires, Grey data cable and thin Red and
Black red dot pointer wires.
Step 5:
Tuck any lose wires back in to the engraver and proceed to replace the Rear
Panel.
If you completed Procedure D (Installing the new PSU
Bracket), you will have been provided with a new rear panel
to accommodate the new orientation of the PSU. Please use
the new rear panel.


