Owner's Manual for EPILOG Legend Model 6000
December, 2000
62
Section 12 – Optional Equipment
ROTARY OPTION
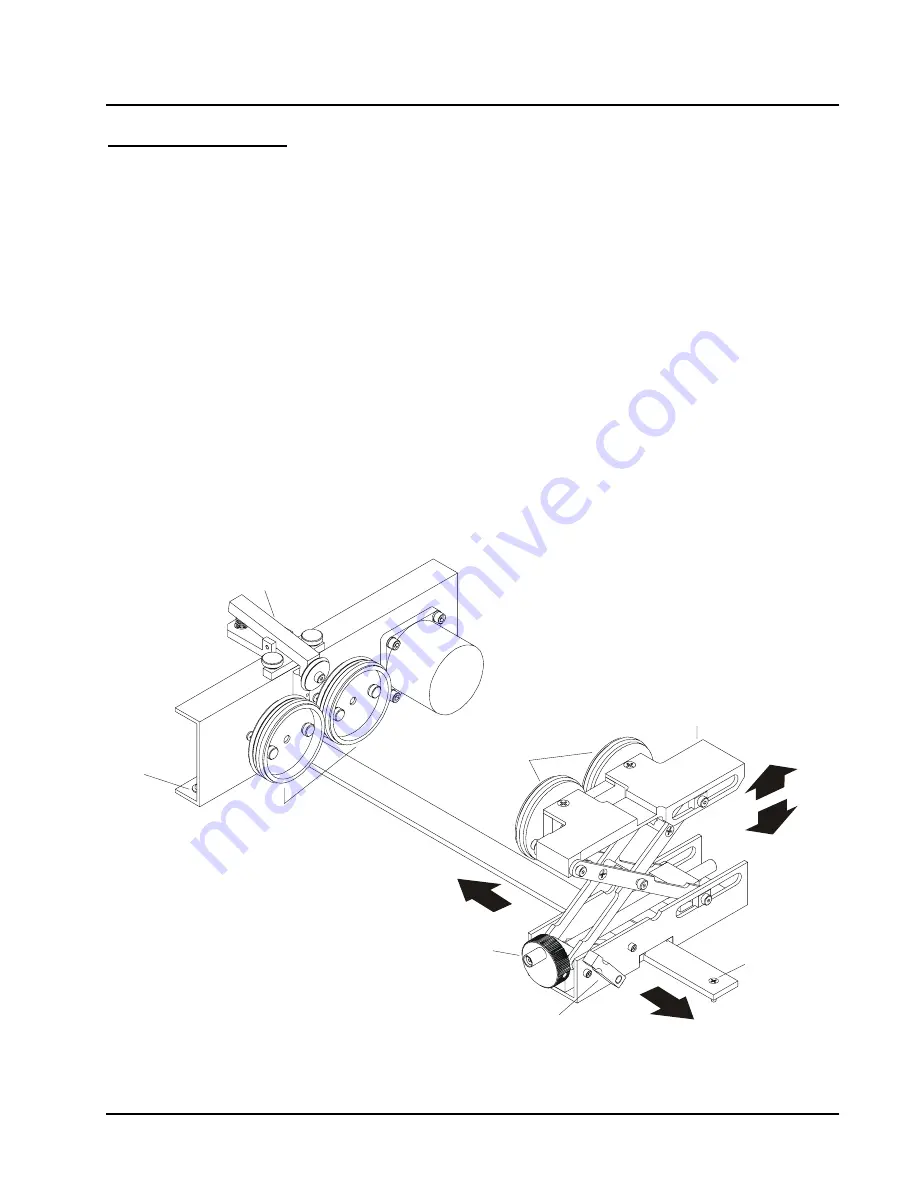
The rotary option allows you to mark or engrave cylindrical objects.
INSTALLATION
1)
Lower the engraving table to its lowest point.
2)
Turn off the power to the engraver.
3)
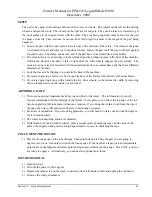
Set the rotary attachment onto the engraving table so that the three pins in the bottom of the rotary
attachment slide into the three corresponding holes in the table. Ensure the bottom of the attachment
is flush to the engraving table at all three-pin positions.
4)
There is a motor on the rotary attachment with a plug on the end. Plug the rotary into the mating
connector located at the inside, front, left hand corner of the engraver. This connector is oriented so
that you cannot install it backwards unless you push really hard.
5)
The rotary attachment is now installed! Turn the power on.
6)
The engraver knows that the rotary attachment is installed and changes its home position to a point
directly above the center point of the drive wheels on the attachment.
Clamp
Drive Wheels
Idler Wheels
Elevator
Mounting
Pin
Mounting
Pin
Adjustment
Knob
Elevator Lock
(shown unlocked)

