Section 8: Using the Front Control Panel
95
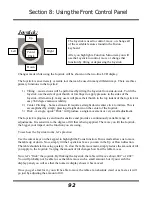
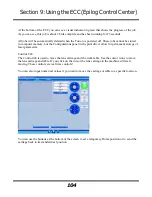
When a job has been printed to the laser and the Job menu is highlighted, you will be see the job in
the first line of the display. The estimated job time and the print resolution will show on the second
line of the display. Pressing the Go button on the keyboard will start this job. After pressing the Go
button the job timer will be active and the print resolution will be displayed on the second line of the
display.
If multiple jobs have been printed to the laser, the last job printed to the Fusion will show. Use the
Joystick to scroll through multiple jobs.
The Job name is the same name as the file used to print the job.
In the image above, the job time estimator indicates that the job will take 2 minutes and 23 seconds
at 600 DPI.
The Job Time estimator is an extremely handy tool for pricing jobs!
Focus:
With Focus highlighted, use the Joystick to move the table up or down. The display will show a
digital readout of the table position.
Using a Center-Click action on the Joystick will move the lens carriage out about two inches to
make manual focus easier.
Pressing the RESET button will move the carriage back to its resting position.
Jog:
With Jog highlighted, use the Joystick to move the lens carriage. Turn on the red dot pointer for a
visual indicator of where the carriage is moving. The carriage can be moved in X, Y or diagonally.
The display will show a digital readout of the lens location.
When you are in Jog mode you can also set a new Home position anywhere on the table. After
moving the carriage to your desired location, press the Joystick using the Center-Click action. This
establishes new Home position.
Job:1. Fusion Test
00:02:23 600 DPI
Summary of Contents for Fusion 13000
Page 2: ...ii THIS PAGE WAS INTENTIONALLY LEFT BLANK ...
Page 4: ...Contents at a Glance iv THIS PAGE WAS INTENTIONALLY LEFT BLANK ...
Page 8: ...Table of Contents viii INDEX 195 THIS PAGE WAS INTENTIONALLY LEFT BLANK ...
Page 10: ...Fire Warning x SEE PREVIOUS PAGE ...
Page 14: ...Introduction xiv THIS PAGE WAS INTENTIONALLY LEFT BLANK ...
Page 15: ...1 Manual Epilog Laser Setup ...
Page 16: ...2 THIS PAGE WAS INTENTIONALLY LEFT BLANK ...
Page 26: ...Section 1 Safety 10 ...
Page 27: ...Section 1 Safety 11 ...
Page 28: ...Section 1 Safety 12 THIS PAGE WAS INTENTIONALLY LEFT BLANK ...
Page 41: ...Section 3 Getting Started 11 THIS PAGE WAS INTENTIONALLY LEFT BLANK ...
Page 44: ...Section 4 Installing the ECC 14 ...
Page 51: ...Section 4 Installing the ECC 21 THIS PAGE WAS INTENTIONALLY LEFT BLANK ...
Page 58: ...Section 5 Installing the Epilog Dashboard Print Driver 28 10 Click on Update Driver ...
Page 68: ...Section 5 Installing the Epilog Dashboard Print Driver 38 Click on Add Local Printer ...
Page 108: ...Section 6 Using the Epilog Dashboard 78 THIS PAGE WAS INTENTIONALLY LEFT BLANK ...
Page 109: ...79 Manual Basic Operations ...
Page 110: ...80 THIS PAGE WAS INTENTIONALLY LEFT BLANK ...
Page 130: ...Section 8 Using the Front Control Panel 100 THIS PAGE WAS INTENTIONALLY LEFT BLANK ...
Page 136: ...Section 9 Using the ECC Epilog Control Center 106 THIS PAGE WAS INTENTIONALLY LEFT BLANK ...
Page 148: ...Section 10 Standard Optional Machine Features 118 ...
Page 152: ...Section 11 Engraving Machine Cleaning 122 Crash Bar and locating pins ...
Page 160: ...Section 11 Engraving Machine Cleaning 130 ...
Page 184: ...Section 13 Material Engraving Techniques 154 THIS PAGE WAS INTENTIONALLY LEFT BLANK ...
Page 191: ...161 Manual Technical Support Troubleshooting and Specifications ...
Page 192: ...162 THIS PAGE WAS INTENTIONALLY LEFT BLANK ...
Page 194: ...Section 15 In Case of Difficulty 164 THIS PAGE WAS INTENTIONALLY LEFT BLANK ...
Page 200: ...Section 16 Specifications 170 THIS PAGE WAS INTENTIONALLY LEFT BLANK ...
Page 208: ...APPENDIX A 178 THIS PAGE WAS INTENTIONALLY LEFT BLANK ...
Page 218: ...Appendix C Additional Dashboard Instructions 188 ...

