Section 6: Using the Epilog Dashboard
55
Speed and Power settings are dependent on resolution setting. For example, there
is greater overlap of each raster line at 600 DPI than there is at 300 DPI. The
additional overlap at 600 DPI has the effect of lasering over more of each line
twice. This means that on material like wood, you will notice a greater depth of
engraving at 600 DPI than you will at 300 DPI if you use the same Speed and
Power settings.
Resolution Settings
Uses for different resolution settings:
75 – 150 DPI
These resolution values are typically used for non-production purposes where you
want to experiment with image location, or if you want to quickly produce a
rough draft.
200 DPI
Some users like 200 DPI for engraving photographs that have been processed
through PhotoGrav or other photo editing software designed for the laser. Other
users prefer 300 DPI for this style of photographs.
300 DPI
This resolution can be good for production work where image quality needs to be
good, but not great. Many users will use 300 DPI on plastic and other materials
that don’t require a lot of power in combination with large block lettering.
Attempting to produce really fine detail with 300 DPI is not recommended.
400 DPI
This resolution value is ideal for many applications. It combines very good image
quality with fast engraving times. Many users like 400 DPI for all of their work.
600 DPI
When really fine detail or overall excellent results are required, most users choose
600 DPI.
1200 DPI
This resolution is used for projects that require the best engraving quality
possible, although it’s seldom used because under normal circumstances most
people cannot visually discern the difference between 1200 and 600 DPI. There
Summary of Contents for Fusion 13000
Page 2: ...ii THIS PAGE WAS INTENTIONALLY LEFT BLANK ...
Page 4: ...Contents at a Glance iv THIS PAGE WAS INTENTIONALLY LEFT BLANK ...
Page 8: ...Table of Contents viii INDEX 195 THIS PAGE WAS INTENTIONALLY LEFT BLANK ...
Page 10: ...Fire Warning x SEE PREVIOUS PAGE ...
Page 14: ...Introduction xiv THIS PAGE WAS INTENTIONALLY LEFT BLANK ...
Page 15: ...1 Manual Epilog Laser Setup ...
Page 16: ...2 THIS PAGE WAS INTENTIONALLY LEFT BLANK ...
Page 26: ...Section 1 Safety 10 ...
Page 27: ...Section 1 Safety 11 ...
Page 28: ...Section 1 Safety 12 THIS PAGE WAS INTENTIONALLY LEFT BLANK ...
Page 41: ...Section 3 Getting Started 11 THIS PAGE WAS INTENTIONALLY LEFT BLANK ...
Page 44: ...Section 4 Installing the ECC 14 ...
Page 51: ...Section 4 Installing the ECC 21 THIS PAGE WAS INTENTIONALLY LEFT BLANK ...
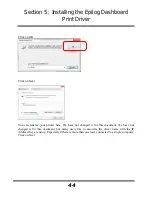
Page 58: ...Section 5 Installing the Epilog Dashboard Print Driver 28 10 Click on Update Driver ...
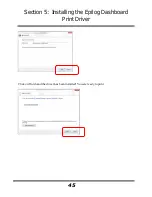
Page 68: ...Section 5 Installing the Epilog Dashboard Print Driver 38 Click on Add Local Printer ...
Page 108: ...Section 6 Using the Epilog Dashboard 78 THIS PAGE WAS INTENTIONALLY LEFT BLANK ...
Page 109: ...79 Manual Basic Operations ...
Page 110: ...80 THIS PAGE WAS INTENTIONALLY LEFT BLANK ...
Page 130: ...Section 8 Using the Front Control Panel 100 THIS PAGE WAS INTENTIONALLY LEFT BLANK ...
Page 136: ...Section 9 Using the ECC Epilog Control Center 106 THIS PAGE WAS INTENTIONALLY LEFT BLANK ...
Page 148: ...Section 10 Standard Optional Machine Features 118 ...
Page 152: ...Section 11 Engraving Machine Cleaning 122 Crash Bar and locating pins ...
Page 160: ...Section 11 Engraving Machine Cleaning 130 ...
Page 184: ...Section 13 Material Engraving Techniques 154 THIS PAGE WAS INTENTIONALLY LEFT BLANK ...
Page 191: ...161 Manual Technical Support Troubleshooting and Specifications ...
Page 192: ...162 THIS PAGE WAS INTENTIONALLY LEFT BLANK ...
Page 194: ...Section 15 In Case of Difficulty 164 THIS PAGE WAS INTENTIONALLY LEFT BLANK ...
Page 200: ...Section 16 Specifications 170 THIS PAGE WAS INTENTIONALLY LEFT BLANK ...
Page 208: ...APPENDIX A 178 THIS PAGE WAS INTENTIONALLY LEFT BLANK ...
Page 218: ...Appendix C Additional Dashboard Instructions 188 ...


