background image

factors it is virtually impossible to cut cleanly through plywood.

MDF is an engineered wood product with glued together wood fibers. Since there are not layers of wood 

glued together, like in the plywood, the engraving and cutting is much better. You will produce some 

charring on the edge of MDF when cut, so you may need to sand the edges after cutting. 

Wood Engraving Techniques

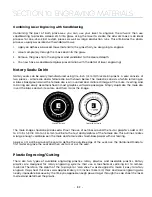
•  To create a quality image on wood, contrast and depth are usually desired. The higher the power 

levels, the higher the contrast and depth will be. 

•  Speed and Power Settings: Wood is a great material to laser engrave because it discolors when 

engraved and the depth of engraving is greater than most materials. The downside is that it takes a 

lot of power to deeply engrave wood at high speeds. Most wood can be engraved using full power 

no matter whether you are using a 30-watt laser or a 120-watt laser. Depending on the wattage of 

your laser, the best approach is to set the laser power at 100% and adjust the speed to obtain the 

desired depth. 

•  Resolution Settings:

 Wood is a very easy material to work with and you can produce very nice 

detail with as little as 300 DPI engraving. 600 DPI engraving into wood produces fabulous results, 

especially on photos. 

• 

Gray Scales:

 Gray scales look wonderful when engraved into wood. The reason for this is that 

the wood will react much differently to each level of gray scale, providing amazing contrast. 

Experiment! Take a piece of clipart and ungroup it and change the colors so that they range from a 

dark color like red, to a light color like yellow, then engrave it. This will create a shading effect that is 

almost 3-D in its appearance.

Wood Vector Cutting Techniques

Epilog Laser Systems are ideal for cutting through solid wood material. The thickness of the wood that 

you can cut varies with the wattage of the laser and the hardness of the wood, but in general you can 

cut approximately ¼ inch (6.35 mm) wood with a 30-watt laser and up to ½ inch (12.7 mm) wood with a 120 

watt laser. 

•  When cutting wood of any thickness, Epilog recommends the use of the Vector Cutting Table and Air 

Assist options. The Vector Cutting Table raises the wood off of the solid metal engraving table and 

supports the wood on an aluminum grid. The grid greatly reduces backside burning of the wood 

and also provides ventilation that allows the fumes and smoke to be exhausted to the rear of the 

engraving cabinet. Information regarding accessing the Vector Cutting Table is located in 

“Vector 

Cutting Table” on page 97.

•  Air assist greatly reduces flaming that may occur if too much laser power is applied to the wood 

piece being cut.

•  Depending on the type of wood being vector cut, it is sometimes advantageous to apply a cover 

of masking or transfer tape to the surface before cutting. The masking tape will reduce residue 

buildup on the top surface of the wood surrounding the cut line.

•  Reduce the frequency settings in the driver to around 20 for a better laser cut edge. The laser will 

pulse less frequency, reducing the charring and burning on the side of the wood. 

-  112  -

SECTION 10: ENGRAVING MATERIALS

Summary of Contents for FusionPro 32

Page 1: ... 1 303 215 9171 Knowledge Base support epiloglaser com System Registration epiloglaser com register Driver Firmware epiloglaser com fusionpro drivers UPDATED APRIL 2019 EPILOGLASER COM MANUALS Register your system now for driver update notifications and FREE files EPILOGLASER COM REGISTER ...

Page 2: ......

Page 3: ...How to Install the Epilog Job Manager 25 Troubleshooting the Job Manager 31 Important Job Manager Notes 32 SECTION 4 THE JOB MANAGER 33 Using the Epilog Job Manager 33 Printing to the Epilog Job Manager 34 Organizing Your Print Jobs 34 Previewing Your Job 38 Searching for a Job 38 Finding Job History 39 Vector Sorting 40 Material Settings Tab 41 Job Settings Tab 44 Changing Program Settings 46 SEC...

Page 4: ...cuum Hold Down Table 97 PhotoLaser Plus 98 SECTION 10 ENGRAVING MATERIALS 105 CO2 Laser Materials Techniques 105 SECTION 11 SPECIFICATIONS 115 Fusion Pro Laser Technical Specifications 115 Compatibility 116 Recommended PC 116 About The CO2 Laser Source 117 Federal Communications Commission FCC Notice 118 SECTION 12 TECHNICAL SUPPORT 119 Contacting Technical Support 119 Frequently Asked Questions 1...

Page 5: ...cetone alcohol or gasoline Be prepared with a fire extinguisher Always keep a properly maintained and inspected fire extinguisher on hand Epilog recommends a Halotron fire extinguisher or a multi purpose dry chemical fire extinguisher The Halotron extinguishers are more expensive than a dry chemical but offer certain advantages should you ever need to use an extinguisher The Halotron extinguisher ...

Page 6: ... read the first few sections Then you can refer to topics in the remaining sections as you work Icons Used in this Manual Look for these symbols to help you find valuable information throughout the text Helpful notes to keep in mind when running the laser This icon signifies advice you can try that will save you significant time This icon highlights current contact information for receiving help W...

Page 7: ...is the operator s responsibility to ensure that the installation and operation of the Epilog Model 16000 Laser System is performed in accordance with all applicable laws Copies of ANSI Standard Z136 1 2000 are available from Epilog Corporation or from Laser Institute of America 12424 Research Parkway Suite 125 Orlando FL 32826 407 380 1553 Electrical Safety The AC input power to the Epilog Model 1...

Page 8: ...ned A visible emission indication when the Laser Diode Pointer Red Dot Pointer is operating There is an LED indicator on the machine s front panel 21 CFR 1040 and IEC 60825 1 require that certification identification and warning labels be placed on laser products Reproductions of labels on the Epilog Model 16000 Laser System follow with their locations specified 1 Certification Identification Plat...

Page 9: ...net doors one on the front door and one on the top door 6 Emergency Stop Label This label is located below the red Emergency Stop switch on the top right side of the machine 7 Electrical Safety Label This label is located on the back of the machine in the lower left hand corner 8 Main Breaker Label This label is located on or above the power module panel at the right side of the machine s cabinet ...

Page 10: ...The following diagrams show the location of each specific label Fusion Pro 32 6 SECTION 1 SAFETY ...

Page 11: ...Fusion Pro 48 7 SECTION 1 SAFETY ...

Page 12: ... 8 SECTION 1 SAFETY ...

Page 13: ...found to comply with the limits for a Class A digital device pursuant to Part 15 of the FCC Rules These limits are designed to provide reasonable protection against harmful interference when the equipment is operated in a commercial environment This equipment generates uses and can radiate radio frequency energy and if not installed and used in accordance with the instruction manual may cause harm...

Page 14: ...a significant risk of fire if the machine is set improperly or if the machine should experience a mechanical or electrical failure while operating Do Not Vector Cut While Machine is Unattended Never laser cut any material with the laser without someone watching the system Because vector cutting moves relatively slowly compared to raster engraving a tremendous amount of heat is applied to the mater...

Page 15: ...ables You will also need 1 A computer or laptop 2 An exhaust fan The exhaust fan is mandatory and is used to remove smoke and debris from the Fusion Pro work area The exhaust air can be ported to the outside or into a filter box Follow these steps to setup your Fusion Pro Laser system 1 Unpack the laser system 2 Choose where to locate the system 3 Connect the exhaust system to your laser 4 Connect...

Page 16: ...ox 1 Unpacking the Laser System Unpack the laser system from the crate provided by Epilog Please be sure to hold on to all packing materials and crating in case you need to move the system in the future 1 First remove the screws securing the top lid using a screwdriver 2 Remove the top lid and set it to the side ...

Page 17: ...es as well as any foam pieces around the machine 7 Using the top panel you removed at the beginning align its corners with the ledge on the bottom of the box making a ramp Secure the ramp with a screw 8 Roll the machine down the ramp slowly and carefully until it is out of the box and on level ground ...

Page 18: ...of restrictions and should never be covered Warning The cooling fans and vents are located on both sides of the Fusion Pro and should never be covered or blocked in any way Lasers that overheat will not operate properly and may begin to produce erratic laser output or possibly complete failure Ambient air temperature where the laser system is operating should not exceed 90 degrees F 32 C Operating...

Page 19: ...ly for direct ventilation exhaust systems that are ported to the outside Please note that this is also a recommendation and not a requirement because factors such as length and type of tubing from the Epilog laser to the exhaust fan and from the exhaust fan to the outside of the building can produce significant losses on the true amount of air that is drawn from the Epilog laser Exhaust flow rates...

Page 20: ...e or leaking exhaust The drawings above show the typical exhaust setup The left drawing shows the exhaust near the machine and the right drawing shows the exhaust fan on the roof Where the exhaust fan is placed is a choice of personal preference Some users like the exhaust fan outside because of noise considerations Roof or Exterior Wall 4 102 mm flexible aluminum duct or rigid galvanized sheet me...

Page 21: ...n Pro Electrical Specifications on page 3 5 Connect the Laser to Your Computer You are now ready to connect your computer to the laser The following connections can be used 1 USB only connection You can use the USB port for connecting to the Epilog Job Manager Multiple laser systems cannot be operated from a single computer through the USB connections If you are using the USB connection you will n...

Page 22: ...g the print driver see SECTION 3 SOFTWARE INSTALLATION on page 21 6 Set the Fusion Pro s IP Address Ethernet Cable Setup 1 Once your machine is booted up select the Settings button in the upper right corner of the touchpad 2 Select Network in the settings list 3 Under Network you will see IP Address and Netmask press IP Address and then press the numbers that appear next to them A keyboard should ...

Page 23: ...used 169 254 7 2 6 Press the Close key to close the keyboard then press the Job Menu Button to return to the main screen and your settings should be saved 7 Sign Up for Driver Updates and Register Your System Go to www epiloglaser com register and register your system You can also sign up for our monthly e newsletter quarterly customer printed newsletter and sign up for driver update notifications...

Page 24: ......

Page 25: ...ase and much more It s a great addition to the Epilog Laser product features and we look forward to seeing how our customers use this software Windows 7 8 10 is required to use the Epilog Job Manager Uninstalling the Previous Job Manager If you have installed a previous version of the Job Manager on your computer you must uninstall it first before you continue 1 Go to Control Panel Programs and Fe...

Page 26: ...3 Select Remove all components and then click Next 4 Click Uninstall 5 Click Finish to complete the uninstallation of the previous Job Manager 22 SECTION 3 SOFTWARE INSTALLATION ...

Page 27: ...Set Up TCP IP Address in the Computer Go to your Network and Sharing Center in your computer s Control Panel 1 Click Change Adapter Settings 2 Right click Local Area Connection then click Properties 23 SECTION 3 SOFTWARE INSTALLATION ...

Page 28: ...e the following IP Address Type in the following IP Address 192 168 3 3 This number is not an error the last digit of the IP address in this window must be different than the IP address you set in the laser Type in a Subnet Mask of 255 255 255 0 then click OK 24 SECTION 3 SOFTWARE INSTALLATION ...

Page 29: ...lation file will download as a zip folder that will need to be extracted Right click the folder and click Extract All Once finished double click on the EpilogSuite file Note Make sure that the Ghostscript folder included in the download is always in the same location as your Epilog Suite installation file or the installation will not be able to complete 25 SECTION 3 SOFTWARE INSTALLATION ...

Page 30: ...3 A welcome screen appears click Next 4 Select a directory location for the installation file and click Next 26 SECTION 3 SOFTWARE INSTALLATION ...

Page 31: ...5 Read and accept the license agreements and click Next 6 Click Next to use the default start menu or choose a start menu name of your choice 27 SECTION 3 SOFTWARE INSTALLATION ...

Page 32: ... to begin the installation 8 The Epilog Software Suite will begin installing during the installation a dialog box will pop up to also install the AGPL Ghostscript Package click Next 28 SECTION 3 SOFTWARE INSTALLATION ...

Page 33: ...d accept the AGPL Ghostscript License Agreement then click Next 10 Click Finish to complete the AGPL Ghostscript installation and resume the Epilog Software Suite installation 29 SECTION 3 SOFTWARE INSTALLATION ...

Page 34: ... you want to run the program now Click Finish to complete the installation 12 An icon for the Job Manager will be automatically added to your Desktop You are now ready to use the Job Manager 30 SECTION 3 SOFTWARE INSTALLATION ...

Page 35: ...allation To disable Symantec Anti Virus software choose Options Other anti virus packages should have something similar to Symantec Disable all Virus and Spyware Protection Features After the Job Manager has been installed go back into your Anti Virus software and re enable the setting that was disabled 31 SECTION 3 SOFTWARE INSTALLATION ...

Page 36: ...ating your laser install the newest version of the driver to properly associate the correct machine with the Job Manager We suggest a minimum of 1 GB of free RAM space when managing very large raster and vector jobs 32 SECTION 3 SOFTWARE INSTALLATION ...

Page 37: ...ming your machine setting the IP Address and selecting the correct laser wattage then click Save 2 Your new laser has been activated in the Job Manager and now appears in the left panel It is now ready to accept jobs from the print driver Use the Add or Delete buttons to add or remove additional machines Below you can see we have installed an additional Fusion Pro 32 laser system 33 ...

Page 38: ...your printer and set the Page to Match Orientation and Size Once your desired settings are selected click Print again Organizing Your Print Jobs Click the Jobs tab All print jobs will be displayed in the Uncategorized folder Click on your job to highlight it You can now Print Edit Preview or Delete this job using the available icons 34 SECTION 4 THE JOB MANAGER ...

Page 39: ... Delete Job Folders Click the Add Job Folders icon to add folders You can add as many folders as you d like Type in the folder name and click the check mark to create your new folder 35 SECTION 4 THE JOB MANAGER ...

Page 40: ...rized folder to this subfolder Select the job you want to move and click OK Create Subfolders First highlight the folder in the left panel where you want to add a subfolder Below we have highlighted the Betty s Electronics folder Click the Add Subfolder icon Type the subfolder name in the Add Subfolder field then click the check mark to create the subfolder 36 SECTION 4 THE JOB MANAGER ...

Page 41: ...ers An arrow will indicate where you are placing the job Once you see the arrow selecting the correct folder let go of the job file to place it in that folder Switch Machine Selection By clicking on the machine photo in the upper left corner you can quickly change which machine model you want to have active 37 SECTION 4 THE JOB MANAGER ...

Page 42: ...the vector components of this job The preview mode is very useful in identifying unwanted vector components in a job For more information see Presetting Your Cut Lines on page 52 Searching for a Job The Job Manager has a powerful search function Type in part of a file name and press enter to find all files related to that name You can organize files by Standard Created Last Printed or Alphabetical...

Page 43: ...al its settings Clicking on each machine s icon will only reveal the print history on the selected machine Under the Jobs tab you can modify print or save jobs from this window using the listed settings or with new settings The new settings will be saved as the next print job complete with time stamp and date You ll see which machine it was printed to when it was first printed Initial Print all su...

Page 44: ... cutting order is determined by the order they were created 2 Inside Out All internal vector paths in the file will be process prior to the external vector paths For example if cutting the letter O the inner oval will be cut before the outer oval 3 Optimized The laser will process the vector lines looking for the next closest node for quicker vectoring 40 SECTION 4 THE JOB MANAGER ...

Page 45: ...ngraving or cutting this feature allows you to import those settings into a single process quickly Saving Material Settings 1 To save a process setting first you need to create a folder in the Job Manager under the Material Settings Tab by clicking the Add Subfolder button 2 Name the folder and click the check mark to save it 41 SECTION 4 THE JOB MANAGER ...

Page 46: ...tings you want to save In this example we have clicked on CMYK Blue The Process box should open then click the Export Settings to Material button 4 A box will appear asking you to name the Material Setting and select a folder to save it in Fill out this information and then click Save 42 SECTION 4 THE JOB MANAGER ...

Page 47: ...apply the settings to Then click the Import Material Settings button 2 A box will appear asking you to select the settings you want to load into this process Select your settings and click Import 3 The material settings should load on to that process and be ready to print to the laser 43 SECTION 4 THE JOB MANAGER ...

Page 48: ...llows you to import those settings quickly Saving a Job s Settings 1 To save a job s settings first open the job in the Epilog Dashboard and set up the file as you normally would to print Once your settings are ready to save click the Export Job Settings button at the bottom of the screen 2 A box will appear asking you to name the Job Settings file and select a folder to save it in Fill out this i...

Page 49: ...creen 2 A box will appear asking you to select the settings you want to load into this job Select your settings and click Import 3 The job settings should load into the file ready for printing to the laser Note You may also create Job and Material settings from scratch in their respective Job Manager tabs 45 SECTION 4 THE JOB MANAGER ...

Page 50: ...automatically be opened Discard After Printing When Print is clicked and this option is On the job will be discarded Alerts Tab Choose when the program asks for confirmation when you delete machines folders subfolders or jobs and materials Database Tab Backup Database Save a backup of all files material settings etc Restore Database Reload settings from a previous backup Clear Entire Database Dele...

Page 51: ...our First Project 2 Presetting Your Cut Lines 3 Placing Artwork 4 Dividing Your Job into Processes If you have worked with Epilog s previous print driver you ll see some new ways that the Dashboard lets you interact with your file It may seem different at first but you ll quickly find that you can still use your traditional methods of printing to the laser or use several new ones that make file se...

Page 52: ... make this quick one time change to the settings 1 Go to Tools Options Global Printing Driver Compatibility 2 Select Epilog Engraver from the drop down list 3 Select Printer can match document page sizes and click OK You re ready to go 48 SECTION 5 THE LASER DASHBOARD ...

Page 53: ...ave your file designed print it to the laser Choose the Epilog Engraver as your printer and set the Page to Match Orientation and Size 2 Click on the Color tab and select Output colors as RGB Then click Print 49 SECTION 5 THE LASER DASHBOARD ...

Page 54: ...s in the process list Engrave and Vector These layers automatically separated because we set the line width of cut lines to 003 0 077 mm or thinner You can set the Dashboard to automatically separate vector lines by line thickness color or no action For more information see Presetting Your Cut Lines on page 52 50 SECTION 5 THE LASER DASHBOARD ...

Page 55: ...he process regardless of line width Resolution can be set anywhere between 75 1200 DPI For more information about resolution see Resolution on page 81 Set your Speed and Power Frequency will only be active when the process type is set to Vector For more information see Frequency on page 65 Dithering Vector Sort The dithering drop down will appear for Engrave processes and Vector Sort for Vector pr...

Page 56: ... set to 003 0 077 mm or less 5 Split by Color and Hairlines Automatically split files by both color and line thickness By using the same process to identify your cut lines every time you are setting up a file you will find the process to be quick and easy to have your processes set up whenever you print a new job to the Dashboard Placing Your Artwork With the Laser Dashboard you can move your imag...

Page 57: ...shboard there are several ways to split your project into separate processes Split by Color Color Mapping When you set several items to different colors in your design file you can color map them to their own processes and define their speed and power settings individually There are two ways to separate each color into a different process 1 In your Dashboard settings select Split by Color to autom...

Page 58: ...your file to the laser you can manually select to split your processes by hairline 1 Click on the process and select Split by Hairline 2 All hairline vector lines will be grouped into a separate process 54 SECTION 5 THE LASER DASHBOARD ...

Page 59: ...our artwork you want to separate into its own process and select Selection In this example we have moved the text into a separate process from the other graphics letting us adjust the speed and power settings for just that portion of the engraving 55 SECTION 5 THE LASER DASHBOARD ...

Page 60: ... top most process will engrave first and the job will finish with the leftmost outline being cut The process orderwill always begin with any engraving processes then follow with yourvector processes If you attempt to move a vector process above an engraving process it will automatically go back to its previous position below all the engraving processes This is to ensure that the engraving processe...

Page 61: ...me with the same settings you may merge them into one process Click on the process you want to merge with other processes then click on the icon next to Merge with A list of processes will drop down select a process to merge with by clicking on it 57 SECTION 5 THE LASER DASHBOARD ...

Page 62: ...ltiple processes all at once hold down ctrl before clicking on multiple processes in the list Once you let go of the ctrl button all of the processes should be merged together as one process 58 SECTION 5 THE LASER DASHBOARD ...

Page 63: ...ngraving a quote onto a clothes hanger 1 First place the object you want to engrave on the engraving table then close the top door of the machine 2 Once the live preview of the table appears in the Dashboard click on the Copy Background Image button 3 Open up your preferred graphic software and paste the image into a new document with the table size as the dimensions of your document In this examp...

Page 64: ...e the area we want to place the text with the Freehand tool 5 Once the tracing is finished select the Text tool and move the mouse over the traced line until you see a curved line icon appear Click on the traced line when this icon appears 60 SECTION 5 THE LASER DASHBOARD ...

Page 65: ...ize as needed 7 Once your text is ready select the line you used to curve the text with the Shape tool 8 Then click on the Pick tool and hit Delete on your keyboard to remove the line 9 Select the text go to File Print and change the Print Range to Selection then print to the Epilog Engraver 61 SECTION 5 THE LASER DASHBOARD ...

Page 66: ...cking the folder with the down arrow Select between the Engrave and Vector tabs then choose your material from the list Export your new material settings by clicking the folder with the up arrow Add a settings name and add it to an existing folder For step by step instructions see Material Settings Tab on page 41 2 Settings by Job Your settings for the entire job can be saved by clicking on the fo...

Page 67: ...o in the Job Manager View This will change what portions of the graphic are shown in the preview Choose to show all processes Combined or just your Engrave or Vector processes This is a good way to preview your job and make sure you have set all of the lines you want to cut rather than engrave At the bottom of the page you ll see several additional file settings Name Set your file name Time Displa...

Page 68: ...events the debris from collecting in the freshly engraved spaces Process Type Choose between the three modes of operation Off This setting will tell the laser to ignore any items within this process Engrave Mode Used for engraving or marking materials Typical uses include engraving clipart scanned images photos text and graphic images Vector Mode Selected when you are running only cut lines or for...

Page 69: ... dot patterns will be engraved in raster images that contain grayscale images blends or color The Dashboard offers six different dithering patterns to enhance your engraving projects The default mode is Standard This mode can be used for all images including photographs but some images improve when engraved with other dithering patterns For more information go to Image Dithering on page 87 Offset ...

Page 70: ... Processes tab is an alternative view of the various processes within your file You can see each process with the settings located next to the process without the video view of the table 66 SECTION 5 THE LASER DASHBOARD ...

Page 71: ...econd time If you have a process with more than one cycle process 1 cycles 1 process 2 cycles 2 and set the copies to 2 it will run process 1 once process 2 twice then process 1 once again and process 2 twice more This is useful when using the fiber laser with the system Notes Tab Use the Notes tab to keep notes on running your file This can include suggestions for artwork placement speed and powe...

Page 72: ...that process to Off Additional CorelDRAW Laser Dashboard Features Each program you use will provide different ways to manage these functions CorelDRAW offers a very straight forward way to access each of these features Multiple Passes You can automatically engrave or cut a job multiple times by setting the Number of Copies to the number of passes that you want to make When each pass is finished th...

Page 73: ...e Control Panel with the first file coming across as Job 1 File Name then Job 2 Page 2 Job 3 Page 3 Remember the last page of the job will be the current file when you go to the Fusion s control panel so scroll back to Job 1 File Name to run that one first If you start engraving the jobs and become uncertain about which pages are which you can refer back to your print preview screen and the Page n...

Page 74: ......

Page 75: ... Menu Status Indicator In the bottom left corner of the screen you will see text displaying the current status of the machine Homing This indicates the machine is still powering on None of the functions are available until powering on is completed Idle The machine is inactive and ready to run or resume a job Running A job is in progress when this is displayed Parking The axis is returning to Home ...

Page 76: ... ring around the Go Stop button will change certain colors depending on the Fusion Pro s status White The machine is booting Purple The machine is waiting for the touch screen configuration to load Multi colored The machine is Homing Alternating Light Blue to Green Machine is Idle and ready to run a job Green Machine is actively running or tracing a job Red A drive has failed The number of flashes...

Page 77: ...it s focused properly For more information see Auto Focus vs Manual Focus on page 86 Trace The Trace function is a new feature that will be added soon For now this key will be inactive Job Menu The Job Menu allows you to scroll through the jobs in your laser system You will be able to see a list of jobs that have been sent to the laser The job name displayed is the same as the file name that you p...

Page 78: ... the selected job It ranges from 1 100 DPI This icon indicates the resolution settings on the selected job It ranges from 75 1200 Frequency This icon indicates the frequency settings on the selected job It ranges from 1 100 Delete Button The Delete Button will permanently erase jobs from the Job Menu To delete a job select the job in the Job Menu and then select the Delete Button A dialog will pop...

Page 79: ...tmask The IP Address on this screen should match the IP Address you have assigned your machine in the Job Manager If you have multiple machines each one will need it s own IP Address For more information see 6 Set the Fusion Pro s IP Address on page 18 Park Axis Pressing Park Axis returns the Laser to the Home Position Home Axis Pressing Home Axis repeats the Homing process that happens when the m...

Page 80: ...he table to the correct height Your job should now be in focus Focus Menu To access the Focus Menu press the Focus key which turns green when active The Focus Menu is used for raising or lowering the table level to focus the laser precisely to your engraving or cutting material using the Focus Gauge The height of the table is adjustable by either using the joystick or using the Nudge arrows to fin...

Page 81: ...permanent storage While powered on the machine will store any and all jobs sent until there is no free memory left This feature allows you to save your most run jobs right at the laser without needing to first print them from the computer To save a job press and hold down on a job in the Job Menu until it pulls up the job s settings Select the save button in the upper right corner and the job will...

Page 82: ......

Page 83: ...Laser Plus on page 98 Vector Cutting When you are vector cutting the laser is following a continuous path that follows the outline or profile of an image Vector cutting is normally used to cut completely through materials such as wood acrylic paper etc It can also be used for quick marking of characters and geometric patterns You can vector cut with the laser by setting objects and text to be unfi...

Page 84: ...ave most of the elephant then vector cut any of the thin lines below 003 0 077 mm in CorelDraw or 001 0 025 mm in Adobe Illustrator You can also use the Preview function of the Epilog Job Manager to view only vector lines See Previewing Your Job on page 38 Setting a Vector Cutting Line With the new Job Manager you have many options for setting your Vector Cutting lines The easiest way to do it is ...

Page 85: ...e quality Resolution is expressed in dots per inch DPI and is determined by the number of lines or dots that are engraved for every inch of movement Each horizontal line is referred to as a raster line The higher the resolution setting the finer the detail that can be achieved Keep in mind that engraving resolution is only one factor in determining image quality The quality of the artwork being se...

Page 86: ...at 600 DPI At 300 DPI the lesser overlap is responsible for the jagged edges that are visible when engraving at lower resolutions It s important to remember that while resolution plays a part in producing good image quality the artwork that is sent to be engraved is just as important If the artwork that is sent to the laser is poor quality trying to engrave it at 600 DPI will not improve the quali...

Page 87: ...ation of your file Many users set up their artwork in portrait mode and then rotate the artwork 90 degrees if they are going to print from landscape mode This project setup shows the same job in portrait mode left and landscape mode right The landscape mode will engrave quicker because there is less turnaround time as the laser makes longer passes across the engraving table For example at 100 spee...

Page 88: ...ly become second nature which mode works best for different types of artwork A third consideration for landscape or portrait art setup is material specific Some materials such as wood or plastics that have a grain or brushed look will look better when engraved if the grain of the material runs parallel with the X stroke of the carriage While the orientation of material without a grain pattern is u...

Page 89: ... tab The IRIS Camera Positioning System will provide the most accurate results when the piece being cut or engraved is placed directly underneath the camera s and the table level is focused to the piece If the piece is not in focus on the table the artwork may not be aligned properly in the live preview The camera s may also be calibrated for improved accuracy For more information see Camera Calib...

Page 90: ... cut a crisp clean image your material must be the correct distance from the bottom of the focus lens Setting the distance from the bottom of the focus lens to the top ofyour material is the process of focusing and is accomplished by placing your material on the table and moving the table up or down Auto Focus When you enter Jog mode and have jogged the lens carriage above your material press the ...

Page 91: ... engraving projects The default mode is Standard This mode can be used for all images including photographs Dithering is used only for raster engraving and has no effect on vector cut lines Laser engraved photographs on wood usually require a third party software package to produce a good image that is suitable for the laser Epilog recommends PhotoLaser Plus for this application Users find it an i...

Page 92: ...d This mode is the default mode and will be used for most engraving jobs that include text and clipart at 600 DPI Photograph Modes Floyd Steinberg Produces an almost wave like pattern to an image This works well for some photos containing a great deal of detail Photos with more monotone swatches of color may not be as pleasing as Jarvis or Stucki modes Jarvis Many users find this mode good for eng...

Page 93: ...h only clipart images or photograph modes with all photographs Many users prefer one of the photograph modes for many clipart images and one of the clipart modes for photographs The choice is entirely up to you and will take some experimentation Color Mapping Using Color Mapping When the Split ByColor option is selected the graphic s single process will split into separate processes by each color ...

Page 94: ...ing a specific color process to Engrave means the laser will apply the same engraving settings to all objects set to that color Vector Setting a specific color process to Vector means the laser will apply the same vector settings to all objects set to that color Speed Applies a speed setting for all objects of the same color Power Applies a power setting for all objects of the same color Frequency...

Page 95: ...ire different speeds and powers so this is a perfect job for Color Mapping Note While you could set the vector line you want to just mark to an engraving width it takes much longer to engrave a box than to use vector settings to quickly follow the line and mark it The graphic shows a simple architectural drawing The drawing is set up so that when we use Color Mapping we can assign one speed and po...

Page 96: ...cting the Red color in the summary area then adjusting the speed to 20 and power to 100 Using Color Mapping to Adjust Object Order Another popular use for color mapping is to adjust the order a series of objects engraved or cut In the example below there are three columns of names we are engraving If we engrave the left file in the image below the laser carriage will have to travel all the way acr...

Page 97: ...quires a little more planning than Raster only or Vector only modes 1 Any object that is color mapped will be raster engraved first in the order the colors appear in the Summary section of the tab Any other raster objects that are not color mapped will then be raster engraved using the raster settings found in the General Tab 2 After all of the raster objects have all been engraved the vector obje...

Page 98: ...as been pressed by accident Front Access Door The front access door will open up to 180 degrees and is usually used for easy loading and unloading of palletized materials The door is interlocked and the laser will not fire if the door is open Task Plate Vacuum Hold Down Table Task Plate On the Fusion Pro the task plate is used as the standard engraving table for jobs that do not include vector cut...

Page 99: ...flatten most sheet stock as long as it is not too severely warped bent or too rigid Magnets can be used to hold oddly shaped items in place if needed Exhaust Plenum The Fusion Pro incorporates an exhaust plenum and an integrated Vacuum hold down table Both the exhaust plenum and the hold down table use the airflow from the exhaust fan for two distinct functions 1 Exhaust Plenum The exhaust fan mov...

Page 100: ......

Page 101: ... and engraving table on the other half for increased versatility Slat Table The optional Slat Table is a second option for vector cutting jobs The Slat Table has bars that are adjustable and removable to help avoid any kind of grid marks appearing on the back of the piece you re engraving On the Fusion Pro 48 a divided table allows you to use a slat table on half of the bed and engraving table on ...

Page 102: ...eLab software is a powerful standalone graphics package Support forthe full EngraveLab is available through CadLink Setting Up the PLP Software Epilog has teamed up with CadLink to bring you a special custom version of PhotoLaser Plus designed to only be used with an Epilog Laser system Primary functions such as printing Copy Paste etc are unavailable unless an Epilog print driver has been establi...

Page 103: ...PhotoLaser Plus Photograph Transformation When you first open PLP your first step is to set your plate size which is your page size You can set this to match the material you are engraving or the size of the engraving table Import your photo to be transformed Select File then Import If the file looks bitmapped after the import select View then Show Reduced Bitmaps to see the higher resolution vers...

Page 104: ...photo Select Image then Image Size from the menu Type in the resolution and select Apply Make sure you have selected Apply or the new resolution will not be saved with the image 12 Transform the Photo With the photo resized and the resolution set we are ready to transform the photograph From the menu select Transform then Photo Laser Choose Interactive to select the material you want to use Choosi...

Page 105: ... features of Corel or other design software along with the photo transformation capabilities of PLP 1 Start by setting up your file in CorelDRAW We ve designed an 8 x 10 plaque added the text and placed a box as a placeholder for the photograph 2 Crop the Photograph Select the photograph then select from the menu bar Effects PowerClip and Place Inside Container Click the outline of the photo place...

Page 106: ... Import and select your transformed file Place the photo in the designated space without resizing the image 11 Print the file from CorelDRAW as you normally would using the same resolution that you selected in step 5 Creating Badges with Variable Names Another feature of PhotoLaser Plus is it s flexible badge layout function We ll show you how to setup multiple items such as badges on one page wit...

Page 107: ...dges you want to create Score Lines Optional setting that you can use to vector cut badges if you re using material like plastic Use Plate It s important that this be checked so that the graphic corresponds with the actual plate size you re using Custom Size The custom plate size corresponds to the size of your material you re using to engrave the badges We re going to laser a 12 x 12 piece of pla...

Page 108: ...left blank intentionally because we had ten badges and only nine names You re ready to print your badges to the laser 1 2 3 4 5 6 7 Troubleshooting Badge Layout Problem The logo doesn t appear on the badges Solution In step 6 you didn t select everything on the badges before clicking the Badge tool Problem The word Name is repeated on all of the badges Solution In the badge setup parameters you di...

Page 109: ... with lasers please read the full FIRE WARNING on page 1 of the manual Choosing the Right Type of Acrylic There are two types of acrylics and each is suitable for different applications Cast acrylic sheets and objects are made from a liquid acrylic that is poured into molds that can be set into various shapes and sizes This is the type of acrylic used for the awards you see on the market Cast acry...

Page 110: ...tively slow speed and high power This combination allows the laser beam to melt the edges of the acrylic and produce an almost flame polished edge Acrylics generally require only a single pass to cut but thicker acrylics may need two passes Some users find that spritzing the protective adhesive paper with water produces a better edge when laser cut Setting the focus distance at the center of your ...

Page 111: ... ask before lasering painted brass if you don t know the substrate If you are unsure if your piece is brass coated steel or genuine brass you can test the material with a magnet A magnet will stick readily to brass coated steel but since solid brass is not magnetic a magnet will not adhere to solid brass Painted Brass Engraving Techniques Engrave painted brass with a high speed and low power setti...

Page 112: ...r will not damage the liquid inside the bottle and as long as you are not completely engraving away a large section of bottle you have very little chance of breaking the bottle Glass Engraving Techniques To produce a smooth frosted finish here are some tips 300 DPI Using a lower resolution around 300 DPI produces a better result on glass as you separate the dots you are engraving 80 Grayscale Chan...

Page 113: ...e packages Simply duplicate the male die invert the black and white colors and then mirror the image The male image should be produced without the use of outlines around the text or graphics Add a 007 to 010 inch 0 178 mm to 0 254 mm outline to the text and graphics of the female die This outline creates a large enough void between the male and female dies to emboss paper without tearing Apply a 0...

Page 114: ... focus lower the table by about 1 16 1 5 mm of an inch This technique enlarges the focus beam a little bit and provides more beam overlap on each pass of the laser The greater overlap produces a smoother engraved surface on the plastic and eliminates the grooves that you sometimes see when engraving plastic With some plastics it is best to engrave using two passes The first pass cuts through the c...

Page 115: ...ave grains that work well with lasers Grain can very greatly in density Cherry Alder Walnut Maple all have fairly little veins of grain in them while Oak has medium to large veins in it For example If a large box was engraved into a piece of Cherry and a piece of Oak the box engraved into the Cherry would have a very uniform appearance the area engraved or the background would be smooth with littl...

Page 116: ... clipart and ungroup it and change the colors so that they range from a dark color like red to a light color like yellow then engrave it This will create a shading effect that is almost 3 D in its appearance Wood Vector Cutting Techniques Epilog Laser Systems are ideal for cutting through solid wood material The thickness of the wood that you can cut varies with the wattage of the laser and the ha...

Page 117: ...red and it is impossible to get the shredded fibers out of the engraved recesses of the wood Most wood products that are designed for laser engraving will have a polyurethane coating so that they are very easy to clean Wood Color Filling Techniques Color filling engraved areas of wood adds either greater contrast or a splash of color to your wood presentation Normally color filling is not required...

Page 118: ......

Page 119: ...eel cord y axis Resolution Fully flexible and user controlled from 75 to 1200 DPI Speed and Power Control engraving depth Computer controlled in 001 increments up to 100 Color mapping feature links Speed Power Frequency Raster Vector mode Air Assist On Off settings to any RGB color Print Interface 10Base T Ethernet USB or Wireless connection Compatible with Windows XP Vista 7 8 10 Size W x D x H 5...

Page 120: ...tware Suite Operating system should have all system updates before installation of the Epilog Software Suite RAM Random Access Memory 4 GB RAM is the minimum that is required however we recommend 8GB or more if possible RAM is like short term memory It s fast and readily available for the computer to access and makes time consuming tasks go much quicker if you have lots of it Having more than 4 GB...

Page 121: ...problems before they can damage the expensive equipment computer and laser they are protecting About The CO2 Laser Source Your Epilog CO2 laser system uses the latest in laser technology to provide a powerful tool that is simple and safe to setup and operate The Epilog Laser can mark engrave and cut a variety of non metallic materials The CO2 laser beam itself is invisible and operates at a wavele...

Page 122: ... when the equipment is operated in a commercial environment This equipment generates uses and can radiate radio frequency energy and if not installed and used in accordance with the instruction manual may cause harmful interference to radio communications Operation of this equipment in a residential area is likely to cause harmful interference in which case the user will be required to correct the...

Page 123: ...orado USA during the hours of 6 a m and 6 p m Mountain Time Technical Support Direct Line 1 303 215 9171 Email tech epiloglaser com Technical Support Online support epiloglaser com What to do prior to contacting Epilog Technical Support 1 Have the machine serial number available 2 Have time to work on machine Many issues will require troubleshooting 3 Clean your machine especially the optics this ...

Page 124: ... correct Speed Power and Frequency settings for the type of material that you are engraving The Exhaust Is Not Pulling Enough Air 1 Move the blower closer to the machine The closer the two are the better exhaust you will receive 2 Clean your exhaust system on a regular basis including the engraver and blower Use a bottle brush and a vacuum on the areas where the exhaust buildup accumulates The Eng...

Page 125: ...d and increase the lifetime of your laser system How to Shorten Your Engraving Cutting Time Lower the Resolution How important is the highest resolution image Processing jobs at 400 DPI vs 600 DPI can reduce cycle times by up to 30 and processing at 300 DPI could mean half the cycle time Reduce White Space Orientate the parts to minimize engraving dead space area where head travels but has nothing...

Page 126: ...al media channels Facebook page www facebook com epiloglaser Fan page www facebook com groups 75753849193 Youtube channel www youtube com epiloglaser Twitter www twitter com EpilogLaser Instagram www instagram com epiloglaser Pinterest www pinterest com epiloglaser LinkedIn www linkedin com company epilog 122 SECTION 12 TECHNICAL SUPPORT ...

Page 127: ...in OR 800 248 2352 www smoke wood com CORIAN AND FOUNTAINHEAD Johnson Plastics Plus Minneapolis MN 800 869 7800 www johnsonplastics com CORK Jelinek Cork Group Savannah GA 800 959 0995 www corkstore com CUSTOM ARTWORK AND GRAPHICS Cascade Metal Designs Burlington WA 360 420 5962 www freedxf com Digital Art Solutions Tempe AZ 85281 800 959 7627 www digitalartsolutions com Gantry Company 3D Graphics...

Page 128: ...00 843 8853 www jdsindustries com NapTags Grand Rapids MI 800 451 3330 www NapTags com R S Owens Company Chicago IL 800 282 6200 www rsowens com Victory Chicago IL 800 327 5578 www buyvictory com METAL MARKING COMPOUNDS CerMark Sales Multiple Shipping Locations 866 241 9881 cermarksales com EnduraMark Austin TX 512 236 6424 enduramark com Ferro 500 minimum order Mayfield Heights OH 800 245 4951 ww...

Page 129: ...WI 800 776 7194 www innotape com JDS Sioux Falls SD 800 843 8853 www jdsindustries com Polyonics Westmoreland NH 603 352 1415 www polyonics com TASKBOARD Taskboard Miami FL 561 983 6289 www taskboard com WOOD PLAQUES AND SPECIALTY PRODUCTS Colorado Heirloom Loveland CO 970 667 4222 www coloradoheirloom com Infinity Woods Clarion PA 814 226 4361 www infinitywoods com JDS Sioux Falls SD 800 843 8853...

Page 130: ......

Page 131: ...or insufficient ventilation acts of God or other situations out of the control of Epilog failure to operate in accordance with instructions provided in the Owner s Manuals for the Epilog model 16000 including specific safety and operational warnings contained therein cosmetic damage sustained in use and damage caused by unauthorized modifications ofanyequipment Allwarrantiesto original purchasers ...

Page 132: ......

Page 133: ...100s 15p 100s 10p 100s 5p Anodized Aluminum Photos Clipart 400 DPI 100s 45p 100s 40p 100s 35p 100s 30p Photos Clipart 500 DPI 100s 40p 100s 35p 100s 30p 100s 25p Text 500 DPI 100s 50p 100s 45p 100s 40p 100s 35p We find when engraving anodized aluminum text appears best at 600 DPI but photos and clipart can be engraved with great detail down to 400 DPI Cork Engraving 300 DPI 100s 40p 100s 35p 100s ...

Page 134: ... Engraving 500 DPI 50s 100p 60s 100p 70s 100p 100s 100p Clipart Text Engraving 300 DPI 40s 100p 50s 100p 60s 100p 90s 100p Clipart Text Engraving 500 DPI 45s 100p 55s 100p 65s 100p 85s 100p Deep Engraving 500 DPI 20s 100p 25s 100p 30s 100p 60s 100p Thin Veneer Cutting 10 f 40s 100p 40s 90p 50s 80p 50s 60p Cutting 1 8 3 mm 10 f 6s 100p 8s 100p 12s 100p 20s 100p Cutting 1 4 6 mm 10 f 3s 100p 4s 100p...

Page 135: ...similar settings When you are working with a material you aren t familiar with think about a similar material and what settings you would use with that product Most anodized aluminums will react well with similar settings as will most plastics When in doubt start low Remember you can always re run your job as long as you don t move it in the machine Let s say you re running a photograph in a one o...

Page 136: ......

Page 137: ...ize in The size of the bed in the machine in inches Format is as follows WIDTH HEIGHT Requires Home Axis to take effect Disable Table Homing Setting to disable homing the table when the machine boots For optimal operation leave this at a value of 0 A value of 1 will disable table homing Will take effect after reboot Rotary Encoder cnts in The number of encoder counts per inch of travel for the rot...

Page 138: ...en the machine is idle Requires Park Axis to take effect Plunger Offset cnts The number of table encoder counts from the laser zero focus position to the auto focus plunger Rotary Offset in The offset of the rotary origin relative to the X and Y limit switches Rotary Table Height in The distance in inches to clear the rotary device Scale mm in A scale factor to adjust the scale of the X and Y axis...

Page 139: ...The distance in table encoder counts from the top crash switch to the laser focus position RHS Y Skew cnts The number of encoder counts to skew the right hand side of the Y axis after homing Requires Home Axis to take effect Air Assist Delay s The number of seconds to delay turning ON and turning OFF the air assist before and after a job finished Format is as follows ON OFF 135 APPENDIX C SYSTEM C...

Page 140: ...n pattern mentioned in the prompt will be used by the single camera at the laser head You can optionally skip this step by clicking Skip You must use an 8 x 5 inch or larger piece of anodized aluminum Idle Settings Calibrate Joystick Alignment Focus Commands Calibrate Cameras Diagnostics Setup Idle Ok This calibration routine requires you to engrave a calibration pattern onto black anodized alumin...

Page 141: ...run the calibration job More instructions will automatically appear once the job is running Cancel Idle The job is currently running Once complete the calibration will continue automatically and the carriage will begin moving Cancel 7 Once the job has finished engraving the camera at the laser head will take pictures of the engraving to calibrate itself This process takes several minutes Idle Plea...

Page 142: ... place the calibration mat on the table Idle Ok Carriage calibration was successful Reprojection error of 0 525037 Cancel 9 The calibration will now calibrate the overhead camera s The Fusion Pro 32 has 1 overhead camera and the Fusion Pro 48 has 2 overhead cameras Click Ok to continue Idle Ok Place the chessboard calibration target in the machine bed making sure the circle reference mark is in th...

Page 143: ...has successfully finished a dialog will appear The rms error will be listed and is used to determine the quality of the calibration The calibration will fail if the rms error is above 2 0 The lower the value the better A value below 0 6 is desired Click Ok to finish calibration and use the supplied results Idle Ok Overhead Calibration Succesful Camera ID 0D0EC405 rms error 0 447014 Camera ID 2D12C...

Page 144: ......

Page 145: ... Coated Steel 107 Painted 107 113 Solid 107 C Camera Calibration 136 Camera System See IRIS Camera Positioning System Cermark 130 Certification Identification Plate 4 Cherry 111 Class A 118 CO2 Laser Source 117 Color Fill 113 Material Suppliers 123 Color Mapping Combined Mode 93 Functions 90 Non Mapped Colors 93 Object Order 92 Speed and Power 91 Computer Recommendation 116 Control Panel 71 Delete...

Page 146: ...phics Card 116 Grayscale 108 112 Group Ungroup 53 H Halotron Extinguisher See Fire Extinguisher Hard Drive 117 Home Axis 75 Home Table 75 Homing 71 I Idle 71 IEC 60825 1 4 Install the Epilog Job Manager 25 Interlock Safety 4 IP Address 18 IRIS Camera Positioning System 85 J Jarvis 108 Job Folders 35 Job Manager 33 Job Manager Print History 39 Job Menu 73 Job Storage 77 Jog function 73 Jogging 71 J...

Page 147: ...od 111 Pointer Button 73 Polish 108 Polyvinyl Chloride See PVC Portrait vs Landscape 83 Power 112 115 Connection 17 Laser Dashboard 64 Power Connection 17 Power Key 87 Power Label 5 Presetting Your Cut Lines 52 Previewing Your Job 38 Previous Settings 52 Print Driver 18 Print History 39 Print Interface 115 Print Page Orientation 34 Print Range 68 Processes Tab 66 Process Name 51 Processor Speed 11...

Page 148: ...Laser 17 V Vacuum Hold Down Table 95 97 Vector Cutting 79 Vector Cutting Table Acrylic 106 Plastics 110 Wood 112 Vector Line Creation 80 Vector Line Width 81 Vector Sorting Inside Out 40 Optimized 40 Ventilation 115 Vinyl 10 W Walnut 111 Warning Labels 4 Warranty 127 Wattages 115 Wavelength CO2 Laser Source 117 Weight 115 Windows 7 Ethernet Installation 23 Wood 111 113 130 Bare Wood 111 Cleaning 1...

Reviews: