Pearl-2 User Guide
Configure DHCP
Apply
when you're done.
The default gateway and DNS Server fields cannot be left blank. If you do not have a default
gateway or a DNS server for your network, enter the static IP address in those fields.
Configure DHCP
If you need to switch Pearl-2 from using static IP address allocation to using dynamic allocation with DHCP,
you can do this three different ways:
l
Restore factory settings, which clear all your custom settings. See
.
l
Load a configuration preset file that uses DHCP networking. See
Apply a configuration preset using the
Apply a configuration preset using the touch screen
.
l
Change the network settings manually using either the touch screen or the Admin panel.
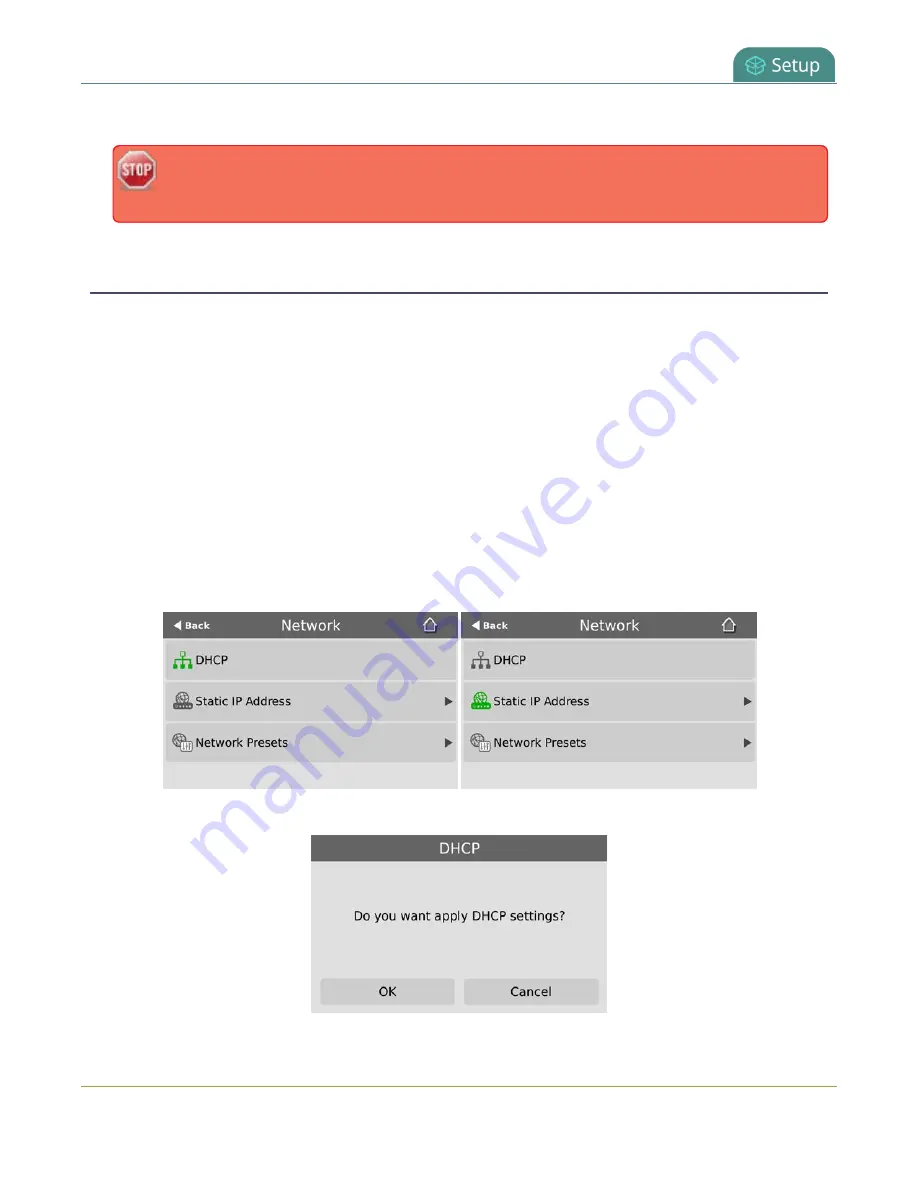
To manually select DHCP as the network type using the touch screen:
1. Tap the
gear
icon to open the System settings screen. If the control icons aren't showing, tap anywhere
on the touch screen.
2. Tap
Network
. The Network settings page appears. The currently enabled network type (DHCP or
static) is highlighted green.
3. Tap
DHCP
, and then tap
OK
to confirm.
104
Summary of Contents for Pearl-2 Rackmount
Page 139: ...Pearl 2 User Guide Mute audio 4 Click Apply 126 ...
Page 151: ...Pearl 2 User Guide Mirror the video output port display 138 ...
Page 156: ...Pearl 2 User Guide 4K feature add on 143 ...
Page 180: ...Pearl 2 User Guide Delete a configuration preset 167 ...
Page 440: ...Pearl 2 User Guide Register Pearl 2 427 ...
Page 488: ...l Pro audio inputs l 512 GB data storage SSD l Touchscreen ...
Page 497: ... and 2019 Epiphan Systems Inc ...


