Pearl-2 User Guide
Configure date and time
Configure date and time
Pearl-2 uses the current date and time in naming recorded files and when synchronizing and timestamping
inputs from multiple sources (i.e. when synchronizing an audio and a video source). The Admin panel lets you
specify date and time settings to ensure they are correctly configured for your time zone and your network.
Topics include:
l
View the current date and time settings
l
l
Manually set the date, time, and zone
View the current date and time settings
There are two ways to view the current date and time settings of Pearl-2:
l
From the Date and Time page using the Admin panel.
l
From the Settings menu using the touch screen on Pearl-2.
You can manually set the date and time, change the time zone, and set up for a local Network Time Protocol
(NTP) server from the Date and Time page using the Admin panel.
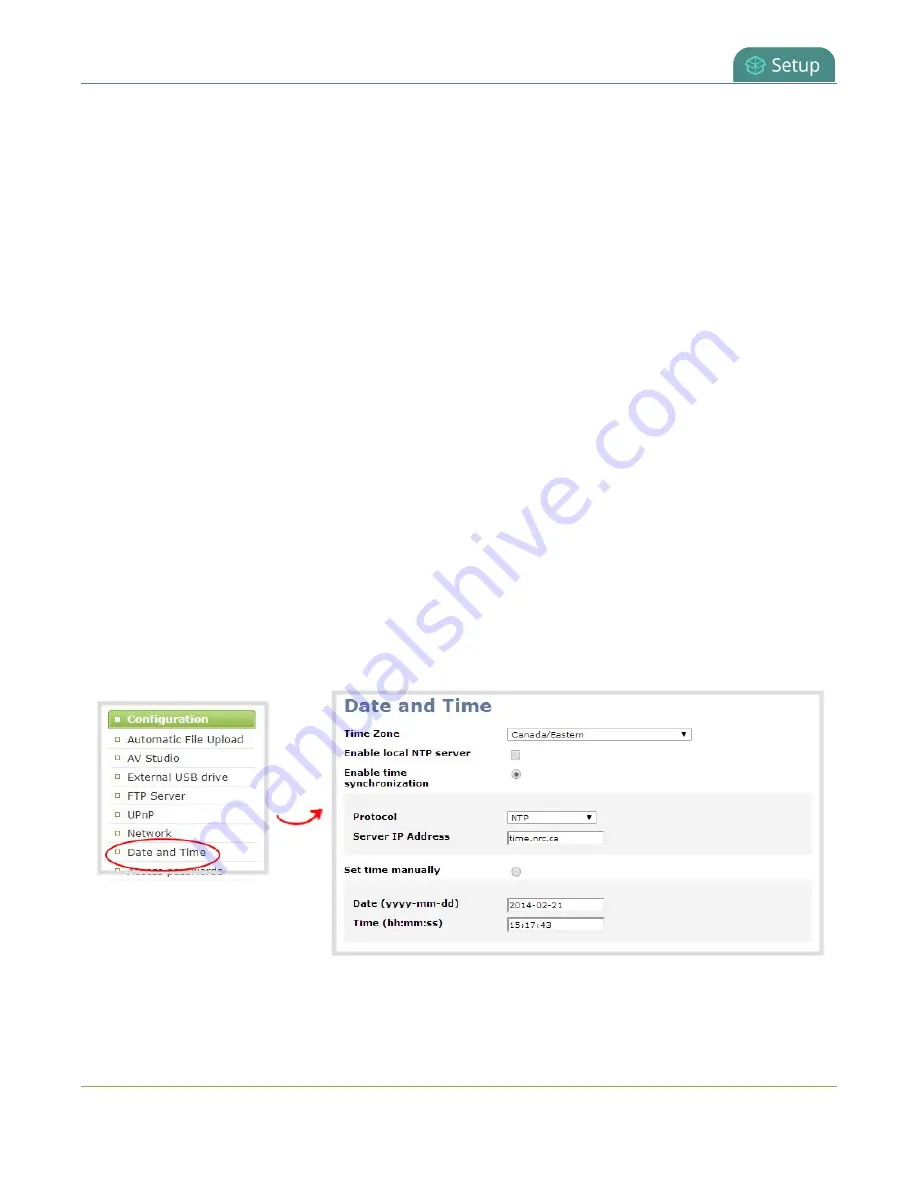
To view the current Date and Time configuration page using the Admin panel:
1. Login to the Admin panel as
admin
2. From the Configuration menu, select
Date and Time
. The Date and Time configuration page opens.
116
Summary of Contents for Pearl-2 Rackmount
Page 139: ...Pearl 2 User Guide Mute audio 4 Click Apply 126 ...
Page 151: ...Pearl 2 User Guide Mirror the video output port display 138 ...
Page 156: ...Pearl 2 User Guide 4K feature add on 143 ...
Page 180: ...Pearl 2 User Guide Delete a configuration preset 167 ...
Page 440: ...Pearl 2 User Guide Register Pearl 2 427 ...
Page 488: ...l Pro audio inputs l 512 GB data storage SSD l Touchscreen ...
Page 497: ... and 2019 Epiphan Systems Inc ...


