Pg. 11
©2014 Episode™
Pg. 10
©2014 Episode™
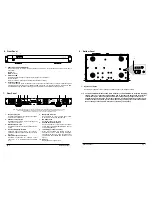
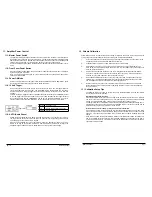
11.1. Master Power Switch
The master power toggle switch at the back of the unit controls the main power. If this is turned off,
the amplifier will not respond to any control method. This switch should be left in the ON position
after installation and setup is finished unless the amplifier will not be used for an extended period
of time or is being serviced. For everyday use, decide on one of the options below.
Use the Power Mode switch (below the Master Power switch) to select the desired power control
mode.
11.2. Front Panel Power Button
When the amplifier is powered On, the power button will illuminate solid blue. When it is in Stand-
by, the power button will be red.
Note: The front panel Power button only controls the amplifier when the power mode selector
switch is set to Power ON.
11.3. Power ON Mode
For manual control of the amplifier power state, set the Power Mode switch to POWER On. Press
the front panel Power button to toggle between Stand-by and On.
11.4. 12 Volt Trigger
Some audio sources and custom remote control systems can use a 12V DC trigger output to
control the power state of an amplifier. The ECA-70AMP-2D is equipped with 12V DC trigger
inputs and outputs to allow for trigger control and daisy chaining for control of more than one
amplifier.
To utilize the 12V DC trigger function, set the Power Mode switch to the right to TRIGGER (closest
to the 12V trigger connections) and attach a mono mini cable between the 12V trigger output of
the controlling device and the TRIGGER DC 12V IN port on the ECA-70AMP-2D. Connect to
other devices by connecting them to the OUT port on the amplifier with a mono-mini cable.
11.5. AUTO (Audio Sense)
Setting the Power Mode switch to AUTO will allow the amplifier to monitor the level of signal
coming in from the source connection and power on when the level is high enough to be process
as an audio signal. No further setup is needed.
When a source attached to any input generates a signal, the amplifier will power on, and will
remain on as long as the signal is maintained. After 20 minutes of inactivity on all inputs, the
amplifier will power down and return to Stand-by mode until a signal is received again.
11. Amplifier Power Control
Cable
3.5mm Mono-mini
Tip
4.5-15v DC (constant during use)
Sleeve Ground/Common
12. Volume Calibration
Follow these directions to calibrate the LEVEL setting in relation to the source input volume and inline
volume control level (if applicable) for the best sounding and most reliable installation.
1.
Connect all speaker and audio source wiring and configure the amplifier. Connect power to the
amplifier but leave it turned Off at the Master Power Switch.
2.
(If applicable) Set all volume controls to their maximum volume setting.
3.
Set the LEVEL for each zone in use to baseline by turning the knob counterclockwise to its
minimum limit, and then turning it back up about ¼ turn. Set the LEVEL for any unused zones to
minimum (counterclockwise).
4.
Power on the amplifier and the source to be used. Play audio typical of what will be played
in the zone. Set the volume of the source to around half of its volume. If the audio becomes
distorted, turn the volume back to a point where audio is clear.
5.
Set the LEVEL adjustment for the zone to a level where the volume is slightly above normal
listening level. If the audio becomes distorted, experiment with changes to the source volume
and the LEVEL adjustment until audio is clear and slightly too loud.
6.
Now the volume level of each zone is matched to the volume of the source input. Adjust the
level of audio back to a comfortable level by adjusting the inline volume control (if equipped) or
the source volume.
12.1. Calibration Setup Tips
The following common issues may occur with a poorly calibrated system. Use the tips listed to
identify and correct these problems:
Distorted Audio at Normal Volume
If the LEVEL adjustment for a zone is set too high to compensate for low source volume, distortion
can occur in the form of background noise or poor audio quality. This will be heard as a steady
hissing or humming behind music, clipping of signal, or distortion of highs and lows.
To eliminate this issue, re-adjust the volume levels by starting back at baseline settings and re-
adjusting the final volume so that a maximum comfortable volume level can be reached with no
distortion while using the source volume or inline control.
Inline Volume Controls “Thump” or Play Source Audio in the Walls
If inline volume controls are thumping in the wall, then the amplifier and the source volume levels
are set too high and the volume controls are being used to attenuate too much power from the
speakers. This causes the entire system to work harder, and can reduce reliability and sound
quality.
Inline volume controls should be calibrated in relation to source/amplifier volume so that they are
one or two adjustment levels away from their maximum setting when audio heard in the room is
at the normal listening level. This will leave one to three settings above normal level for use if a
little extra volume is needed.

