background image

BEP_6.1_241111 


17 


Fig. 3.13 

3.2.2. Adobe Reader 10 Installation 

You should  have installed pdf file viewer like Adobe Reader on your PC. This program let 
you read and learn digital versions of “User  Manual”  and  “Quick Start Guide”.  EPresenter 
Installation  Process  can  ask  you  to  install  Adobe  Reader  10.  If  this  software  is  already 
installed just skip the next step. 

3.2.3. K-Lite Codec Pack Installation 

K-Lite  Codec  Pack  let  your  video  player  play  files  of  various  media  formats,  video  and 
audio. If this software is already installed just skip the next step. 

3.2.4. Microsoft .NET Framework 3.5 Installation 

EPresenter software requires Microsoft. NET Framework 3.5 to be installed. You can install 
it during ePresenter software installation. 
 

3.2.4.1. Component selection 

You can select the installation of Microsoft .NET 3.5 on step 5. If the 

“Custom installation” 

was  selected  you  should  tick  a  proper  checkbox  manually.  In  other  case  all  required 
components are installed automatically. 
It could take some time to install Microsoft .NET Framework. So you should wait for the end 
of process. If this software was installed on your PC before the installation wouldn’t be run 
again. 
 

3.2.4.2. Microsoft. NET Framework 3.5 setup under Microsoft Windows 7 

Microsoft  Windows  7  includes  this  component  by  default  so  you  just  need  to  turn  it  on. 
Please follow the instruction below.


Open  Utility 

‘Programs  and  Features’  window  (Fig.  3.14).  Then  open  Start  menu  window 

and select an option "Run". You cal also use a hot keys combination 

«Win» + «R». «Win» is 

a  key  with  the  Windows  logo  be

tween  the  keys  «Ctrl»  and  «Alt»  on  the  keyboard.  A  text 

input field  will appear.  Please print  a string 

«appwiz.cpl» in it and then click “OK” or press 

“Enter”. 

Summary of Contents for EP03

Page 1: ...est Technologies in Education LLC INTE and can be reproduced no fully neither partially replicated in any way or distributed without owner permission INTE The content of this document may be changed without previous notification Permitted to use in educational institutions of Ukraine Certificate 591 dated September 15 2010 LLC Institute of the Newest Technologies in Education Ukraine 04136 Kyiv ul...

Page 2: ...ations 4 1 6 Construction and operating 5 1 7 Packaging 8 1 8 Package contents 8 2 Using Interactive Whiteboard ePresenter 9 2 1 Terms of use 9 2 2 Precautions for operation 9 2 3 Transportation and Storage 9 2 4 Product Maintenance 10 3 User Guide 10 3 1 Mounting IWB 10 3 2 Software Installation 12 3 3 Interactive Whiteboard Connection 18 3 4 ePresenter Software Customization 25 3 5 Language Sett...

Page 3: ...able in two different modifications ePresenter EP03 wired model and ePresenter EP03M wireless model The difference between these two models is a way to connect interactive block to managing PC EPresenter EP03 is connected to computer s USB port directly via USB cable ePresenter EP03M uses Bluetooth wireless adapter 1 3 The interactive system ePresenter content Interactive system with interactive w...

Page 4: ...940 nm Control elements body button touch sensitive writing element Power supply one battery 1 5W type ААА Dimensions length 140 mm diameter 20 mm Weight with battery without battery 27 15 g Infrared pointer not supplied optional Positioning technology optical infrared Outgoing wavelength 940 nm Control elements body button Power supply one battery 1 5W dimension type ААА Dimensions length 760 mm ...

Page 5: ...uld see all projection surface for IWB may operate correctly for proper work the IWB optical sensor should see the projection surface completely Interactive whiteboard has to be calibrated to provide it The optical sensor detector window has always view all the projection surface during operation It s not permitted to place some objects between optical sensor and projection surface which could cov...

Page 6: ...ck is powered or it isn t An indicator receives signals from other devices and confirms this receiving by lightning A short light means that any infrared signal was received A long light means a signal was generated by Projector Remote Control Also it indicates than interactive block is ready to receive and to keep a control signal from Remote Control 8 The infrared receiver window Fig 1 5 which i...

Page 7: ...e battery please pull gently the front edge You should watch the correct polarity installing batteries Special marks on stylus body show polarity Use correct type of batteries AAA only Fig 1 9 Fig 1 10 It s Important An optical stylus won t operate if batteries were installed incorrectly with wrong polarity To test the stylus operating please do some operations listed below take a digital photo ca...

Page 8: ... below Table and Fig 1 12 It can be different and depends on interactive block mofidication Name Position on Fig 1 12 Number in delivery set ePresenter EP03 ePresenter EP03M 1 Interactive block 1 1 1 2 Power block 6В 300мА 2 1 3 Quick Start Guide 3 1 1 4 Installation disk containing drivers customized software and digital User Guide 4 1 1 5 Ceiling mounting kit for interactive block 5 1 1 6 USB ca...

Page 9: ...n to leave a product without user s watch for a long time to touch cables or contacts if the power is turned on to connect device to damaged electrical wall outlets to look to projector s length when it s turned on You may damage your eyes because of the effect of bright light 2 2 3 You should follow the SAFETY RULES when use this product do not leave this product without attendance until it in op...

Page 10: ...block should be installed on any flat surface You can regulate angle of the device changing U shaped bracket s angle Fig 3 1 So all projection surface would be covered by optical sensor Fig 3 1 ePresenter EP03M can be powered by external power block or by four batteries of type AA Interactive block powered by batteries is completely wireless ePresenter EP03 is powered only by PC through connection...

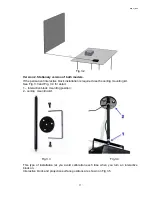
Page 11: ... required use the ceiling mounting kit See Fig 3 3 and Fig 3 4 for detail 1 interactive block mounting position 2 ceiling mounting kit Fig 3 3 Fig 3 4 This type of installation let you avoid calibration each time when you turn an interactive block on Interactive block and projection surface positions are shown on Fig 3 5 ...

Page 12: ...standard boards in a table below Dimension type distance a м distance b м efficiency 1 2х2 0 м 2 15 0 83 50 70 1 2х1 8 м 2 10 0 83 50 70 Efficiency is the ratio between active screen area covered by interactive block camera and the total area which infrared receiver can view 3 2 Software Installation Please insert an installation disc into CD DVD drive of control PC or notebook Installation proces...

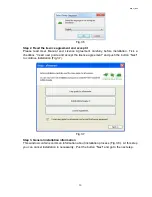
Page 13: ...n Tick a checkbox I read user guide and accept the license agreement and push the button Next to continue installation Fig 3 7 Fig 3 7 Step 3 General installation information This window contains common information about installation process Fig 3 8 At this step you can cancel installation in necessarity Pust the button Next and go to the next step ...

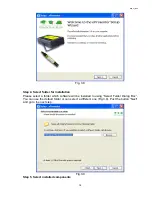
Page 14: ...tallation Please select a folder which software will be installed to using Select Folder Dialog Box You can use the default folder or can select a different one Fig 3 9 Pust the button Next and go to the next step Fig 3 9 Step 5 Select installed components ...

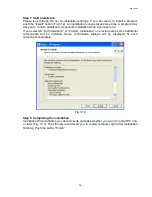
Page 15: ...senter Student or Custom Installation You can choose installed components in block of components Fig 3 10 Pust the button Next and go to the next step Fig 3 10 Step 6 Select Start Menu Folder You can select destination for program s shortcut or accept proposed by default Fig 3 11 Click Next to continue Fig 3 11 ...

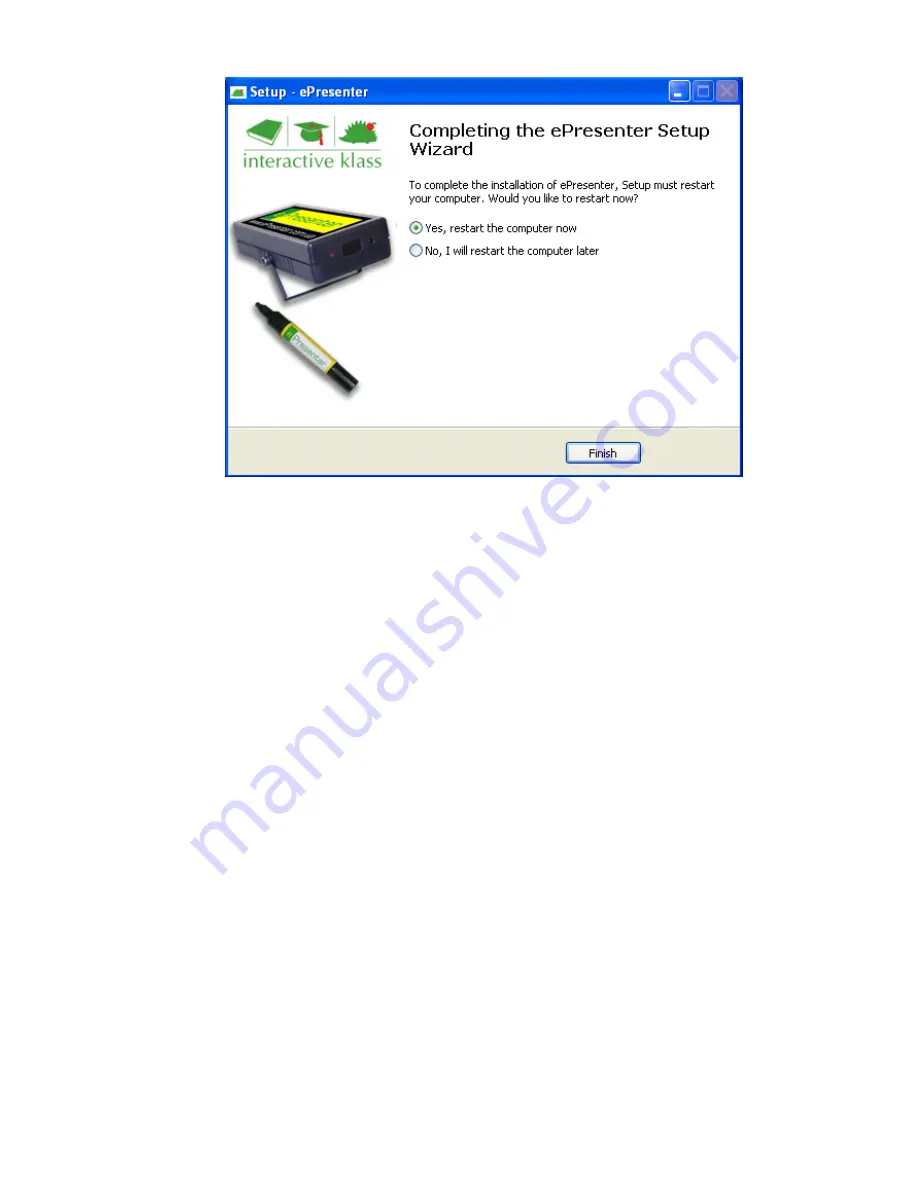
Page 16: ...tion while a process runs If you selected Full Installation or Custom Installation on previous step some additional components will be installed Some confirmation dialogs will be displayed fir each component separately Fig 3 12 Step 8 Completing the installation Installation Wizard informs you about results and asks whether you want to restart PC now or later Fig 3 13 We strongly recommend you to ...

Page 17: ...onent selection You can select the installation of Microsoft NET 3 5 on step 5 If the Custom installation was selected you should tick a proper checkbox manually In other case all required components are installed automatically It could take some time to install Microsoft NET Framework So you should wait for the end of process If this software was installed on your PC before the installation would...

Page 18: ...16 and push the button OK Fig 3 15 Fig 3 16 3 3 Interactive Whiteboard Connection Projector should be placed near the control PC on the table surface or to be mounted on a ceiling Projector s lens has to be directed to an active projection surface Connect projector and computer via the D sub port or any other currect way It s Important We recommend you to set Clone mode in video adapter settings w...

Page 19: ... PC to have USB adapter Bluetooth Fig 3 17 Bluetooth wireless technology supports a short distance connection only It requires a distance between Bluetooth devices is less than 10 meters If consumer has any other types of Bluetooth including built in he can use it instead of supplied Fig 3 17 3 3 2 Software Getting Start Please turn your control PC on wait for uploading process is completed and de...

Page 20: ... 1 Synchronization ePresenter EP03 After you connect interactive block and control PC via USB cable operating system will detect a new device Fig 3 21 and will install a proper driver automatically In case of success of device installation a system message will be displayed Fig 3 22 Fig 3 21 Fig 3 22 Push the button OK in confirmation box Fig 3 23 for device connection ...

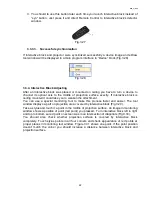
Page 21: ... use projector s remote control for Bluetooth synchronization you should program Interactive block once while the first customization runs We recomend you to program a rarely or non used button for current projector s modification To program a button please do the follow 1 Press the button prg on the ePresenter body back Fig 1 4 Red LED placed on the front panel will light in three seconds 2 Direc...

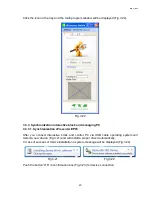
Page 22: ...nted it could take you to weaken the attachment You can use a special monitoring tool to make this process faster and easier The tool window displays a part on projection area covered by interactive block Fig 3 29 Take a stylus and touch it a point in the middle of projection surface An image in monitoring window shows a position of point red point you pressed Turn interactive block left to right ...

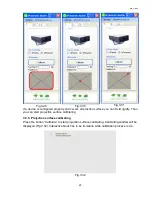
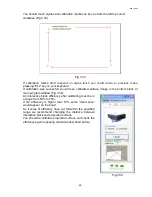
Page 23: ...rface you can fix id rigidly Then you can start projection surface calibrating 3 3 5 Projection surface calibrating Press the button Calibrate to start projection surface calibrating Calibrating window will be displayed Fig 3 32 Interactive block has to be immobile while calibration process is run Fig 3 32 ...

Page 24: ...ed surface image in the bottom block of main program window Fig 3 34 An interactive block efficiency after calibrating must be in a range from 50 to 70 If the efficiency is higher than 70 some dead zone would appear on the boad So if value of efficiency does not fall within the specified range we recommend changing the distance between interactive block and projection surface You should re calibra...

Page 25: ...et you manage program interface behavior If you want the main program window being always expanded tick off checkboxes Start application minimized and Minimize on Tray Area in block Interface settings A Right Click delay setting defines a time of the right mouse buttons firing If you touch stylus a projection surface and hold it more than 1 second right button click menu will be activate The defau...

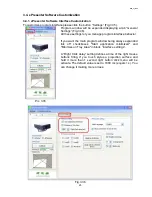
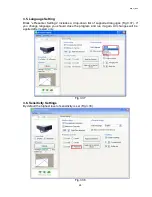
Page 26: ...udes a drop down list of supported languges Fig 3 37 If you change language you should close the program and run it again All changes will be applied after restart only Fig 3 37 3 6 Sensitivity Settings By default the highest level of sensitivity is set Fig 3 38 Fig 3 38 ...

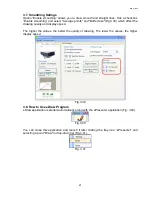
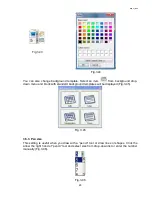
Page 27: ...ing quality and display speed The higher the values the better the quality of drawing The lower the values the higher display speed Fig 3 39 3 8 How to Use eDraw Program eDraw application is started automatically along with the ePresenter application Fig 3 40 Fig 3 40 You can close this application and launch it later clicking the tray icon ePresenter and selecting a point Draw in drop down list F...

Page 28: ...trol mode just click the button Fig 3 42 3 5 2 Background selection By default a background for your drawings is a background of current running application But you can change this background to solid one Please press the button to draw on a solid background Press button to return to drawing on the desktop background You can also select background color Press the arrow right of change background b...

Page 29: ...down menu and block with standard background templates will be displayed Fig 3 45 Fig 3 45 3 5 3 Pen size This setting is useful when you draw with a pencil tool or draw lines or shapes Click the arrow the right hand of pencil tool and select size from drop down list or enter the number manually Fig 3 46 Fig 3 46 ...

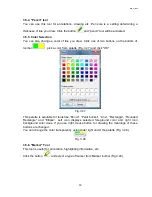
Page 30: ... 3 47 and click OK Fig 3 47 This palette is available for tools like Pencil Paint bucket Line Rectangle Rounded Rectangle and Ellipse Left icon displays selected foreground color and right icon background color does If you use right mouse button for drawing the meanings of these buttons are changed You can change the color transparency using slider right under the palette Fig 3 48 Fig 3 48 3 5 6 M...

Page 31: ...wings partially from the page Press the button to use this tool You can also change a size of eraser clicking the arrow by Eraser button A list of available sizes will be diaplsyed Fig 3 50 Fig 3 50 When you work with Eraser tool the left mouse button click displayes the Marker tool features but the right mouse button click displays the Paint busket tool features 3 5 10 Line Tool You can draw line...

Page 32: ...e click the button 3 5 13 Page Manager You can create more than one pages and then move between them with navigation buttons Button move you to the next page and button return you to previous one You can delete current page pressing button The confirmation block will be displayed asking you whether you want to delete page or not Fig 3 55 Fig 3 55 3 5 14 Opening Files You can create new page using ...

Page 33: ...ck the button enter a new file name select a type of file from drop down list below and click the button Save Fig 3 57 All pages will be saved in the file Fig 3 57 If you select a multi format TIFF all pages will be saved as a single file If you select one line format each page will be saved separately as a different files ...

Page 34: ...lassmatePresenter The complete description of all software features you can find in a separate User Manual embedded to software Please open Program menu and choose Interactive Klass KlassmatePresenter User Guide 4 Troubleshooting Questions and Answers Num Question Answer 1 May ePresenter be installed further than 3m from the projection surface We don t reconend to install ePresenter further than 3...

Page 35: ...sor position on the screen doesn t match a point where stylus touches a projection surface The possible reason tham the calibration was damaged Please calibrate an active surface system again 8 Stylus slips on the board surface badly Possible reason is a board surface pollution or dusting Please process a board surface any aerosol furniture polish containing wax 9 Dead zone which don t respond to ...

Reviews: