background image

Summary of Contents for 1010

Page 1: ......

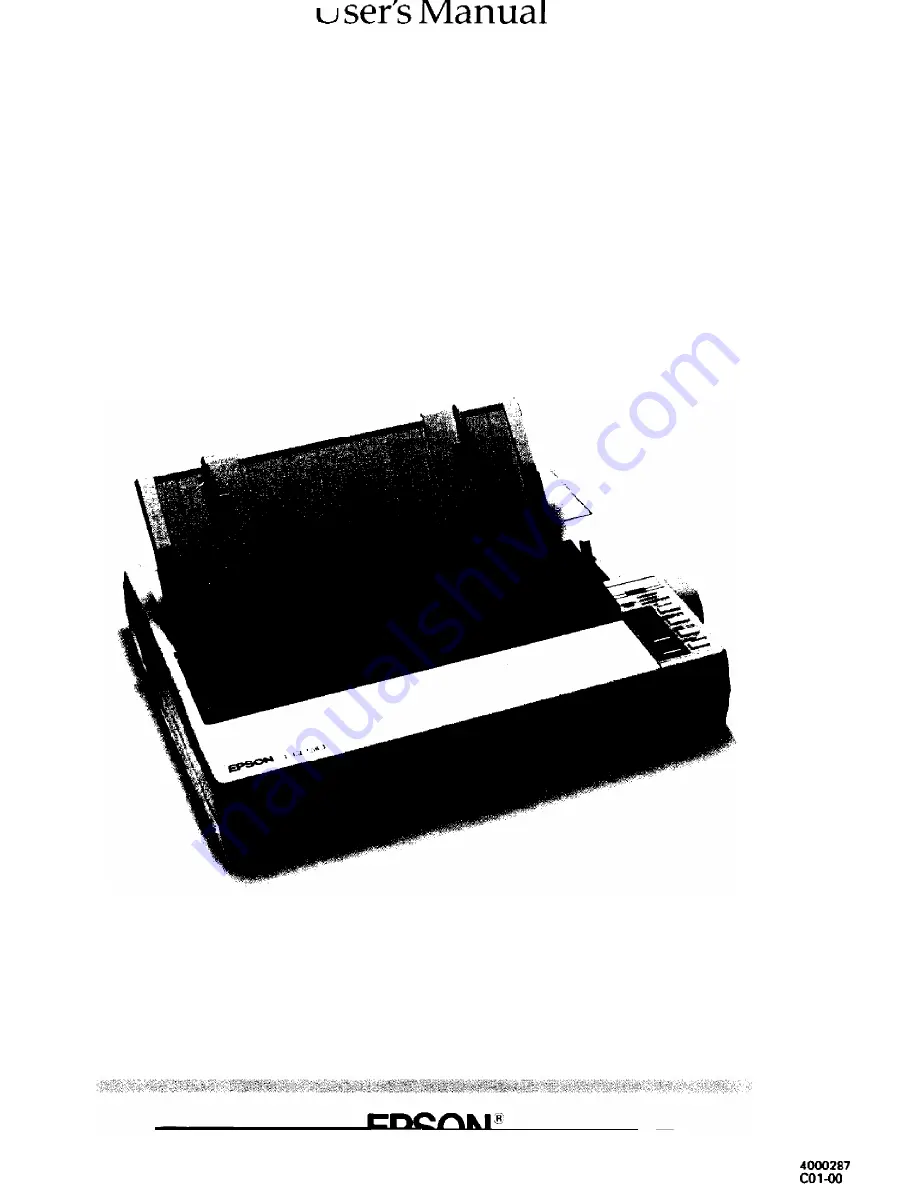
Page 2: ...EPSON LQ 510 1010 User s Manual ...

Page 3: ...rface connector do not leave cables connected to unused interfaces Changes or modifications not expressly approved by Epson America Inc could void the user s authority to operate the equipment FOR CANADIAN USERS This digital apparatus does not exceed the Class B limits for radio noise emissions from digital apparatus as set out in the radio interference regulations of the Canadian Department of Co...

Page 4: ...penings should never be blocked by placing the product on a bed sofa rug or other similar surface This product should never be placed near or over a radiator or heat register This product should not be placed in a built in installation unless proper ventilation is provided 7 This product should be operated from the type of power source indicated on the marking label If you are not sure of the type...

Page 5: ...Remove may expose you to dangerous voltage points or other risks Refer all servicing in those compartments to service personnel 13 Unplug this product from the wall outlet and refer servicing to qualified service personnel under the following conditions A When the power cord or plug is damaged or frayed B If liquid has been spilled into the product C If the product has been exposed to rain or wate...

Page 6: ...er 1 22 Setting Up Your Application Software 1 25 Chapter 2 Paper Handling 2 1 Selecting a Paper Feeding Method 2 2 Using Single Sheets 2 4 Using Continuous Paper 2 8 Switching Between Continuous and Single Sheets 2 16 Printing on Special Paper 2 23 Chapter 3 Using the Printer Operating the Control Panel Selecting Typestyles Setting the DIP Switches Page Length Skip Over Perforation Adjusting the ...

Page 7: ...ing the Printer Options 5 1 The Cut Sheet Feeder 5 2 The Pull Tractor 5 24 The Interface Boards 5 37 Chapter 6 Maintenance 6 1 Cleaning the Printer 6 2 Replacing the Ribbon 6 4 Transporting the Printer 6 10 Chapter 7 Troubleshooting 7 1 Printing 7 2 Paper Handling 7 7 Options 7 10 Chapter 8 Technical Specifications 8 1 Printer Specifications 8 2 Interface Specifications 8 9 Option Specifications 8...

Page 8: ...Chapter 9 Command Summary 9 1 Using the Command Summary 9 2 Commands in Numerical Order 9 5 Commands Arranged by Topic 9 8 Appendix A 1 Proportional Width Table A 2 Character Sets A 6 Glossary Index vii ...

Page 9: ...Q 1500 LQ 2500 and LQ 2550 Fast draft mode printing of up to 192 characters per second at 12 cpi characters per inch An improved control panel design that allows direct selection of character fonts as well as a choice of normal or condensed printing The SmartPark paper handling system which allows use of single sheets of paper without removing the continuous paper eliminates paper waste with short...

Page 10: ...at accommodates paper up to a width of 10 inches The LQ 1010 has a wide carriage that accommodates paper up to a width of 14 inches Throughout this manual the LQ 510 is referred to as the standard width printer and the LQ 1010 is referred to as the wide carriage printer Options A variety of printer options is available for use with your printer For detailed information on installing and using thes...

Page 11: ...heet paper more easily and more efficiently Up to 150 sheets of standard bond paper can be automatically fed into the printer without reloading l Pull Tractor Unit C800062 C800142 This option improves the performance of continuous paper handling It is especially useful with continuous multi part forms Introduction 3 ...

Page 12: ...tep instructions on setting up and operating your printer Finding your way around l Chapter 1 contains information on unpacking setting up testing and connecting the printer Be sure to read and follow these instructions first Inside the back cover of this manual are illustrations of the printer in which all of the major parts are identified l Chapters 2 and 3 cover paper handling and general print...

Page 13: ...n printer options general maintenance and specifications You will also find a glossary of printer terms At the back of this manual is a handy Quick Reference card that contains the information you are most likely to need Note The majority of the illustrations in this manual show the standard width printer Whenever necessary an illustration is included to show the wide carriage printer Warnings Cau...

Page 14: ...ess where you purchased your Epson product to request assistance If the people there do not have the answer to your question they can obtain it through our dealer support program Epson is confident that this policy will provide you with the assistance you need Call the Epson Consumer Information Center at 1 213 782 2600 for the following l The location of the nearest Epson dealer l The location of...

Page 15: ...r 1 5 Assembling the Printer 1 7 Installing the Platen Knob 1 7 Installing the Ribbon Cartridge 1 8 Attaching the Paper Guide 1 13 Testing the Printer 1 15 Plugging in the Printer 1 15 Running the Self Test 1 15 Connecting the Printer to Your Computer 1 22 The Parallel Interface 1 22 Setting Up Your Application Software 1 25 Setting Up the Printer 1 1 ...

Page 16: ...ng the Parts When you unpack the printer make sure that you have all the parts shown below and that none have been damaged platen knob ribbon cartridge After removing the parts save the packaging materials in case you ever need to transport your printer 1 2 Setting Up the Printer ...

Page 17: ...e printer CAUTION Before turning on the wide carriage printer be absolutely sure you have removed the locking clip Turning on the printer while the clip is attached may seriously damage the mechanism Follow these steps to remove the protective materials 1 Remove the printer cover 2 Remove the pieces of white packing material At this point the standard width printer is completely unpacked Setting U...

Page 18: ...he locking clip on the wide carriage printer lift and remove the paper tension unit 4 Remove the locking clip Note Store the clip with the other packing material in case you ever need to transport your printer 1 4 Setting Up the Printer ...

Page 19: ...tenance and for unrestricted flow of air around the printer Use a grounded outlet do not use an adapter plug Avoid locations that are subject to direct sunlight excessive heat moisture or dust Avoid electrical outlets controlled by wall switches or automatic timers Accidental interruption of power can wipe out information in both your computer s and printer s memory Avoid using outlets that share ...

Page 20: ...from horizontal l With a cut sheet feeder your printer must be kept level l If your paper supply is positioned below the printer stand make sure there is enough clearance to keep the paper from catching on the underside of the stand Also make sure the distance between the stand supports is wide enough for the paper you are using l Position your printer s cables so that they do not interfere with p...

Page 21: ...e Platen Knob The platen knob is used to feed the paper manually in the event of a paper jam or other paper feeding problem The platen knob is packed in an indentation in the printer s white foam packing material 1 Insert the knob into the hole on the printer s side and rotate it slowly until it slips onto the shaft Setting Up the Printer 1 7 ...

Page 22: ...paper This interferes with the automatic paper loading system and may cause a paper jam Installing the Ribbon Cartridge Your printer s ribbon cartridge is designed for easy installation and removal Before installing the ribbon cartridge make sure the printer is turned off Install the ribbon cartridge as follows 1 8 Setting Up the Printer ...

Page 23: ...nter is turned on because this can damage the printer Also if you have been using the printer the print head may be hot let it cool for a few minutes before touching it 2 Turn the ribbon tightening knob in the direction of the arrow This removes slack in the ribbon and makes it easier to install Setting Up the Printer 1 9 ...

Page 24: ...eady removed the paper tension unit when you removed the locking clip 4 Hold the ribbon cartridge by its handle and push it firmly down into position making sure the plastic hooks fit into the slots Note Press lightly on both ends of the cartridge to make sure the plastic hooks are properly seated 1 10 Setting Up the Printer ...

Page 25: ...n between the print head and ribbon guide while you turn the ribbon tightening knob to help feed the ribbon into place Slide the print head from side to side to make sure it moves smoothly Also check that the ribbon is not twisted or creased Setting Up the Printer 1 11 ...

Page 26: ...dth printer close the paper tension unit cover The standard width printer is now complete 8 On the wide carriage printer fit the rear notches of the paper tension unit over the pins of the printer then lower the unit 1 12 Setting Up the Printer ...

Page 27: ... in place Attaching the Paper Guide When you use single sheets the paper guide helps to feed the paper smoothly and efficiently into the printer Attach the paper guide using the following procedure 1 Place the paper guide on the printer Setting Up the Printer 1 13 ...

Page 28: ...guide lift up slightly to release it from its locked position then gently lower it down onto the printer 3 Attach the printer cover by fitting the hooks on the cover into the notches at the front of the printer and tilting the cover back into place 1 14 Setting Up the Printer ...

Page 29: ...hipping and that the ribbon is correctly installed Before running the self test you need to connect the printer to an electrical outlet and load a sheet of paper Plugging in the Printer 1 Make sure that the printer is turned off 2 Plug the power cable into a properly grounded electrical outlet Running the Self Test The self test can be run in the draft or Letter Quality mode depending on which but...

Page 30: ...printer or 14 inches 360 mm on the wide carriage printer This prevents the print head from printing directly onto the platen which can damage the print head Although the self test can be run with continuous paper use a single sheet of paper now because single sheet loading is easier 1 Make sure the printer is turned off 2 Push the paper release lever back to the single sheet position 1 16 Setting ...

Page 31: ...etter Quality mode turn on the printer The printer beeps several times and POWER and PAPER OUT lights come on 4 Move the left edge guide so that it locks in place next to the guide mark 5 Adjust the right edge guide to match the width of your paper Setting Up the Printer 1 17 ...

Page 32: ...s the self test Note If the platen turns without loading the paper press the ON LINE button to take the printer off line Then remove the paper and reinsert it more firmly A list of DIP switch settings is printed first followed by a series of characters The self test continues until the paper runs out or until you press the ON LINE button 1 18 Setting Up the Printer ...

Page 33: ...ill loaded press the LOAD EJECT button or LINE FEED button to eject it Then turn off the printer CAUTION After turning the power off always wait at least five seconds before turning it back on Turning the power on and off rapidly can damage the printer Setting Up the Printer 1 19 ...

Page 34: ...11 off off 1 2 on off 8 5 off on A4 o n on Tear off Invalid Valid 1 Skip Invalid Valid Auto LF Invalid Valid Receive I 1kbytes 8kbytes Graphics Uni d Bi d SW1 6 0123456789 ABCDEFGHIJKLM 0123456789 ABCDEFGHIJKLMNO 0123456789 ABCDEFGHIJKLMNO 0123456789 ABCDEFGHIJKLMNOP 0123456789 ABCDEFGHIJKLMNOPQ P r e s t i g e 1 0 0123456789 ABCDEFGHIJKLMNOPQR Note When using the optional cut sheet feeder the fir...

Page 35: ...packing material and shipping restraints have been removed from inside the printer See Chapter 7 Troubleshooting for other possible causes and solutions If the printer still does not print the self test correctly contact your dealer or call the Consumer Information number listed in Where to Get Help Setting Up the Printer 1 21 ...

Page 36: ...ibe how to connect the parallel interface cable If your computer requires another type of interface you need to install an optional interface board See Interface Boards in Chapter 5 If you are not sure which type of interface cable is required see your computer manual The Parallel Interface Connect the parallel interface cable as described below 1 Make sure that both your printer and computer are ...

Page 37: ...ze the wire clips together until they lock in place on either side of the connector 4 If your cable has a ground wire connect it to the ground screw beneath the interface connector Setting Up the Printer 1 23 ...

Page 38: ...ter to your Computer 5 Plug the other end of the cable into the computer If there is a ground wire at the computer end of the cable attach it to the ground connector at the back of the computer 1 24 Setting Up the Printer ...

Page 39: ...on printers shares a great many commands you can use an application program even if it does not list your printer on its selection menu If the printer is not listed choose one of the following printers They are listed in order of preference LQ 2550 LQ 2500 LQ 850 LQ 1050 LQ 500 LQ 800 LQ 1000 LQ 1500 If none of the above printers is listed select the first one available on the following list LQ EX...

Page 40: ...tinuous Paper 2 8 Positioning Your Continuous Paper Supply 2 8 Loading Continuous Paper 2 8 Switching Between Continuous and Single Sheets 2 16 Switching to Single Sheets 2 16 Switching Back to Continuous Paper 2 19 Printing on Special Paper 2 23 The Paper Thickness Lever 2 23 Multi part Forms 2 26 Labels 2 27 Envelopes 2 28 Paper Handling 2 1 ...

Page 41: ...th printer has two positions and on the wide carriage printer has three positions for use with the various methods of paper feeding Make sure the paper release lever is set to match the desired paper feeding method Standard width printer Wide carriage printer 2 2 Paper Handling ...

Page 42: ...le on the wide carriage printer Pull tractor position wide carriage printer only When you load continuous paper with the optional pull tractor the lever should be all the way forward on the wide carriage printer Even when you use the built in push tractor at the same time you must set the lever to this position Only select this position if you are using the optional pull tractor Note On the standa...

Page 43: ...mm If you do most of your printing on single sheets you may find it more convenient to install the optional cut sheet feeder This option automatically inserts a new sheet and can hold up to 150 pages For more details see Chapter 5 Loading Paper 1 Push the paper release lever back to the single sheet position 2 Turn on the printer The green POWER light should come on Note Do not insert paper before...

Page 44: ...that it locks in place next to the guide mark You may want to change this position later depending on the margin settings of your application program 4 Adjust the right edge guide to match the width of your paper Paper Handling 2 5 ...

Page 45: ...lly and is set ON LINE so that it can accept data from your computer CAUTION Never advance the paper using the platen knob while the printer is turned on If the platen turns without loading the paper press the ON LINE button to set the printer off line Then remove the paper and reinsert it more firmly You are now ready to begin printing 2 6 Paper Handling ...

Page 46: ... depending on your application program software If the ON LINE light remains on the first thing you should do is press the ON LINE button to take the printer off line Once the ON Line light is off remove the sheet that has just been printed if necessary press the LOAD EJECT button to eject the page and load a new sheet Press the ON LINE button to start printing the next page and follow any additio...

Page 47: ...printer Positioning Your Continuous Paper Supply An important consideration for achieving smooth and trouble free paper feeding is the position of your paper supply Three ways of positioning your printer and continuous paper supply are shown below Be sure to align the paper supply with the paper loaded in the tractor so that the paper feeds smoothly into the printer Loading Continuous Paper 1 Be s...

Page 48: ...2 Set the paper release lever to the continuous paper position On the standard width printer this is the forward position On the wide carriage printer this is the center position Paper Handling 2 9 ...

Page 49: ...ase the sprocket units by pulling the sprocket lock levers forward as shown below 4 Slide the left sprocket unit until it is one half inch from the farthest left position Press the lever back to lock it in place 2 10 Paper Handling ...

Page 50: ...ng Continuous Paper 5 Slide the right sprocket unit so that it roughly matches the width of your paper but do not lock it 6 Move the paper support midway between the two sprocket units Paper Handling 2 11 ...

Page 51: ...7 Open both sprocket covers Note Make sure that your paper has a clean straight edge before inserting it into the printer 2 12 Paper Handling ...

Page 52: ...8 Fit the first three holes in the paper over the pins of both sprockets 9 Close the sprocket covers Paper Handling 2 13 ...

Page 53: ...e the right sprocket unit to a position where the paper is straight and has no wrinkles Then lock it in place 11 Reattach the paper guide Then slide the edge guides apart to the sides of the paper guide as shown 2 14 Paper Handling ...

Page 54: ... loading position and advances each page to the same position If you need to adjust the loading position use the micro adjustment feature See Adjusting the Loading Position in Chapter 3 CAUTION Never adjust the loading position using the platen knob and never turn the platen knob while the printer is turned on Note Before you begin printing check the page length and skip over perforation settings ...

Page 55: ...nuous paper to single sheets you remove the last printed document and then back the continuous paper out of the way Follow the steps below 1 If the printer is on line press the ON LINE button to set the printer off line 2 Tear off any outgoing sheets If the end of the last printed sheet has not reached the tear off edge you need to press the FORM FEED button to advance your document to a point whe...

Page 56: ...he paper is still attached to the tractor but no longer in the paper path Note Pressing the LOAD EJECT button once may not feed the paper far back enough to reach the standby position If the PAPER OUT light does not come on you need to press the LOAdD EJECT button again With normal width continuous paper you can press the LOAD EJECT button up to three times If however you are using narrow paper be...

Page 57: ...ckward through the printer Labels can easily come off the backing sheet and jam the printer 4 Push the paper release lever back to the single sheet position 5 Stand the paper guide upright and adjust the edge guides to roughly match the width of your paper 2 18 Paper Handling ...

Page 58: ...y and is set ON LINE so that is can accept data from your computer Note If the platen turns without loading the paper press the ON LINE button to take the printer off line Then remove the paper and reinsert it more firmly Switching Back to Continuous Paper It is easy to switch back to printing with continuous paper Before switching to continuous paper make sure that the single sheet is ejected and...

Page 59: ...1 Slide the edge guides apart so they do not interfere with continuous paper feeding 2 Lower the paper guide onto the printer 2 20 Paper Handling ...

Page 60: ...ard width printer pull the paper release lever forward to the continuous paper position On the wide carriage printer set the paper release lever to the middle position for continuous paper feeding Paper Handling 2 21 ...

Page 61: ...een Continuous and Single Sheets 4 Press the LOAD EJECT button to feed the continuous paper to the loading position 5 Press the ON LINE button to set the printer on line so that it can accept data 2 22 Paper Handling ...

Page 62: ...t any closer than one half inch from either side of the paper For information on the printable area for envelopes see Envelopes later in this chapter The Paper Thickness Lever To accommodate various thicknesses of paper the printer is equipped with a paper thickness lever that can be set to seven positions standard width printer or eight positions wide carriage printer These positions are identifi...

Page 63: ...e paper thickness you want according to the table on the next page For normal use the lever should always be set to position 2 on the scale Note If you have installed the optional film ribbon cartridge set the paper thickness lever to position 1 2 24 Paper Handling ...

Page 64: ...s or continuous Thin paper 24 lb paper Multi part forms P sheet 3 sheet Labels Envelopes Air mail Plain Bond 20 lb Bond 24 lb Lever Position 1 2 2 3 3 4 4 4 or 5 6 6 7 Note When the lever is set to position 4 or higher the printing speed is reduced 4 Reattach the printer cover Paper Handling 2 25 ...

Page 65: ... envelopes multi part forms labels or thicker than normal paper can damage the print head Multi part Forms With the built in tractor unit your printer can print on continuous multi part forms You can use multi part forms that have up to three parts including the original Make sure you set the paper thickness lever to the proper position Except for the paper thickness lever setting you load multi p...

Page 66: ...ith a tractor Do not try to print labels as single sheets because labels on a shiny backing sheet almost always slip a little You load labels the same way that you load continuous paper except that the paper thickness lever must be adjusted for printing labels See Loading Continuous Paper earlier in this chapter For the correct paper thickness setting see The Paper Thickness Lever earlier in this ...

Page 67: ...all the Consumer Information number listed in Where to Get Help Because labels are especially sensitive to temperature and humidity always use them under normal operating conditions Don t leave labels loaded in the printer between jobs they curl around the platen and may jam when you resume printing Envelopes You can feed envelopes individually using the single sheet loading feature Before loading...

Page 68: ...et it to feed properly CAUTION The printable area for envelopes is shown on the next page The print head must not go past the left or right edge of the envelope or other thick paper Make sure that the page setup of your application program keeps the printing entirely within this printable area Paper Handling 2 29 ...

Page 69: ... minimum Note Envelope printing is only available at normal temperature 40 F to 95 F or 5 C to 35 C To make sure that the printing fits within the printable area always print a test sample using a normal sheet of paper before printing on envelopes 2 30 Paper Handling ...

Page 70: ...itch Setting 3 11 The DIP Switch Tables 3 12 The DIP Switch Functions 3 14 Page Length 3 15 Skip Over Perforation 3 16 Adjusting the Loading Position 3 17 Using Micro adjustment 3 17 Using Short Tear off 3 19 Adjusting the Tear off Position 3 20 Selecting an International Character Set 3 22 Choosing a Character Set 3 24 Using the Data Dump Mode 3 26 Using the Printer 3 1 ...

Page 71: ...et to position 4 or higher When this light is blinking the micro adjustment function can be used POWER green On when the POWER switch is on and power is supplied READY green On when the printer is ready to accept input data Flickers during printing PAPER OUT red On when the printer is out of paper or when continuous paper is in the standby position ON LINE green On when the printer is on line and ...

Page 72: ...gle sheet of paper or to advance continuous paper to the top of the next page LINE FEED When the printer is off line press this button to advance the paper one line or hold it down to advance the paper continuously LOAD EJECT This button is used to feed paper to the loading position or to eject paper that is already loaded Paper is ejected forward if the paper release lever is set to the single sh...

Page 73: ...ee Selecting Typestyles later in this chapter CONDENSED Press this button to turn the condensed mode on and off The orange indicator light is on when the printer is in the condensed mode In the condensed mode all characters are printed at approximately 60 percent of their normal width 3 4 Using the Printer ...

Page 74: ...ore information Micro adjustment By pressing the FORM FEED button immediately after loading paper or when using short tear off you can make fine adjustments to the loading and short tear off positions These positions can only be adjusted while the MULTI PART light is blinking See Adjusting the Loading Position and Using Short Tear off later in this chapter Data dump By holding down both the LINE F...

Page 75: ...rinter However commands from your application program temporarily override the SelecType settings Some application programs are designed to control all typestyle functions These programs cancel all previous typestyle settings with software commands Because these commands override SelecType settings you should use the program s print options instead of SelecType to select your typestyles If SelecTy...

Page 76: ...tor lights show the selected font indicates the light is off indicates the light is on indicates the light is blinking You use the software command ESC k to select the other two built in fonts ESC k 6 OCR A ESC k 8 Epson Orator S When you select one of these fonts the indicator lights show the OTHER pattern See the Command Summary in Chapter 9 for details on software commands Using the Printer 3 7...

Page 77: ...The following samples show the character set available for each font DRAFT Epson Roman Epson Sans Serif Epson Courier Epson Prestige 3 8 Using the Printer ...

Page 78: ...ts can be read by an optical character reader also known as a document reader or image scanner for input into another computer Print enhancements such as bold and underlining cannot be read by an actual character reader Epson Orator Using the Printer 3 9 ...

Page 79: ...rs Hence condensed printing is very useful for spreadsheets and other applications where you need to print the maximum amount of information on a page You can combine the condensed mode with 10 cpi 12 cpi and proportional printing but not 15 cpi To select the condensed mode simply press the CONDENSED button so that the orange indicator light comes on To turn off the condensed mode press the button...

Page 80: ...set or initialized DIP switch settings are shown in the DIP switch tables later in this section Descriptions of all the DIP switch functions follow the tables Changing a DIP Switch Setting To change a DIP switch setting follow these steps 1 Turn off the printer 2 Open the DIP switch cover and use a pointed object such as a pen to change the DIP switch settings A DIP switch is on when it is up and ...

Page 81: ... feeder mode on off ON OFF See tables 1 and 2 See table 3 Condensed Normal Graphics Italics On Off Page 3 22 3 24 3 15 3 10 3 24 5 2 DIP switch 2 SW Description ON OFF Page 2 1 Not used 2 2 Tear off mode On Off 3 14 2 3 1 inch skip over perforation On Off 3 16 2 4 Auto line feed On Off 3 14 2 5 Input buffer capacity 8 KB 1 KB 3 14 2 6 Graphics print direction Bidirect Unidirect 3 14 2 7 Character ...

Page 82: ...PC 437 United States Epson Extended Graphics ON ON ON PC 850 Multilingual ON ON OFF PC 860 Portugal ON OFF ON PC 863 Canada French ON OFF OFF PC 865 Norway OFF ON ON SW 17 ON ON ON ON ON The graphics character sets are also called code page tables Table 3 Page length selection Page length SW 1 4 SW 1 5 11 inches OFF OFF 12 inches ON OFF 8 5 inches OFF ON 11 7 inches ON ON Table 4 Character spacing...

Page 83: ... such as lines and boxes With bidirectional printing the print head prints in both directions This is faster than unidirectional printing When DIP switch 2 6 is off the printer prints unidirectionally when it is on the printer prints bidirectionally Either setting can be overridden by a software command ESC U To achieve precise vertical alignment without the slower printing speed caused by unidire...

Page 84: ...2 inches 305 mm ON OFF Note Be sure to set the page length to match the paper you are using Other page lengths can be set using the commands ESC C and ESC C 0 See the Command Summary in Chapter 9 for details Note If you are using the cut sheet feeder the page length is automatically set when you run the self test See The Cut Sheet Feeder in Chapter 5 for details Using the Printer 3 15 ...

Page 85: ... margin at the bottom of one page and half at the top of the next page as shown in the following illustration DIP switch 2 3 ON Skip over perforation ON 23456789 ABCDEFGHIJKLMNOPQRSTUVWXYZ 3456789 ABCDEFGHIJKLMNOPQRSTUVWXYZ _ 456789 ABCDEFGHIJKLMNOPQRSTUVWXYZ _ l 56789 ABCDEFGHIJKLMNOPQRSTUVWXYZf _ e 6789 ABCDEFGHIJKLMNOPQRSTUVWXY _ at Note Most application programs take care of top and bottom mar...

Page 86: ...e Until the loading position is reset the printer remembers this position even if it is turned off and uses it as a reference point for feeding paper The micro adjustment feature moves the paper in 1 180 inch increments to make fine adjustments to the loading position Once you have used micro adjustment to change the loading position of continuous paper the printer remembers that position even aft...

Page 87: ...er forward or the LINE FEED button to feed the paper backward Note When the paper reaches the factory set loading position the printer beeps and micro adjustment feeding pauses for a moment before continuing You can use this factory setting as a reference point when adjusting the printer s loading position When the paper reaches either the minimum or maximum top margin the printer beeps and the pa...

Page 88: ... the normal way You can leave the short tear off feature turned on DIP switch 2 2 on even when you are using single sheets When you move the paper release lever to the singlesheet position the short tear off feature is disabled CAUTION Never use short tear off with labels Otherwise labels may come off their backing and jam the printer When you have finished printing and if the perforation is at th...

Page 89: ...ed and no more data is received for three seconds When you resume printing after tearing off the sheet the paper automatically feeds backward to the loading position before printing begins Adjusting the Tear off Position If the paper s perforation does not meet the tear off edge follow these steps to adjust the tear off position 1 Make sure the printer feeds the paper to the tear off position afte...

Page 90: ...ff position 3 To make fine adjustments to the tear off position press the FORM FEED button to feed the paper forward or the LINE FEED button to feed it backward You can now tear off your document from the perforation and resume printing The printer remembers this new tear off position even after the printer is turned off Using the Printer 3 21 ...

Page 91: ... 2 and 1 3 according to the table below Note DIP switch 1 7 must be off To select an international character set when DIP switch 1 7 is on use the ESC R command This table also shows the characters that differ in each international character set Country ASCII code hex DIP SW 23 24 40 58 5C 5D 5E 60 7B 7C 7D 7E 1 1 1 2 1 3 0 U S A 1 France 2 Germany 3 U K 4 Denmark 5 Sweden 6 Italy 7 Spain ON ON ON...

Page 92: ... character sets that follow can be selected with a software command ESC R For more information see the Command Summary in Chapter 9 Country ASCII code hex 23 24 40 5B 5C 5D 5E 60 7B 7C 7D 7E 8 Japan 9 Norway 10 Denmark II 11 Spain II 12 Latin America 13 Korea 64 Legal Using the Printer 3 23 ...

Page 93: ...cter set you can still print ordinary text and italics For italics see your software manual or the description of the ESC 4 command in the Command Summary Chapter 9 Note In most cases a graphics character set is the preferred selection To select either the italics or a graphics character set set DIP switch 1 7 according to the table below Character set DIP SW 1 7 Italics Graphics OFF ON Note To ch...

Page 94: ... ON PC 850 Multilingual ON ON OFF PC 860 Portugal ON OFF ON PC 863 Canada French ON OFF OFF PC 865 Norway OFF ON ON The graphics character sets are also called code page tables Sample printouts of the italic character set and the graphics character sets are shown in the Appendix Note When DIP switch 1 7 is off DIP switches 1 1 1 2 and 1 3 select an international character set Using the Printer 3 2...

Page 95: ...ams The data dump mode gives a printout of the codes reaching the printer To use the data dump mode follow these steps 1 Make sure the printer is loaded with either single sheet or continuous paper Note Use paper at least 7 2 inches 182 mm wide 2 If the printer is on switch it off then hold down the FORM FEED and LINE FEED buttons at the same time you turn on the printer 3 26 Using the Printer ...

Page 96: ...in hexadecimal format On the right side of the printout all printable characters are printed and others such as control codes are represented by dots 4 To turn off the data dump mode after you have taken the printer off line turn off the printer By comparing the characters printed in the text field on the right side of the data dump printout with the printout of hex codes you can check which codes...

Page 97: ... 4 11 Column Reservation Numbers 4 12 A Simple Graphics Program 4 12 Designing Your Own Graphics 4 13 User defined Characters 4 17 Designing Your Characters 4 17 Defining Your Characters 4 19 Sending Information to Your Printer 4 21 Printing User defined Characters 4 24 Copying ROM Characters to RAM 4 25 Letter Quality Characters 4 26 Mixing Print Styles 4 27 Software and Graphics 4 1 ...

Page 98: ...ted with a software command For each of the built in fonts you can choose a character spacing of 10 12 or 15 characters per inch or proportional spacing The printout below compares the three spacings This is 10 cpi printing This is 12 cpi printing This is 15 cpi printing As shown above 15 cpi characters are only about two thirds the height of 10 and 12 cpi characters This makes 15 cpi particularly...

Page 99: ... change the size of your printing These modes are double width double height and condensed The doublewidth mode doubles the width of any size character while the double height mode doubles the height of any size character These modes are useful for emphasizing document titles and headings in reports but are usually not suitable for large amounts of text These modes can also be combined to obtain e...

Page 100: ...ft margin by printing spaces you may need to change the left margin and the number of characters on a line to keep the margins correct if you change character widths See the Print Size and Character Width commands in Chapter 9 Special Effects and Emphasis The printer offers two ways of emphasizing text and also allows you to use underlining superscripts subscripts and italics These features can be...

Page 101: ...lic printing You can print italics by using the ESC 4 software command see Chapter 9 This is true no matter how DIP switch 1 7 is set This is ROMAN printing T h i s i s R O M A N i t a l i c s Underlining strike through and overlining The underline strike through and overline modes are useful for highlighting selected text This feature can be used to score spaces subscripts and superscripts withou...

Page 102: ...ommands in Chapter 9 Outline and shadow The outline and shadow features are useful for adding variation and emphasis to text that you wish to stand out such as headings The following samples show the outline and shadow features individually plus a combination of outline with shadow T h i s i s o u t l i n e s t y l e T h i s i s s h a d o w s t y l e T h i s i s o u t l i n e W i t h s h a d o w S...

Page 103: ...t pictures and graphs like the ones on this page and the next by simply giving your software a few instructions If you use commercial software that produces graphics all you need to know about dot graphics is how to use the software The application program will take care of the printer Some programs call this bit image printing On the other hand if you wish to do your own programming or merely wis...

Page 104: ...verlap each other both horizontally and vertically in Letter Quality mode it is difficult to see the individual dots Instead the letters and symbols seem to be made up of unbroken lines In order for the dots to overlap vertically the pins in the print head are in more than one column but the intelligence of the printer handles the timing of pin firings so that the effect is that of 24 pins arrange...

Page 105: ... paper every 1 180th of an inch it must receive instructions about which of its 24 pins to fire At each position it can fire any number of pins from none to 24 This means that the printer must receive 24 bits of information for each column it prints Because the printer uses 8 bit bytes of information in communicating with the computer it needs three bytes of information for each position Pin label...

Page 106: ...16 16 8 8 8 8 8 4 4 4 4 2 2 2 2 2 2 1 1 1 170 74 134 With this numbering system any combination of the eight pins adds up to a decimal number between 0 and 255 and no numbers are duplicated Because there are 24 pins in each column you must make a calculation for each of the three sections in each column As you can see this method of planning and printing dot graphics requires considerable calculat...

Page 107: ...on the paper Your printer has one command that allows you to use any of the 11 graphics options The format of the command is ESC m n1 n2 data In this command m selects the graphics option and n1 and n2 specify the number of columns to reserve for graphics The available graphics options are listed below Option Pins m Horiz density dots in Single density 8 0 6 0 Double density 8 1 1 2 0 High speed d...

Page 108: ...e n1 the number of columns you are reserving and make n2 a zero For example if you wish to send 1632 columns of graphics data n1 should be 96 and n2 should be 6 because 1632 96 6 x 256 The printer interprets the number of bytes specified by n1 and n2 as graphics data no matter what codes they are This means that you must be sure to supply enough bytes of graphics data or the printer stops and wait...

Page 109: ...phics requires three bytes of data for each column line 30 begins a loop to supply 120 bytes of data Line 40 contains the number 170 which produces the first pin pattern shown in the section on pin labels and line 50 ends the loop Designing Your Own Graphics With what you know now you can use the simplest application of graphics calculating by hand the data to print the graphic image While this me...

Page 110: ...pattern that the printer prints on the paper is of course made up of dots that overlap each other both vertically and horizontally The reason the planning grid uses an x for each dot is that using an accurate representation of the dots makes calculating the data numbers difficult because they cover each other Therefore remember that each x represents the center of a dot and the dots actually overl...

Page 111: ... 0 0 0 0 0 0 15 127 255 255 255 255 255 255 240 128 255 127 0 128 240 255 31 1 0 0 3 31 255 255 255 255 255 255 252 224 240 255 15 0 192 254 127 7 0 0 63 255 255 255 255 255 254 248 224 0 0 0 192 240 252 15 7 7 199 247 127 127 255 255 255 255 255 252 240 192 0 0 0 224 248 126 7 7 135 231 255 63 The BASIC program that prints the above design is shown on the next page Note that the data numbers in l...

Page 112: ...7 135 140 DATA 0 31 199 0 7 231 0 1 247 0 0 255 0 0 127 0 0 63 In this program line 20 assigns the graphics option 24 pin triple density with code 39 Code 42 sets the number of pin columns at 42 Lines 80 through 140 contain 126 bytes of data 42 pin columns x 3 bytes for each pin column Lines 30 through 60 print the design that you see below Notice that the dots overlap quite a bit This design was ...

Page 113: ...ng a commercial software program that assists you in creating characters or simply supplies you with sets of characters already created Also some popular software programs make use of the printer s user defined character function to enhance printouts These characters are called download characters in some programs The standard ASCII characters are stored in the printer s Read Only Memory ROM and t...

Page 114: ...closely together than those for draft characters The illustrations below show the two design grids The line at the side labeled cap height indicates the top of a standard capital letter The line labeled baseline indicates the baseline for all letters except those with descenders the bottom parts of such letters as j and y The bottom row is usually left blank because it is needed for underlining Dr...

Page 115: ...nt them to print The examples shown here like the ones in the graphics section use an x to represent each dot In the illustration below you see a draft grid with a simple user defined character planned on it Now you translate the dot pattern you ve created on paper to a numeric format so you can send the data to your printer Every dot has an assigned value Each vertical column which has a maximum ...

Page 116: ... in this example On the left side of the figure the data numbers are calculated for the middle column The value of each byte is calculated by adding the values of the rows in which dots appear The right side of the figure shows the whole character with the three data numbers for each column indicated at the bottom This manual uses decimal numbers because the program examples are written in BASIC a...

Page 117: ... uses to define characters is one of the most complex in its repertoire The format of the command is this ESC 0 n1 n2 d0 d1 d2 data The ESC is simple enough The 0 allows for future enhancements At this time it is always ASCII 0 You can define many characters with a single command The values n1 and n2 are the ASCII codes of the first and last characters you are defining If you are defining only one...

Page 118: ...s is specified by d0 and the right space is specified by d2 The second byte d1 specifies the number of columns of dots that are printed to make up the character By varying the width of the character and the spaces around it you can create proportional width characters that print at draft speed The table below shows the maximum values for these bytes Mode d 1 d 0 d 1 d 2 Draft 91 12 Letter Quality ...

Page 119: ...nd selects draft printing The actual character definition starts in line 20 The two signs in line 30 represent n1 and n2 the range of characters being defined in this case a range of 1 Line 40 contains d0 d1 and d2 The information about the actual character design which is contained in the DATA statements at the end of the program is sent to the printer in the loop between lines 50 and 70 Note Whe...

Page 120: ...inal characters in ROM that the printer normally uses and the alternative character you defined remain in the printer available for your use The command to switch between the two sets is used in line 90 and 110 It is ESC n If n is equal to 0 the normal ROM character set is selected this is the default If n is equal to 1 the user defined character set is selected If you select the user defined char...

Page 121: ...itch back and forth at will between the normal character set and your user defined character set It is however rather inconvenient Therefore your printer has a command that allows you to copy all of the standard characters from ROM to the user defined character set The command format is as follows where the value of n represents the font family Esc 0 n 0 Note This command cancels any user defined ...

Page 122: ...cannot place dots in adjacent columns There must be an empty dot position both to the left and right of each dot that prints Superscripts and subscripts You can also create superscript and subscript user defined characters Just as Letter Quality characters are defined when the Letter Quality mode is selected superscript and subscript characters are created when either superscript or subscript is s...

Page 123: ...characters you design are enhanced to give this printing effect Mixing the three types of user defined character sets is not possible For example if you select draft and define some characters then select proportional and define some more the first draft character definitions are deleted Only one type of character definition may be stored in RAM at any time If you define characters in one mode the...

Page 124: ...e stored in RAM which is not permanent memory When the printer power is turned off or the printer is initialized with the INIT signal the user defined characters are lost Some computers do this each time BASIC is loaded 4 28 Software and Graphics ...

Page 125: ...Cut Sheet Feeder 5 11 Switching Between the Cut Sheet Feeder and PushTractor 5 15 Removing the Cut Sheet Feeder 5 22 The Pull Tractor 5 24 Installation 5 24 Paper Handling 5 27 Removing the Pull Tractor 5 33 The Interface Boards 5 37 Choosing an Interface 5 37 Compatible Interfaces 5 38 Installation 5 38 8143 New Serial Interface 5 46 Using the Printer Options 5 1 ...

Page 126: ...ficiently Up to 150 sheets of standard bond paper can be fed automatically into the printer without reloading Installation 1 Assemble the cut sheet feeder by following the instructions provided in its accompanying manual 2 Make sure that the printer is turned off guide and printer cover Then remove the paper 5 2 Using the Printer Options ...

Page 127: ...clear plastic part of the printer cover from the printer cover by pressing on the tabs on each side 4 Attach the clear plastic part included with the cut sheet feeder to the printer cover Using the Printer Options 5 3 ...

Page 128: ...e lever is pushed all the way to the back 6 Tilt the cut sheet feeder slightly forward to fit the notches at the base of the unit over the black pins inside the printer Tilt the feeder back until it rests on top of the printer 5 4 Using the Printer Options ...

Page 129: ...The Cut Sheet Feeder 7 Attach the printer cover 8 Turn on the cut sheet feeder mode by setting DIP switch 1 8 to on 9 Turn on the printer Using the Printer Options 5 5 ...

Page 130: ...ake sure that the cut sheet feeder mode is turned on with DIP switch 1 8 Pull the paper set levers all the way forward until the paper supports retract and lock open to allow for paper loading 5 6 Using the Printer Options ...

Page 131: ...lide the right paper guide so that it roughly matches the width of your paper 4 Take a stack of paper and fan it as shown This keeps the paper from sticking and ensures that only one sheet feeds at a time Tap the side and bottom of the paper on a flat surface to even the stack Using the Printer Options 5 7 ...

Page 132: ...abels in the cut sheet feeder 5 Insert the stack of paper between the paper guides aligning it with the left edge of the guide Then adjust the right paper guide until the paper is held firmly but not so tightly that it causes the paper to buckle Make sure the paper can move up and down freely 6 Push the paper set levers back until they click into place and clamp the paper against the guide rollers...

Page 133: ...t the bottom of the first test page This number is the default page length setting This setting however can be overridden by software commands Running the self test is the same as when the cut sheet feeder mode is off The steps below are for a self test in draft mode Note Run the self test using paper that is 8 inches 210 mm wide on the standard width printer and 14 inches 360 mm wide on the wide ...

Page 134: ...se lever is set to the back position 2 While holding down the LINE FEED button turn on the printer For LQ mode press the FORM FEED button instead of the LINE FEED button A part of the printout of the fit sheet is shown below The printout of the second sheet is similar to the original self test described in Chapter 1 5 10 Using the Printer Options ...

Page 135: ...ing the Cut Sheet Feeder After stacking paper in the cut sheet feeder turn on the printer and make sure that the ON LINE light is on When the printer is on line a new sheet of paper loads automatically whenever a printable character or line feed command is sent to the printer CAUTION If there is no paper in the cut sheet feeder do not press the FORM FEED button or the LOAD EJECT button and do not ...

Page 136: ...nd press the ON LINE button Note If you turn off your printer during the time the printer detects a paper out or paper jam condition any data remaining in the printer s buffer is discarded Inserting single sheets Your cut sheet feeder also has a single sheet loading feature This feature is especially useful because it allows you to switch to a different type or size of paper for one sheet only wit...

Page 137: ...The Cut Sheet Feeder 3 Press the LOAD EJECT button to load the sheet Using the Printer Options 5 13 ...

Page 138: ...When there is paper in the printer press this button to eject the sheet When there is no paper in the printer press this button to load the paper from the cut sheet feeder When there is paper in the printer press this button to eject the sheet Using software The following commands cause the printer to eject the sheet in the printer without loading the next sheet FF Form feed ESC EM R Ejects a shee...

Page 139: ...ftware is not effective while the printer is off line Make sure that the printer is on line if you wish to control the cut sheet feeder using software commands Switching Between the Cut Sheet Feeder and Push Tractor The printer lets you switch easily between the cut sheet feeder and tractor feeding systems without having to remove either the feeder or the continuous paper supply 1 Make sure the co...

Page 140: ...gle sheets are still in the printer press the LOAD EJECT button to eject the paper Pull the paper release lever forward to the continuous paper position You do not need to change the DIP switch 1 8 setting 5 16 Using the Printer Options ...

Page 141: ...he Cut Sheet Feeder On the wide carriage printer set the paper release lever to the center continuous paper position 4 Press the LOAD EJECT button to load continuous paper Using the Printer Options 5 17 ...

Page 142: ...INE button to set the printer on line so that it can accept data 6 After the first printed page passes the printer cover edge fold at the perforation so the page lies on the printer cover 5 18 Using the Printer Options ...

Page 143: ...inuous paper aligned with the tractor so that the paper feeds smoothly into the printer Switching back to the cut sheet feeder It is easy to switch back to using the cut sheet feeder 1 Press the ON LINE button to set the printer off line Using the Printer Options 5 19 ...

Page 144: ...o eject any printed continuous paper Tear off all printed sheets CAUTION To feed printed continuous paper forward use the FORM FEED button only Never press the LOAD EJECT button this will feed the continuous paper backward 5 20 Using the Printer Options ...

Page 145: ...e LOAD EJECT button until you feed the continuous paper backward out of the paper path and into the standby position CAUTION Never press the LOAD EJECT button more than twice This may cause a paper jam Using the Printer Options 5 21 ...

Page 146: ... back to the single sheet position 5 Press the ON LINE button to set the printer on line Removing the Cut Sheet Feeder 1 Turn off the printer and remove any paper remaining in the bin and printer 2 Remove the printer cover 5 22 Using the Printer Options ...

Page 147: ...8 to off to turn off the cut sheet feeder mode 5 Replace the clear plastic part of the cut sheet feeder cover with the clear plastic part that was originally on the printer cover Removal of the cut sheet feeder is now completed Be sure to store the removed cut sheet feeder in its original box and packing materials Using the Printer Options 5 23 ...

Page 148: ...rt forms and labels For best results use the pull tractor along with the built in push tractor as described in this section Installation 1 Turn off the printer and remove the printer cover and paper guide 2 On the standard width printer remove the paper tension unit cover On the wide carriage printer you remove the paper tension unit 5 24 Using the Printer Options ...

Page 149: ...the rear mounting pins in the printer Then tilt the tractor unit toward you until the front latches click in place over the black front mounting pins Push down on the front latches to be sure they are firmly seated Using the Printer Options 5 25 ...

Page 150: ...Pull the paper release lever forward to the continuous paper position 5 Set DIP switch 2 2 to off Note You cannot use the short tear off function with the pull tractor 6 Turn on the printer 5 26 Using the Printer Options ...

Page 151: ... wide carriage printer this is the forward continuous feed position 2 Set the first three holes of the continuous paper onto the built in push tractor as described in Chapter 2 3 Press the LOAD EJECT button to load the continuous paper then press the FORM FEED button This advances the paper one page so that you can fit the paper onto the pull tractor Using the Printer Options 5 27 ...

Page 152: ...l until step 10 CAUTION Never use the platen knob while the printer is turned on To adjust the loading position use the micro adjustment feature described in Chapter 3 4 Open the sprocket covers of the pull tractor and pull the sprocket lock levers toward you to release them 5 28 Using the Printer Options ...

Page 153: ...h the width of the paper Then adjust the paper support so that it is halfway between the sprocket units 6 Fit the holes in the paper over the tractor pins on the sprocket units and close the sprocket covers Using the Printer Options 5 29 ...

Page 154: ...he tractor pins or if the paper buckles press in on the gray pull tractor knob and turn it in the desired direction until the paper fits properly 8 See that the paper is not crooked or wrinkled and lock the sprocket units in place 5 30 Using the Printer Options ...

Page 155: ...or 9 Install the paper guide Slide the edge guides all the way apart 10 Separate the clear plastic part of the printer cover from the printer cover by pressing on the tabs on each side Using the Printer Options 5 31 ...

Page 156: ...ll Tractor 11 Attach the clear plastic part included with the pull tractor to the printer cover 12 Attach the pull tractor cover and press the ON LINE button the printer on line 5 32 Using the Printer Options ...

Page 157: ...per Note Do not use the short tear off feature with the pull tractor Removing the Pull Tractor 1 Make sure to tear off the printed document and remove the tractor cover and paper guide Then turn on the printer 2 Press the ON LINE button to set the printer off line Then press the LOAD EJECT button until the continuous paper feeds backward out of the paper path to the standby position The PAPER OUT ...

Page 158: ... the push tractor unit 4 Place your thumbs beside the front latches on each end of the tractor unit and gently push up on them slowly tilting the unit back Push the paper release lever to the back position 5 34 Using the Printer Options ...

Page 159: ...5 On the standard width printer replace the paper tension unit cover On the wide carriage printer replace the paper tension unit Using the Printer Options 5 35 ...

Page 160: ...The Pull Tractor 6 Remove the tractor cover from the printer cover and reassemble the printer cover 7 Install the paper guide and printer cover 5 36 Using the Printer Options ...

Page 161: ...faces offer standardized connections trouble free operation and the ability to connect computers printers and other devices on the same line so that they may share data freely Third party interfaces such as Coax and Twinax allow Epson printers to function as local IBM printers without the addition of any other circuitry or components The buffered parallel interfaces also offer trouble free operati...

Page 162: ...them If the board has an identification code printed on it it is a four digit number beginning with 8 and should correspond to one of the numbers listed in the table above Coax and Twinax interfaces are also available from Epson dealers These interfaces allow connectivity to mainframe and minicomputers and emulation of IBM printers Installation The optional interface boards available for your prin...

Page 163: ...ower cord is unplugged Also try not to touch contacts on the circuit board of the printer because many of the components can be destroyed by the static electricity present in your body Do not change the settings of any DIP switches on the main board 2 Remove the screw securing the interface board cover and lift off the cover Using the Printer Options 5 39 ...

Page 164: ...th the FG wire not attached and one with the FG wire attached This slight difference changes the way the boards are installed in the printer but does not affect the operation of the interface in any way Check to see which type of interface board you have FG wire not attached FG wire attached 5 40 Using the Printer Options ...

Page 165: ...h the round end of the FG frame ground wire to the main board and position the other end as shown 2 Carefully insert the pins on the optional interface board into the mating connector on the main board then secure the board with the screws provided Using the Printer Options 5 41 ...

Page 166: ...e DIP switches on the interface board according to the manual accompanying it If the FG wire is attached follow these steps 1 Carefully place the interface board next to the printer Use the CG screw to connect the round end of the FG frame ground wire to the main board 5 42 Using the Printer Options ...

Page 167: ... Holding the interface board level rotate it into position and attach it to the main board Make sure that the connector pins are properly inserted into the mating connector Using the Printer Options 5 43 ...

Page 168: ... New Serial Interface board set the DIP switches on the interface board according to the manual accompanying it If you have the 8143 board see the next section Attaching the interface board cover 1 Bend back the hinge plate on the interface board cover 5 44 Using the Printer Options ...

Page 169: ...e careful not to subject it to excessive bending 2 Reattach the board cover CAUTION When an optional interface board is installed be sure to disconnect the printer cable from the printer s built in parallel interface Two interface cables must not be connected at the same time Using the Printer Options 5 45 ...

Page 170: ...conventions such as word structure or communications protocol use the information in the manual supplied with your 8143 optional interface Baud rate selection You can select baud rates from 75 to 19 200 BPS Bits Per Second When setting the baud rate make sure you use the bit rate selection table for printers with buffers in the 8143 interface manual For more information on the printer s input buff...

Page 171: ...Chapter 6 Maintenance Cleaning the Printer 6 2 Replacing the Ribbon 6 4 Transporting the Printer 6 10 Maintenance 6 1 ...

Page 172: ... the printer is turned off Then remove the paper guide or the cut sheet feeder 2 Using a soft brush carefully remove all dust and dirt 3 If the outer case or paper guide is dirty or dusty clean it with a soft clean cloth dampened with a mild detergent solution Keep the printer cover in place to prevent water from getting inside the printer 6 2 Maintenance ...

Page 173: ...ul not to get water on the printer mechanism or electronic components l Do not use a hard or abrasive brush l Do not spray the inside of the printer with lubricants unsuitable oils can damage the mechanism If you think lubrication is needed contact your dealer or call the Consumer Information number listed in Where to Get Help Maintenance 6 3 ...

Page 174: ... Wide carriage printer 7754 Film ribbon 7768 7770 Notes l Use the optional film ribbon only when you need especially high quality printing For everyday operations use the standard ribbon l Do not use ribbons designed for nine pin printers 1 Make sure that the printer is turned off Then remove the printer cover 2 On the standard width printer open the paper tension unit cover 6 4 Maintenance ...

Page 175: ... 3 To remove the ribbon cartridge grip it by the black plastic tab and lift the cartridge straight up and out of the printer WARNING If the printer has just been used the print head may be hot Let it cool before attempting to replace the ribbon Maintenance 6 5 ...

Page 176: ... to the middle of the printer 5 To remove slack in the new ribbon turn the ribbon tightening knob in the direction of the arrow 6 Push the new ribbon cartridge firmly into position making sure the plastic hooks fit into the slots 6 6 Maintenance ...

Page 177: ...ke sure the hooks are properly inserted 7 Use a pointed object such as a ball point pen to guide the ribbon between the print head and ribbon guide while you turn the ribbon tightening knob to help feed the ribbon into place Be careful not to puncture the ribbon Maintenance 6 7 ...

Page 178: ...Slide the print head from side to side to make sure it moves smoothly Also see that the ribbon is not twisted or creased 9 On the standard width printer close the paper tension unit cover 6 8 Maintenance ...

Page 179: ...On the wide carriage printer attach the paper tension unit 10 Insert the hooks on the printer cover unit into the printer and then tilt the printer cover back into place Maintenance 6 9 ...

Page 180: ...printer is turned off Then remove any installed options as well as the paper guide and printer cover CAUTION Turn the printer off before unplugging the power cable from the AC outlet 2 Unplug the power cable from the electrical outlet Coil the cable and tie it then disconnect the interface cable from the printer and the computer 3 Remove the ribbon cartridge and platen knob 6 10 Maintenance ...

Page 181: ...need to replace the locking clip Remove the paper tension unit Then attach the locking clip Then replace the paper tension unit 5 Reattach the printer cover 6 Replace the packing materials and put the printer in its box Maintenance 6 11 ...

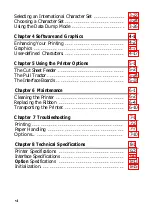
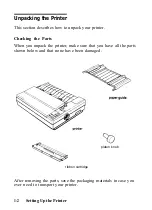
Page 182: ...Chapter 7 Troubleshooting Printing 7 2 Paper Handling 7 7 Options 7 10 Troubleshooting 7 1 ...

Page 183: ...cal device into the outlet to determine whether the outlet is operating properly The printer does not print l The ON LINE light is off Press the ON LINE button to set the printer on line l The ON LINE light is on but nothing is printed Check both ends of the interface cable between the printer and the computer Make sure your interface cable meets both the printer and the computer specifications Th...

Page 184: ...y contact your dealer or call the Consumer Information number listed in Where to Get Help l The ON LINE light is flickering but the printer does not print or it stops printing abruptly The print head is overheated Wait a few minutes the printer resumes printing automatically when the print head cools The print is faint or uneven l Printed characters have parts missing at the bottom The ribbon cart...

Page 185: ...ftware cannot be printed Check that the software is correctly installed for your printer l You selected a font using SelecType but the characters are printed in a different font Your software may be overriding your SelecType setting Check the font selected by your software l The wrong characters are printed The wrong graphics character set or international character set is selected Check the DIP s...

Page 186: ...rn l The text is printed with an extra blank line in between Two line feed signals are being sent Set DIP switch 2 4 off l Page length does not match the length of the paper Check the page length set by DIP switches 1 4 and 1 5 Check the page length set by your application software and adjust it if necessary l Regular gaps occur in the printout One inch skip over perforation may be set Set DIP swi...

Page 187: ...also select unidirectional printing by setting DIP switch 2 6 to off Unidirectional printing is slightly slower If the printer still does not print disconnect the printer from your computer and try the self test described in Chapter 1 If the self test works properly the printer is working and the problem probably lies in the computer the software or the cable If the self test does not work or if a...

Page 188: ...aper detector cannot sense it Move the paper a little to the left The PAPER OUT light should go off l Paper was inserted in the sheet guide and the platen rotated but paper was not fed Check that the paper release lever is pushed back to the single sheet position Check that the paper guide is installed properly The left and right edge guides may be too close together preventing the paper from feed...

Page 189: ...e the printer is on line ON LINE light on Press the ON LINE button once to set the printer off line then try feeding paper After feeding paper press the ON LINE button again to set the printer on line The paper release lever may be pushed back to the single sheet position When using the tractor be sure the paper release lever is pulled forward to the continuous paper position On the wide carriage ...

Page 190: ...are aligned with each other Also make sure the sprocket lock levers are locked and the sprocket covers are closed l The short tear off function does not work Make sure DIP switch 2 2 is set to on Short tear off is performed whenever the printer receives a full page of data or a form feed and no more data is received for three seconds Make sure your software sends a form feed at the end of a docume...

Page 191: ...back to the single sheet position Make sure paper is loaded in the cut sheet feeder s bin If only one sheet is left in the bin add more paper l Two or more sheets feed at the same time You may have loaded too many sheets in the cut sheet feeder s bin You may have forgotten to fan the stack of paper before loading it into the bin Remove the paper and fan it l The paper feed is crooked The paper may...

Page 192: ...s correctly inserted into the connector on the main board Check the specifications to make sure that you can use the interface with this printer Make sure that the cable matches the interface specifications Check that the DIP switches or jumpers on the interface board are set correctly Also make sure that the computer and interface settings match Troubleshooting 7 11 ...

Page 193: ...trical 8 8 Environment 8 8 Interface Specifications 8 9 Pin Assignments for the Parallel Interface 8 9 Interface Timing 8 11 Printing Enabled Disabled Signals and Control Conditions 8 12 Option Specifications 8 13 Cut Sheet Feeder 8 13 Initialization 8 15 Default Settings 8 15 Technical Specifications 8 1 ...

Page 194: ...tional logic seeking for text printing Unidirectional for graphics can also be switched to bidirectional by using the proper software command when DIP switch 2 6 is on 1 6 inch or programmable in increments of 1 360th of an inch 2 2 inches per sec 100 ms line Maximum printed characters Standard width printer Wide carriage printer Character spacing 10 cpi 80 136 10 cpi condensed 137 233 12 cpi 96 1...

Page 195: ...2 Epson Prestige 10 12 15 3 Epson Script 10 12 15 4 OCR B 10 5 OCR A 10 6 Epson Orator 10 7 Epson Orator S 10 8 Characters 96 standard ASCII character set including italic characters 15 international character sets 5 graphics character sets also called code page tables Paper Paper feeding methods Friction Built in push feed tractor with paper tension unit Pull tractor optional Cut sheet feeder opt...

Page 196: ...nches 7 2 to 14 3 inches 182 to 257 mm 182 to 364 mm 7 2 to 14 3 inches 7 2 to 14 3 inches 182 to 364 mm 182 to 364 mm 4 0 to 10 0 inches 4 0 to 16 0 inches 101 to 254 mm 101 to 406 mm No 6 6 54 x 3 62 inches 166 x 92 mm No 10 9 45 x 4 09 inches 240 x 104 mm 2 5 x 0 94 inch 63 5 x 23 8 mm minimum Printable area Single sheet 8 4 Technical Specifications ...

Page 197: ... and left margins to 0 9 inch 24 mm Continuous paper 0 51 inch 13mm minimum Note The minimum for the right and left margins increases to 0 98 inch 25 mm when printing on 10 inch wide paper on the standard width printer or on 15 to 16 inch wide paper on the wide carriage printer Technical Specifications 8 5 ...

Page 198: ... Continuous Envelope Label with backing 14 lb to 24 lb 14 lb to 22 lb 12 lb to 15 lb per sheet Maximum number sheets 3 12 lb to 24 lb 0 0025 to 0 0055 inches 0 065 to 0 14 mm 0 0025 to 0 0098 inches 0 065 to 0 25 mm 0 0063 to 0 0197 inches 0 16 to 0 52 mm 0 0075 inches Maximum 0 19 mm Number of copies Up to 3 sheets including the original Total thickness must not exceed 0 01 inches 0 25 mm 8 6 Tec...

Page 199: ...is between 40 F and 95 F 5 C to 35 C The relative humidity is between 10 and 80 percent Mechanical Ribbon Black ribbon cartridge 7753 7754 Life expectancy in Letter Quality characters at 48 dots character 2 million characters Film ribbon cartridge 7768 7770 Life expectancy in Letter Quality characters at 48 dots character 0 2 million characters MCBF For all components excluding print head 3 000 00...

Page 200: ...ronment Temperature Humidity Shock Vibration Operation angle 120 VAC 10 100 watts maximum 50 0 5 Hz 60 0 5 Hz 10 Mohms between AC power line and chassis Can withstand 1 0 kV rms applied for one minute or 1 2 kV applied for one second Operation 40 F to 95 F 5 C to 35 C Storage 22 F to 140 F 30 C to 60 C Operation 10 to 80 noncondensing Storage 5 to 85 noncondensing Operation Upto1Gwithin1ms Storage...

Page 201: ...ent information of 3 21 DATA 2 IN the 1st to 8th bits of parallel data 4 22 DATA 3 IN respectively Each signal is at HIGH 5 23 DATA 4 IN level when data is logical 1 and LOW 6 24 DATA 5 IN when it is logical 0 7 25 DATA 6 IN 8 26 DATA 7 IN 9 27 DATA 8 IN 10 28 ACKNLG OUT About an 11 microsecond pulse LOW indicates that data has been received and that the printer is ready to accept more data 11 29 ...

Page 202: ...und which is isolated from the logic ground Not used Twisted pair return signal ground level When this level becomes LOW the printer controller is reset to its power up state and the print buffer is cleared This level is normally HIGH its pulse width must be more than 50 microseconds at the receiving terminal This level becomes LOW when the printer is 1 in paper out state 2 off line 3 in error sta...

Page 203: ...be shielded and connected to the chassis of the host computer and the printer All interface conditions are based on TTL level Both the rise and the fall times of each signal must be less than 0 2 microseconds Data transfer must be carried out by observing the ACKNLG or BUSY signal Data transfer to this printer can be carried out only after receipt of the ACKNLG signal or when the level of the BUSY...

Page 204: ...ERROR On line Low J10 interface DC1 DC3 no effect High High Low Pulsed Enabled each normal character condition High DC1 Recv d High High Low Pulsed each character Enabled On line On line High Disabled Disabled DC3 Recv d DC1 DC3 no effect High Low High Pulsed each character Not generated High Low Off line High Low no effect l While printing is disabled character data is being received and acknowle...

Page 205: ...m 443 mm 2 7 kg Dimensions mounted on printer Bin and Stacker capacity Single sheet Up to 100 sheets of 24 lb 90g m 2 paper Up to 185 sheets of 17 lb 64g m 2 paper total thickness should be up to 0 59 inch or 15 mm MCBF 100 000 cycles Environmental condition Temperature Operation 40 F to 95 F 5 C to 35 C Storage 22 F to 140 F 30 C to 60 C Humidity Operation 15 to 80 noncondensing Storage 5 to 85 n...

Page 206: ...4 mm 257 to 364 mm 0 0028 to 0 005 inches 0 07 to 0 14 mm 17 to 24 lb 64 to 90 g m Printable area Note The use of 24 lb paper is available only at normal temperature Paper feed accuracy cannot be assured within 0 9 22 mm from either the top or bottom edges of the paper Storage condition Temperature 65 F to 70 F 18 C to 22 C Humidity 40 to 60 8 14 Technical Specifications ...

Page 207: ...hen the printer is initialized Item Reset to Top of form position Current paper position Left and right margins Line spacing Vertical tab position Cancelled 1 6 inch line spacing Cleared Horizontal tab positions VFU channel Font selection Every eight characters Channel 0 Hardware The current DIP switch setting Software The current SelecType setting Condensed mode Character spacing Justification Ha...

Page 208: ...leared when the printer is initialized by turning on the power or by an INIT signal Note The user defined character set is not cleared when the printer is initialized with the software command ESC 8 16 Technical Specifications ...

Page 209: ...Arranged by Topic 9 8 Printer Operation 9 8 M S B C o n t r o l 9 11 Data Control 9 12 Vertical Motion 9 13 Horizontal Motion 9 19 Overall Printing Style 9 22 Print Size and Character Width 9 24 Print Enhancement 9 28 Word Processing 9 33 Character Sets 9 34 User defined Characters 9 36 Graphics 9 38 Command Summary 9 1 ...

Page 210: ...rately the commands are divided into the following subjects Printer operation Print size and character width MSB control Print enhancement Data control Word processing Vertical motion Character sets Horizontal motion User defined characters Overall printing style Graphics Each command description has a format section and a comment section The format section gives the ASCII decimal and hexadecimal ...

Page 211: ...W n Decimal 27 87 n Hexadecimal 1B 57 n In this case n can be either 1 on or 0 off to begin or end double width printing You can use either of the following commands to turn on double width print from BASIC LPRINT CHR 27 CHR 87 CHR 1 LPRINT CHR 27 W CHR 1 For the following commands that use only 0 or 1 for the variable either the decimal or hexadecimal values 1 and 0 or the ASCII characters 1 and ...

Page 212: ...mn For example you press the control key and A at the same time to send the value 1 Some application programs that use this system cannot use Control and many programs use the control keys for other purposes Dec Hex Ctrl Key 0 00 1 01 2 02 3 03 4 04 5 05 6 06 7 07 8 08 9 09 10 OA 11 OB 12 OC 13 OD A B C D E F G H I J K L M Dec Hex Ctrl Key 14 OE N 15 OF O 16 10 P 17 11 Q 18 12 R 19 13 S 20 14 T 21...

Page 213: ...ESC 38 26 ESC 40 28 Beeper 9 12 Backspace 9 20 Tab Horizontally 9 21 Line Feed 9 14 Tab Vertically 9 17 Form Feed 9 13 Carriage Return 9 12 Select Double width Mode one line 9 26 Select Condensed Mode 9 25 Select Printer 9 8 Cancel Condensed Mode 9 26 Deselect Printer 9 9 Cancel Double width Mode one line 9 27 Cancel Line 9 12 Delete Character 9 9 Select Double width Mode one line 9 27 Select Cond...

Page 214: ...47 ESC H 72 48 ESC J 74 4A ESC K 75 4B ESC L 76 4C ESC M 77 4D Select Italic Mode 9 34 Cancel Italic Mode 9 35 Enable Printable Characters 9 37 Enable Upper Control Codes 9 37 Copy ROM to RAM 9 36 Select Unidirectional Mode one line 9 9 Set MSB to 0 9 11 Set MSB to 1 9 11 Reassign Graphics Mode 9 40 Initialize Printer 9 8 Set n 60 inch Line Spacing 9 16 Set Vertical Tabs 9 1 7 Set Page Length in L...

Page 215: ...ternational Character Set 9 35 Select Superscript Mode 9 29 Select Subscript Mode 9 30 Cancel Superscript Subscript Mode 9 30 Turn Unidirectional Mode On Off 9 10 Turn Double width Mode On Off 9 27 Select High speed Double density Graphics Mode 9 38 Select Quadruple density Graphics Mode 9 39 Set Relative Print Position 9 21 Select Justification 9 33 Set Vertical Tabs in Channels 9 18 Select 15 CP...

Page 216: ...0 Initialize Printer Comments Resets the printer mode and clears the current print line preceding the command DC1 Select Printer Format ASCII code DC1 Decimal 17 Hexadecimal 11 Comments Returns the printer to the selected state if it has been deselected by the printer deselect code DC3 It does not select the printer if it has been switched off line by the ON LINE button Note DC1 and DC3 do not wor...

Page 217: ...mal 7F Comments Removes the last text character on the print line but does not affect control codes ESC Select Unidirectional Mode one line Format ASCII code Decimal ESC 27 60 Hexadecimal 1B 3C Comments Printing is normally bidirectional This command selects unidirectional printing for one line only It is cancelled by a carriage return The print head moves to the extreme left home position and pri...

Page 218: ... more accurate positioning ESC EM Control Cut Sheet Feeder Format ASCII code ESC EM n Decimal 27 25 n Hexadecimal 1B 19 n Comments The following values can be used for n 0 Turns mode off 4 Turns mode on R Ejects a sheet No paper is loaded The command should not be used unless the cut sheet feeder is installed It is ignored if any value other than 0 4 or R is used for n The cut sheet feeder mode ca...

Page 219: ...ing data to 0 Some computers always send data with the MSB set to 1 which means that italics or character graphics are always printed ESC can overcome this problem ESC Set MSB to 1 Format ASCII code ESC Decimal 27 62 Hexadecimal 1B 3E Comments Sets the MSB bit of all incoming data as 1 ESC Cancel MSB Control Format ASCII code ESC Decimal 27 35 Hexadecimal 1B 23 Comments Cancels the MSB control set...

Page 220: ... l 0 D Carriage Return Comments Prints the data in the print buffer and returns the print position to the left margin A line feed is added if the AUTO FEED XT line on the parallel interface is held LOW CAN Format ASCII code CAN Decimal 24 Hexadecimal 18 Cancel Line Comments Clears all text on the print line but does not affect control codes 9 12 Command Summary ...

Page 221: ... Set Page Length in Lines Comments Sets the page length to n lines in the current line spacing The value of n must be from 1 to 127 lines The top of form position is reset to the current line Overrides the DIP switch setting for page length ESC C 0 Set Page Length in Inches Format ASCII code ESC C 0 n Decimal 27 67 0 n Hexadecimal 1B 43 00 n Comments Sets the page length to n inches The value of n...

Page 222: ...etting is cancelled by ESC O ESC C or ESC C 0 The value of n must be from 1 to 127 Overrides the DIP switch setting for 1 inch skip over perforation ESC O Cancel Skip Over Perforation Format A S C I I c o d e E S C O Decimal 27 79 Hexadecimal 1B 4F Comments Cancels the skip over perforation set by ESC N Overrides the DIP switch setting for 1 inch skip over perforation LF Line Feed Format ASCII cod...

Page 223: ...ing ASCII code ESC 2 Decimal 27 50 Hexadecimal 1B 32 Comments Sets the line spacing to 1 6 of an inch for subsequent line feed commands This line spacing is the default at power on ESC Set n 360 inch Line Spacing Format ASCII code ESC n Decimal 27 43 n Hexadecimal 1B 2B n Comments Sets line spacing to n 360 of an inch for subsequent line feed commands The value of n must be from 0 to 255 Command S...

Page 224: ...cimal 27 65 n Hexadecimal 1B 41 n Comments Sets the line spacing to n 60 of an inch for subsequent line feed commands The value of n must be from 0 to 85 ESC J Perform n 180 inch Line Feed Format ASCII code ESC J n Decimal 27 74 n Hexadecimal 1B 4A n Comments Advances the paper n 180 of an inch The value of n must be from 0 to 255 This command produces an immediate line feed but does not affect su...

Page 225: ...ne ESC B Set Vertical Tabs Format ASCII code ESC B n1 n2 0 Decimal 27 66 n1 n2 0 Hexadecimal 1B 42 n1 n2 00 Comments Sets up to 16 vertical tabs in the current line spacing Tab settings are not affected by subsequent changes in line spacing The tab settings are entered as n1 n2 etc all from 1 to 225 in ascending order The 0 value null indicates the end of the command All settings are stored in cha...

Page 226: ...rom 0 to 7 Therefore up to eight sets of vertical tabs can be set The channels are selected by ESC To clear the tabs in channel c use ESC b c 0 ESC Select Vertical Tab Channel Format ASCII code ESC c Decimal 27 47 c Hexadecimal 1B 2F c Comments This command is used to select the vertical tab channel with the value of c from 0 to 7 All subsequent VT commands use the channel selected by this command...

Page 227: ...e 1 as in left not the numeral one The minimum space between the margins is the width of one double width 10 cpi character ESC Q Format ASCII code ESC Q n Decimal 27 81 n Hexadecimal 1B 51 n Set Right Margin Comments Sets the right margin to n columns in the current character size Settings made in the proportional mode are treated as 10 cpi This command clears previous tab settings and all previou...

Page 228: ...print position of subsequent data is moved back to the point at which graphics printing started ESC Set Absolute Print Position Format ASCII code ESC n1 n 2 Decimal 27 36 n1 n2 Hexadecimal 1B 24 n1 n2 Comments This sequence specifies the distance from the current left margin that subsequent characters are to be printed using this formula total number of dots n1 n2 x 256 Each unit equals 1 60th of ...

Page 229: ...he resulting number using this formula total number of dots n1 256 x n2 The command is ignored if it would move the print position outside the current margins A unit is 1 120th of an inch in draft and 1 180th of an inch in Letter Quality or proportional modes HT Tab Horizontally Format ASCII code HT Decimal 9 Hexadecimal 09 Comments Advances the print position to the next horizontal tab setting Th...

Page 230: ...n power is turned on or after an ESC command are at every eight characters The tab settings are not affected by changes in cpi The tab positions in proportional printing are determined by the 10 cpi character size Overall Printing Style ESC x Select Letter Quality or Draft Format ASCII code ESC x n Decimal 27 120 n Hexadecimal 1B 78 n Comments The following values can be used for n 0 Selects draft...

Page 231: ...e panel setting ESC Master Select Format ASCII code ESC n Decimal 27 33 n Hexadecimal 1B 21 n Comments Selects any valid combination of the following modes 10 cpi 12 cpi proportional condensed emphasized double strike double width italic and underline The variable n identifies the mode or combination of modes To find the value of n use the following table to add up either the decimal or hexadecima...

Page 232: ... normally used to cancel 12 or 15 cpi ESC M Format ASCII code ESC M Decimal 27 77 Hexadecimal 1B 4D Select 12 CPI Comments Selects 12 character per inch printing ESC g Format ASCII code ESC g Decimal 27 103 Hexadecimal 1B 67 Select 15 CPI Comments Selects 15 character per inch printing and cancels 10 or 12 cpi Cannot be combined with condensed mode 9 24 Command Summary ...

Page 233: ...receives less space than a wide letter like W Proportional character widths are given in the Appendix Proportional mode is available only in Roman and Sans Serif fonts SI Select Condensed Mode Format ASCII code SI Decimal 15 Hexadecimal OF Comments Prints characters at about 60 percent of their normal width For example the condensed 10 cpi mode has 17 characters per inch Condensed mode cannot be c...

Page 234: ... panel DC2 Cancel Condensed Mode Format ASCII code DC2 Decimal 18 Hexadecimal 12 Comments Cancels condensed mode set by SI ESC SI or SelecType and returns printing to normal so Format ASCII code s o Decimal 14 Hexadecimal 0E Select Double width Mode one line Comments Doubles the width of all characters on one line This mode is cancelled by LF FF VT or DC4 9 26 Command Summary ...

Page 235: ...code ESC W n Decimal 27 87 n Hexadecimal 1B 57 n Comments Doubles the width of all characters The following values can be used for n 1 Turns mode on 0 Turns mode off DC4 Cancel Double width Mode one line Format ASCII code DC4 Decimal 20 Hexadecimal 14 Comments Cancels double width mode selected by SO or ESC SO but not double width mode selected by ESC W or ESC Command Summary 9 27 ...

Page 236: ...ine spacing to compensate for the height of these characters Cannot be used with the pull tractor Print Enhancement ESC E Select Emphasized Mode Format ASCII code ESC E Decimal 27 69 Hexadecimal 1B 45 Comments Makes text bolder by printing each dot twice with the second dot printed slightly to the right of the first ESC F Format ASCII code ESC F Decimal 27 70 Hexadecimal 1B 46 Cancel Emphasized Mo...

Page 237: ...ble strike Mode Format ASCII code ESC H Decimal 27 72 Hexadecimal 1B 48 Comments Cancels the double strike mode selected by ESC G ESC S0 Format Select Superscript Mode ASCII code Esc S 0 Decimal 27 83 0 Hexadecimal 1B 53 00 Comments Prints characters about two thirds of the normal character height in the upper part of the character space Command Summary 9 29 ...

Page 238: ...53 01 Comments Prints characters about two thirds of the normal character height in the lower part of the character space ESC T Cancel Superscript Subscript Mode Format ASCII code ESC T Decimal 27 84 Hexadecimal 1B 54 Comments Cancels either superscript or subscript 9 30 Command Summary ...

Page 239: ... the first 3 variables n1 must be 3 n2 must be 0 m must be 1 The value of d1 determines the location of the score d1 1 for underline d2 2 for strike through d2 3 for overscore The value of d2 determines whether the score line is single double broken or continuous d2 0 Cancel the score line selected by d1 d2 1 Single continuous line d2 2 Double continuous line d2 5 Single broken line d2 6 Double br...

Page 240: ...ed with HT or ESC are not underlined ESC q Format ASCII code ESC q n Decimal 27 113 n Hexadecimal 1B 71 n Select Character Style Comments The following values can be used for n 0 Selects normal 1 Selects outline 2 Selects shadow 3 Selects outline with shadow This command is valid for all characters with the exception of character codes BOH to DFH F4H and F5H 176 to 223 244 and 245 decimal in the g...

Page 241: ...er becomes full HT and BS are invalid except in n 0 mode For n 3 there must be no carriage returns within a paragraph ESC SP space Set Intercharacter Space Format ASCII code ESC SP n Decimal 27 32 n Hexadecimal 1B 20 n Comments Sets the amount of space added to the right of each character in addition to the space already allowed in the design of the character The number of dots is determined by n ...

Page 242: ...r set 1 Selects a graphics character set 2 Selects the user defined character table and remaps user defined codes O 127 to 128 255 Overrides the function of DIP switch 1 7 Note that the value of n must equal 00 hex 01 hex or 02 hex ESC 4 Format ASCII code ESC 4 Decimal 27 52 Hexadecimal 1B 34 Select Italic Mode Comments Causes characters from the italic character set to be printed This command is ...

Page 243: ...ormat ASCII code ESC R n Decimal 27 82 n Hexadecimal 1B 52 n Comments Selects one of the international character sets The following values can be used for n 0 USA 8 Japan 1 France 9 Norway 2 Germany 10 Denmark II 3 England 11 Spain II 4 Denmark I 12 Latin America 5 Sweden 13 Korea 6 Italy 64 Legal 7 Spain I Overrides the DIP switch settings of the international character set Command Summary 9 35 ...

Page 244: ...his command allows characters to be redefined in the currently selected mode When defining characters DIP switch 2 5 must be set to off ESC Copy ROM to RAM Format ASCII code ESC 0 n 0 Decimal 27 58 0 n 0 Hexadecimal 1B 3A 00 n 00 Comments This sequence copies the characters in ROM to RAM so that specific characters can be redefined The variable n represents the font family 0 Roman 4 Script 1 Sans ...

Page 245: ... Enable Printable Characters Format ASCII code ESC 6 Decimal 27 54 Hexadecimal 1B 36 Comments When a graphics character set is selected ESC 6 enables the printing of codes 128 through 159 decimal as characters not control codes See the Appendix for characters printed ESC 7 Format ASCII code ESC 7 Decimal 27 55 Hexadecimal 1B 37 Enable Upper Control Codes Comments When a graphics character set is s...

Page 246: ... number of columns n1 n2 x 256 ESC L Select Double density Graphics Mode Format ASCII code ESC L n1 n2 Decimal 27 76 n1 n2 Hexadecimal 1B 4C n1 n 2 Comments Turns on 8 pin low speed double density graphics mode The total number of columns n1 n2 x 256 ESC Y Format Select High speed Double density Graphics Mode ASCII code ESC Y n1 n 2 Decimal 27 89 n1 n2 Hexadecimal 1B 59 n1 n2 Comments Turns on 8 p...

Page 247: ...cimal 1B 2A m n1 n 2 Comments Turns on graphics mode m See the following table for details on the available modes The total number of columns n1 n2 x 256 Option Single density Doubledensity High speed double density Quadruple density CRT I CRT II Single density Double density CRT III Triple density Hex density Pins m Horiz density dots in 8 0 60 8 1 120 8 2 120 8 3 240 8 4 80 8 6 90 24 32 60 24 33...

Page 248: ...t ASCII code ESC s m Decimal 27 63 s m Hexadecimal 1B 3F s m Comments Changes from one graphics mode to another The variable s is a character K L Y or Z The variable m corresponds to the mode m in the ESC command 9 40 Command Summary ...

Page 249: ...Appendix Proportional Width Table A 2 Character Sets A 6 A 1 ...

Page 250: ...nternational characters Also see the descriptions of the ESC R and ESC t commands in Chapter 9 for information on how to use these characters The following width table shows each character its ASCII code hexadecimal and its width If there are two numbers in the width column the second one is for the superscript subscript version of the character Code CHR Width Code CHR Width 20 21 22 23 24 25 26 2...

Page 251: ...8 36 24 36 24 36 24 36 24 36 24 36 24 36 24 42 28 36 24 42 28 36 24 36 24 30 20 24 16 30 20 24 16 30 20 30 20 18 12 30 20 36 24 30 20 64 65 66 67 68 69 6A 6B 6C 6D 6E 6F 70 71 72 73 74 75 76 77 78 79 7A 7B 7c 7D 7E d e f g h i j k l m n 0 P q r s t u v w x y z 36 24 30 20 24 16 36 24 36 124 18 12 24 16 36 24 18 12 42 28 36 24 30 20 36 24 36 24 30 20 30 20 24 16 36 24 36 24 42 28 30 20 36 24 30 20 ...

Page 252: ...24 42 28 30 20 30 20 18 12 30 20 36 24 36 24 36 24 30 20 30 20 30 20 30 20 30 20 30 20 30 20 30 20 Code CHR B0 B1 B2 B3 B4 B5 B6 B7 B8 B9 BA BB BC BD BE BF co Cl C2 C3 C4 C5 C6 C7 C8 C9 CA CB CC CD CE CF DO D1 D2 Width 30 20 30 20 30 30 30 30 30 30 30 30 30 30 30 30 30 30 30 30 30 30 30 30 30 30 30 30 30 30 30 30 30 30 30 30 30 30 30 A 4 ...

Page 253: ... EC ED EE EF FO F1 F2 F3 F4 F5 F6 F7 30 30 30 30 30 30 30 30 30 30 30 30 30 30 20 30 20 30 20 30 20 30 20 30 20 30 20 30 20 30 20 30 20 30 20 30 20 30 20 30 20 30 20 30 20 30 30 30 30 30 30 30 30 F8 F9 FA FB FC FD FE 30 30 30 30 30 30 30 24 16 30 20 36 24 36 24 30 20 30 20 30 20 42 28 18 12 30 20 30 20 36 24 36 24 30 20 36 24 A 5 ...

Page 254: ... character sets are selected by DIP switches 1 1 1 2 and 1 3 when DIP switch 1 7 is on For the graphics character sets the ESC 6 or ESC 7 software command lets you select whether to print hex codes 80 to 9F as characters ESC 6 or control codes ESC 7 Italic Character Set CODE 0 1 2 3 4 5 6 7 8 9 A B C D E F 0 1 2 3 4 5 6 7 8 9 A B C D E F A 6 ...

Page 255: ...cter Sets PC 437 United States Epson Extended Graphics code 0 1 2 3 4 5 6 7 8 9 A B C D E F 0 1 2 3 4 5 6 7 8 9 A B C D E F PC 850 Multilingual CODE 0 1 2 3 4 5 6 7 8 9 A B C D E F 0 1 2 3 4 5 6 7 8 9 A B C D E F A 7 ...

Page 256: ...Character Sets PC 860 Portugal CODE 0 1 2 3 4 5 6 7 8 9 A 8 C D E F 0 1 2 3 4 5 6 7 8 9 A B C D E F PC 863 Canada French CODE 0 1 2 3 4 5 6 7 8 9 A B C D E F 0 1 2 3 4 5 6 7 8 9 A B C D E F A 8 ...

Page 257: ...PC 865 Norway CODE 0 1 2 3 4 5 6 7 8 9 A B C D E F 0 1 2 3 4 5 6 7 8 9 A B C D E F A 9 ...

Page 258: ...ernal control through the parallel connector the printer will automatically feed the paper one line after receiving a CR code baud rate A measure of the speed of data transmission Usually expressed in bits per second or bps bidirectional printing Printing in which the print head alternates printing a line left to right then the next line right to left and so on Because the head prints in both dire...

Page 259: ...approximately 60 percent of the width of standard characters For example condensed 10 characters per inch cpi has 17 characters per inch Useful for fitting wide tables or spreadsheets onto the paper continuous paper Paper which has sprocket feed holes on both long edges is perforated between pages and is supplied in a folded stack Also called fanfold paper control code In addition to the codes for...

Page 260: ...ge dot graphics A graphic design formed by patterns of dots Also called bit image graphics dot matrix A method of printing in which each letter or symbol is formed by a pattern matrix of individual dots double height printing Printing in which each character is twice as tall as normal double strike printing A way of producing bolder characters Each character is printed twice Can only be used in dr...

Page 261: ... designated by a family name form In printer terminology a form normally refers to a page form feed Refers to both a control code and a panel button that advances the paper to the top of the next page graphics character sets The graphics character sets contain international accented characters Greek characters and character graphics for printing lines comers and shaded areas Also called code page ...

Page 262: ...e position to which the paper is automatically loaded It can be adjusted by using the micro adjustment feature memory The printer like a computer has a memory When you print a file from a computer the contents of the file are transferred quickly from the computer s memory to the printer s memory The printer then prints information from its own memory at a much slower rate This way of printing free...

Page 263: ...y decimal number between 0 and 255 can be expressed by a two digit hex number on line When the printer is on line it is able to communicate with the computer connected to it paper out sensor A small switch behind the platen that sends a signal when it is not in contact with paper informing the printer and remote computer that there is no paper loaded and causing the PAPER OUT light to go on paper ...

Page 264: ...ous paper through the printer RAM Acronym for Random Access Memory The portion of the printer s memory used as a buffer and as a place for storing user defined characters All data stored in RAM is lost when the printer is turned off reset To return a printer to its defaults either by a command an INIT signal code or by turning the printer off and on ROM Acronym for Read Only Memory The portion of ...

Page 265: ...e standard or default pitch tractor The part of the printer that moves continuous paper through the printer by its sprockets gripping the holes in continuous paper 12 cpi A character spacing in which each character is slightly narrower than normal so that there are 12 characters per inch unidirectional printing Printing in one direction only Allows more precise vertical alignment than bidirectiona...

Page 266: ...25 see also Graphics character sets Command summary 9 1 40 CONDENSED button 3 4 Condensed mode 3 10 4 4 9 25 26 Connecting printer 1 22 24 Consumer Information number Intro 6 Continuous paper loading 2 8 15 switching to single sheets 2 16 22 using 2 8 15 Control keys 9 4 Control panel 3 2 5 buttons 3 3 features 3 5 lights 3 2 Copies number of 8 6 Courier font 3 8 Cut sheet feeder 5 2 23 inserting ...

Page 267: ...25 2 28 30 8 4 8 6 7 Environment specifications 8 8 Epson Extended Graphics 3 13 3 25 A 7 F Film ribbon cartridges 2 24 25 6 4 FONT button 3 4 3 6 FORM FEED button 3 3 G Graphics 4 1 28 character sets 3 13 3 24 25 A 7 9 designing 4 13 16 mode command 4 11 9 39 H Help Intro 6 I IEEE 488 interfaces 5 37 Initialization default settings 8 15 16 specifications 8 15 16 Input buffer 3 14 8 3 Interface bo...

Page 268: ...ns 7 10 11 specifications 8 13 14 Orator font 3 9 Orator S font 3 10 Outline printing 4 6 9 32 Overlining 4 5 9 31 P Page length 3 15 9 13 selection 3 13 Paper length 8 4 specifications 8 3 7 weight 8 6 width 8 4 Paper feeding methods 2 2 3 8 3 speed 8 2 Paper guide attaching 1 13 14 Paper handling 2 1 30 problems and solutions 7 7 9 PARER OUT light 3 2 Paper release lever 2 2 3 Paper thickness 8 ...

Page 269: ...characters 4 26 9 25 A 2 5 Protective materials removing 1 3 4 Pull tractor 5 24 36 installation 5 24 paper handling 5 27 33 removing 5 33 36 4 Index R READY light 3 2 Reloading paper 2 7 Replacement ribbons 6 4 Ribbon cartridge installing 1 8 13 replacing 6 4 9 specifications 8 7 ROM characters 4 25 9 36 Roman font 3 8 S Sans Serif font 3 8 Script font 3 9 SelecType 3 4 3 6 7 settings 3 6 Self te...

Page 270: ...4 26 27 9 30 Superscripts 4 6 4 26 27 9 29 T Tear off mode 3 14 position adjusting 3 20 21 Technical specifications 8 1 16 Testing printer 1 15 21 5 9 11 Thin paper 2 25 Transporting printer 6 10 11 Troubleshooting 7 1 11 Typestyles selecting 3 6 10 U Underlining 4 5 9 31 32 Unidirectional printing 3 12 3 14 8 2 9 9 10 Unpacking printer 1 2 4 User defined characters 4 17 28 W Weight printer 8 8 In...

Page 271: ......

Page 272: ...sted briefly for quick reference For a more detailed explanation see the page reference in Chapter 9 Variables are not included in this quick reference due to their complexity For those codes that contain variables such as ESC Q n for setting the right margin see Chapter 9 ...

Page 273: ...de 9 25 15 OF Select Condensed Mode 9 26 18 12 Cancel Condensed Mode 9 26 SO ESC SO ESC W DC4 14 14 07 20 OE OE 57 14 Select Double width Mode one line Select Double width Mode one line Turn Double width Mode On Off Cancel Double 9 26 9 27 9 27 ESC w width Mode one line 9 27 119 77 Turn Double height Mode On Off I 9 28 Print Enhancement ASCII Dec Hex Description Page ESC E 69 45 Select Emphasized ...

Page 274: ......

Page 275: ......

Page 276: ......

Page 277: ...sted briefly for quick reference For a more detailed explanation see the page reference in Chapter 9 Variables are not included in this quick reference due to their complexity For those codes that contain variables such as ESC Q n for setting the right margin see Chapter 9 ...

Page 278: ......

Page 279: ......

Reviews: