38
How To Scan
■
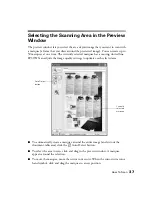
To resize the marquee, move the cursor to an edge or corner of the dotted line.
When the cursor turns into an arrow symbol, click and drag to resize the
selection area.
■
To zoom to the selected area, click the
Zoom
button. If you have multiple
marquees, the currently selected one appears in the Zoom preview.
■
To erase a marquee, click the marquee and click the
Delete button.
■
To create multiple marquees of the same dimensions, select one marquee, then
click the
Duplicate button.
■
To scan all selected areas at once, click the
All
button.
Scanning Tips
Getting the best scan possible depends on several factors, including the quality of your
original and the resolution you select. The better your original is, the better your scan
will be. To get the best possible scan, keep the document table clean, and make sure
the document is flat against the glass surface. You can make many corrections in your
scanning software. For additional photo retouching, use an image editing program
such as Adobe Photoshop Elements.
Selecting Resolution
Resolution refers to how many dots per inch (dpi) or dots per centimeter (dpcm) your
image contains. The best resolution for a scanned image depends on the type of image
you’re scanning and your final output device.
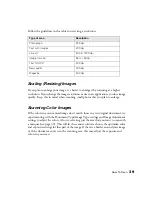
If you want to print the image in its original size (1:1 ratio), scan it at 300 dpi. To
enlarge photographs or scan documents for your OCR software application, select a
resolution of 400 to 600 dpi. If you’re scanning an image to view on-screen,
choose 96 dpi.
Summary of Contents for 15000 - GT - Flatbed Scanner
Page 1: ...Epson GT 15000 User s Guide ...
Page 6: ...6 Contents ...
Page 10: ...10 Welcome ...
Page 18: ...18 Getting Started ...
Page 40: ...40 How To Scan ...
Page 52: ...52 Using Optional Equipment ...
Page 66: ...66 Solving Problems ...
Page 76: ...76 Requirements and Notices ...
Page 80: ...80 Index ...

