Data Dump Mode
Data dump mode is a special feature that allows experienced users
to find the cause of communication problems between
the
printer
and computer. In data dump mode, the printer produces an exact
printout of the codes it receives.
To use data dump mode, follow these steps:
1. Make sure paper is loaded and the printer is off.
2. Hold down both the
LF/FF
and
LOAD/EJECT
buttons while you
turn on the printer.
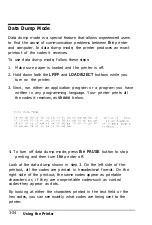
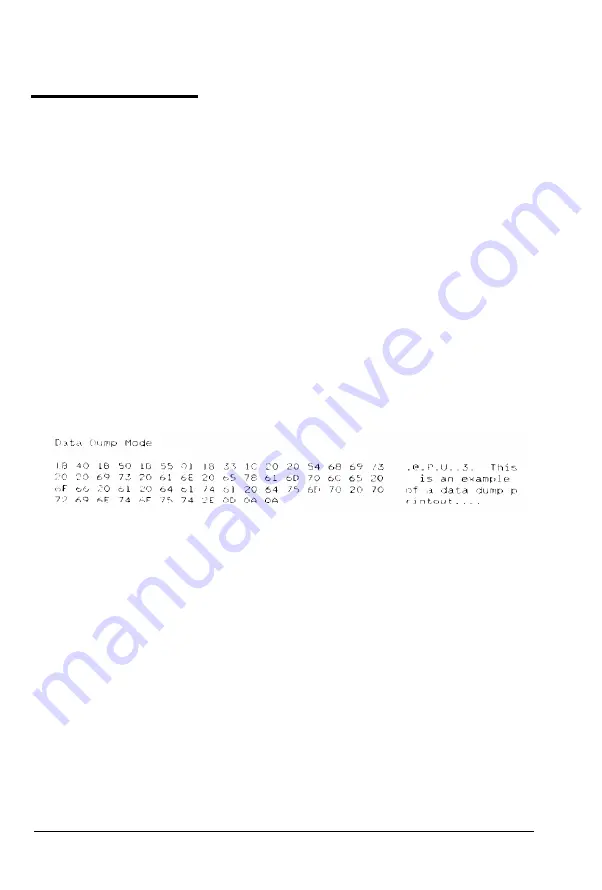
3. Next, run either an application program or a program you have
written in any programming language. Your printer prints all
the codes it receives, as
shown
below.
4. To turn off data dump mode, press
the PAUSE
button to stop
printing and then turn
the
printer off.
Look at the data dump shown in step 3. On the left side of the
printout, all the codes are printed in hexadecimal format. On the
right side of the printout, the same codes appear as printable
characters or, if they are nonprintable codes-such as control
codes-they appear as dots.
By looking at either the characters printed in the text field or the
hex codes, you can see exactly what codes are being sent to the
printer.
3-24
Using the Printer
Summary of Contents for 5000/5500
Page 1: ......
Page 13: ...Introduction Printer Parts 4 Introduction ...
Page 75: ...Typestyles Epson Script C Epson Orator Epson Orator S OCR B 3 22 Using the Printer ...
Page 109: ...Options 6 12 Troubleshooting ...
Page 153: ......

