background image

EPSON LQ-570e

16 -


EPSON LQ-570e

4/00

2. While holding down the 

Pause

 button, turn on the printer. 

It enters the bidirectional adjustment mode, then prints 
instructions and the first set of alignment patterns.

3. As described in the instructions, compare the alignment 

patterns and select the pattern with the best alignment.

4. Follow the instructions to print the remaining sets of 

alignment patterns and select the pattern with the best 
alignment in each set.

5. After you select the best pattern in the final set of alignment 

patterns, turn off the printer and exit the bidirectional 
adjustment mode. Your selections are saved automatically.

Printing a Self Test

Running the self test helps you determine whether the printer 
or the computer is causing a printing problem. You can print 
the self test using either single sheets or continuous paper. 

1. Make sure paper is loaded and the printer is turned off.

Whenever you turn off the printer, wait at least 5 

seconds before turning it back on; otherwise you may 

damage the printer.

2. To run the test using the Draft font, hold down the 

LF/FF


button while you press the 

Operate

 button to turn on the 

printer. To run the test using the printer’s letter-quality 
fonts, hold down the 

Load/Eject

 button while you turn on 

the printer. Either self test can help you determine the 
source of your printing problem; however, the draft test 
prints faster than the letter-quality test.

After a few seconds, the printer loads the paper 
automatically and begins printing the self test. A series of 
characters is printed.

To temporarily stop the self test, press the 

Pause


button. To resume the test, press the 

Pause

 button 

again.

3. To end the self test, press the 

Pause

 button to stop printing 

and the 

Load/Eject

 button to eject the printed page. Then 

turn off the printer.

If the self test results are satisfactory, the printer is working 
properly and the problem probably results from your printer 
driver settings, application settings, computer, or interface 
cable. (Be sure to use a shielded interface cable.)

If the self test does not print properly, there is a problem with 
the printer. 

Printing a Hex Dump 

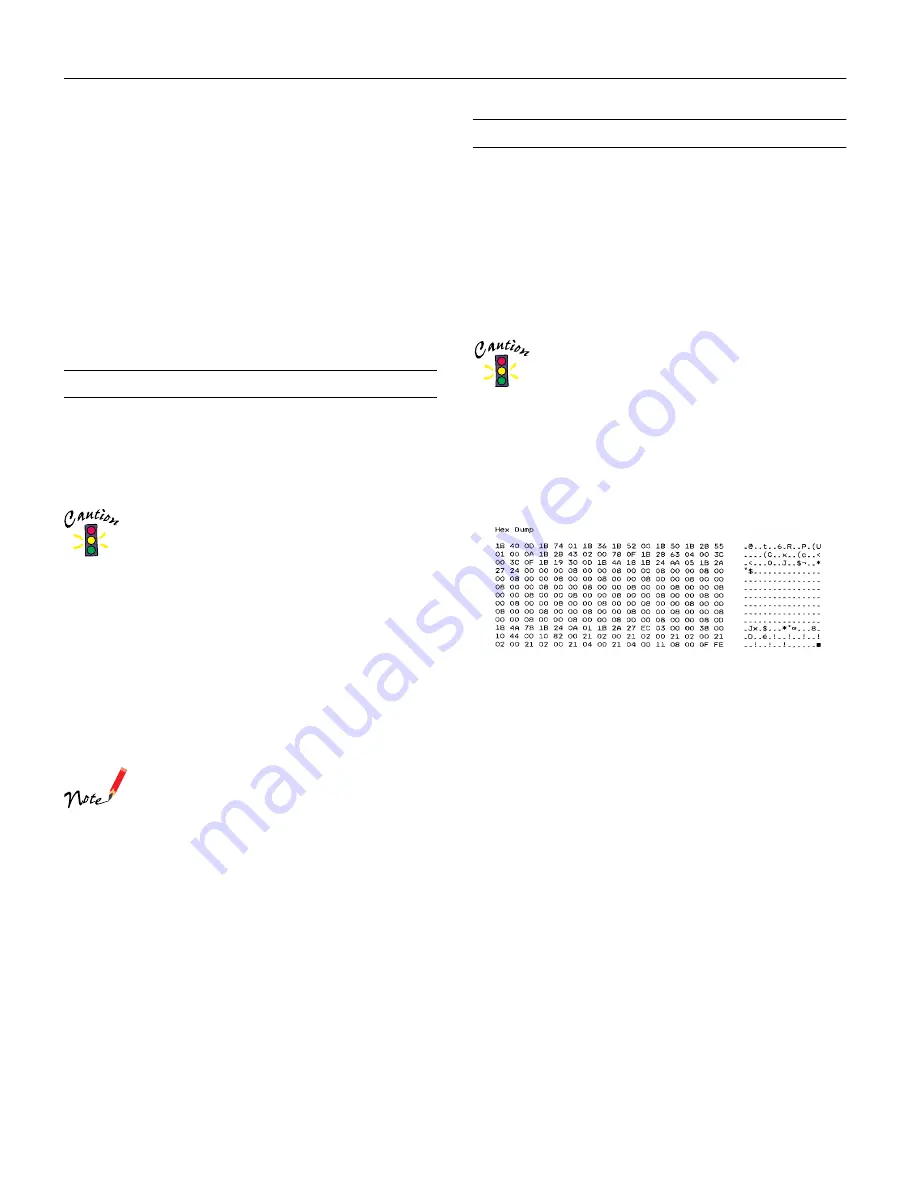
If you are an experienced user or a programmer, you can print a 
hexadecimal dump to isolate communication problems between 
the printer and your software program. In hex dump mode, the 
printer prints all data received from the computer as 
hexadecimal values.

You can print a hex dump using either single sheets or 
continuous paper. 

1. Make sure paper is loaded and the printer is turned off.

Whenever you turn off the printer, wait at least 5 

seconds before turning it back on; otherwise you may 

damage the printer.

2. To enter hex dump mode, hold down both the 

LF/FF

 and 

Load/Eject

 buttons while you turn on the printer.

3. Open a software application and send a print job to the 

printer. Your printer prints all the codes it receives in 
hexadecimal format.

If characters are printable, they appear in the right column 
as ASCII characters. Nonprintable codes, such as control 
codes, are represented by dots. By comparing the characters 
printed in the right column with the printout of the 
hexadecimal codes, you can check the codes the printer is 
receiving.

4. To exit hex dump mode, press the 

Pause

 button to stop 

printing and the 

Load/Eject

 button to eject the printed 

page(s). Then turn off the printer.

Summary of Contents for 570e - LQ B/W Dot-matrix Printer

Page 1: ...ially useful for printing on continuous multipart forms Roll paper holder 8310 Allows you to use your printer with 8 5 inch roll paper like that used with telex machines Front sheet guide C814231 Allows you to easily load single sheets including single sheet mulitpart forms from the front paper slot paper guide cover paper guide front cover closed edge guides printer cover control panel paper rele...

Page 2: ...5 cpi Draft condensed 257 cps at 17 cpi 300 cps at 20 cpi LQ 100 cps at 10 cpi 120 cps at 12 cpi 150 cps at 15 cpi LQ condensed 171 cps at 17 cpi 200 cps at 20 cpi Printing direction Bidirectional logic seeking for text and graphics printing Unidirectional text or graphics printing can be selected using software commands Line spacing 1 6 inch or programmable in 1 360 inch increments Printable colu...

Page 3: ... every 2 pt EPSON Roman T 10 5 8 32 pt every 2 pt EPSON Sans Serif H 10 5 8 32 pt every 2 pt Barcode fonts EAN 13 EAN 8 Interleaved 2 of 5 UPC A UPC E Code 39 Code 128 POSTNET Character tables 1 Italic table and 12 graphical character tables 35 graphical character tables are available in some countries Character sets 14 international character sets and 1 legal character set Reliability Total print...

Page 4: ...Perforated edges up to 0 035 inch 0 9 mm Weight not multipart 14 to 22 lb 52 to 82 g m2 Weight 1 multipart sheet 12 to 15 lb 40 to 58 g m2 Binding Point glue or paper staples on both sides front bottom or rear entry The continuous multipart forms should be securely joined together along the left and right edges by crimping Crimping should be pressed in from the original sheet side and go completel...

Page 5: ...uous paper A The minimum top and bottom margins above and below the perforation are 0 17 inch 4 2 mm B The minimum left and right margins are 0 51 inch 13 mm The maximum paper width is 10 inches 254 mm The maximum printable width is 8 inches 203 2 mm For continuous paper wider than 9 inches 229 2 mm the side margins increase proportionally to match the width of the paper Roll paper A The minimum t...

Page 6: ...et feeder is selected n o when bin 2 of the optional cut sheet feeder is selected n n when the printer is in the card mode n on o off f flashing LF FF button Feeds paper line by line when pressed quickly Ejects a single sheet or advances continuous paper to the next top of form position when held down Load Eject button Loads a single sheet of paper Ejects a single sheet of paper when a sheet is lo...

Page 7: ... the position you want to use Press the Pause button to turn off the Pause light if necessary n Paper Out n Pause No paper is loaded in the selected paper source Load paper in the printer Then press the Pause button to turn off the Pause light if necessary The paper is not loaded correctly Remove your paper and reload it Then press the Pause button to turn off the Pause light if necessary Paper is...

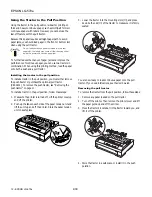
Page 8: ...push position and reinstall it in the pull position or you can purchase an optional tractor unit C800201 and install it in the pull position Using the push and pull tractors in combination You can improve paper feeding and reduce paper jams by using two tractors at the same time This is especially helpful for printing on continuous preprinted forms multipart forms and for printing high quality gra...

Page 9: ... load single sheet multipart forms Paper Release Lever Positions Use the paper release lever to indicate the paper source you want to use The table below describes each paper release lever position Paper release lever position Description Single sheet position For loading single sheets from the top or front slot Push tractor position For loading continuous paper from the tractor installed in the p...

Page 10: ...d or wrinkled If you are using crimp bound paper make sure the protruding side of the crimp faces away from the print head when you print Hitting the crimp protrusion with the print head could severely damage the print head Loading Continuous Paper with Labels When printing use only labels that are mounted on continuous backing sheets with sprocket holes for a tractor feeder Do not try to print on...

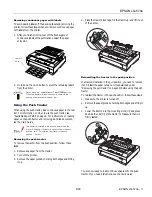
Page 11: ...on when the printer is shipped If a tractor is not installed in the push position see Reinstalling the tractor in the push position below Removing the push tractor To remove the tractor from the push position follow these steps 1 Remove any paper from the tractor 2 Turn off the printer 3 Remove the paper guide by holding both edges and lifting it up 4 Press the tractor s lock tabs tilt the tractor...

Page 12: ...pull position you must either remove the push tractor or purchase the optional pull tractor C800201 To remove the push tractor see Removing the push tractor on page 11 To install a tractor in the pull position follow these steps 1 Make sure the printer is turned off Lift the printer cover up and off the printer 2 Push up the tabs on each side of the paper tension unit and lift the unit up and off ...

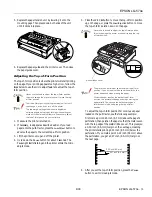
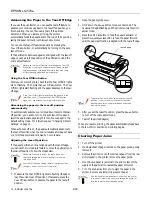
Page 13: ...ause button for about 3 seconds The Pause light starts flashing and the printer enters the micro adjust mode 5 Press the LF FF D button to move the top of form position up on the page or press the Load Eject U button to move the top of form position down on the page Never use the knob to adjust the top of form position this may damage the printer or cause it to lose the top of form position The pr...

Page 14: ...ollowed by no more data Adjusting the tear off position If the paper perforation is not aligned with the tear off edge you can use the micro adjust feature to move the perforation to the tear off position Follow the steps below Never use the knob to adjust the tear off position this may damage the printer or cause it to lose the tear off position Your tear off position setting remains in effect un...

Page 15: ...using the buttons on the printer s control panel The arrows on the instruction sheets indicate the printer s current settings 6 When you finish turn off the printer and exit the default setting mode The current settings remain in effect until you change them again Bidirectional Alignment If you notice that the vertical lines in your printout are not properly aligned you can use the printer s bidir...

Page 16: ...ly stop the self test press the Pause button To resume the test press the Pause button again 3 To end the self test press the Pause button to stop printing and the Load Eject button to eject the printed page Then turn off the printer If the self test results are satisfactory the printer is working properly and the problem probably results from your printer driver settings application settings comp...

Page 17: ...ct an EPSON dealer if you think lubrication is needed Transporting the Printer If you need to transport your printer some distance carefully repack it using the original box and packing materials as described below You need to move the print head by hand to remove the ribbon cartridge If you have just used the printer the print head may be hot let it cool for a few minutes before touching it 1 Rem...

Page 18: ...EPSON LQ 570e 18 EPSON LQ 570e 4 00 ...

Reviews: