EPSON Stylus COLOR 900/900N
Chapter 4 Disassembly and Assembly
103
4.2.8.5 Auto Sheet Feeder (ASF) Unit Removal
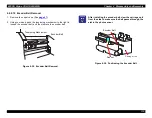
1. Remove the pump/ASF motor together with the switching
mechanism frame. (See
2. Remove the E-clip securing the ASF drive gear located on the side
of the ASF unit.
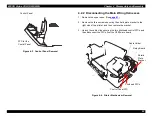
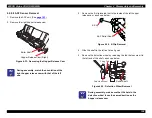
3. Remove the three screws securing the ASF unit to the frame, as
shown below.
Figure 4-22. ASF Unit Removal
4. Slide the ASF unit toward the left side of the printer to remove the
ASF drive gear. Then raise the paper support lever and, while
holding it up and out of the way, remove the ASF unit.
4.2.8.6 ASF Disassembly
.)
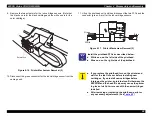
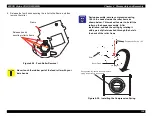
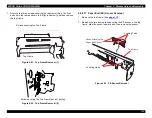
2. Remove the right hopper release cam.
Figure 4-23. Removing the Hopper Release Cam
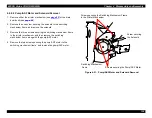
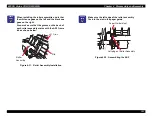
C A U T I O N
When installing the ASF unit, be sure to insert the
screws in their correct locations:
Screw with a flat head: on the left side of the ASF
(viewing the printer from the front).
Screw with a washer: on the right side of the ASF.
Large plastic screw: into the side of the ASF.
S cre w s secu ring the AS F U nit
Paper
Support Lever
ASF Drive Gear
S h a f t ' s S i d e F a c e
L D R o l l e r S h a f t
R e l e a s e H o p p e r L e v e r ( R i g h t )
Hopper Release Cam (Right)
Roller Shaft
Summary of Contents for 900N
Page 1: ...EPSONStylusCOLOR900 900N Color ink jet printer TM SC900 N 6 59 0 18 ...
Page 8: ... 37 5 PRODUCTDESCRIPTION ...
Page 37: ... 37 5 OPERATINGPRINCIPLES ...
Page 67: ... 37 5 TROUBLESHOOTING ...
Page 89: ... 37 5 DISASSEMBLYANDASSEMBLY ...
Page 121: ... 37 5 ADJUSTMENTS ...
Page 156: ... 37 5 MAINTENANCE ...
Page 169: ... 37 5 APPENDIX ...
Page 179: ...EPSON Stylus COLOR 900 900N Chapter 7 Appendix 176 Figure 7 3 C265 Main Board Soldering side ...
Page 181: ...EPSON Stylus COLOR 900 900N Chapter 7 Appendix 178 Figure 7 6 C265 PNL Board ...
Page 195: ...06 03 01 02 for S E ASIA 03 03 05 03 04 EPSON STYLUS COLOR 900 No 7 10056 Rev 01 ...
Page 197: ......
Page 198: ......
Page 199: ......
Page 200: ......
Page 201: ......

