EPSON Stylus COLOR 900/900N
Chapter 5 Adjustments
128
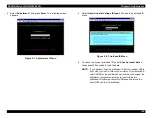
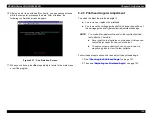
4. Select Adjustment 1 and press Enter. The following screen
appears:
Figure 5-7. Adjustment 1 Menu
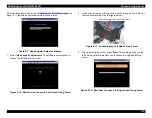
5. Select Head Actuator Voltage ID Input. You see the printhead ID
menu:
Figure 5-8. Printhead ID Menu
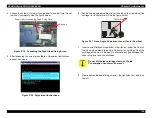
6. To check the current printhead ID, select Check present data. It
takes about 30 seconds to read the data.
NOTE: If you already input the printhead ID but the readout differs
from what you put in, this may be normal. If you installed a
new PROM but the printhead has never been changed, the
adjustment program automatically recalculates the
printhead ID to compensate for differences between the
new ROM and the old printhead.
Summary of Contents for 900N
Page 1: ...EPSONStylusCOLOR900 900N Color ink jet printer TM SC900 N 6 59 0 18 ...
Page 8: ... 37 5 PRODUCTDESCRIPTION ...
Page 37: ... 37 5 OPERATINGPRINCIPLES ...
Page 67: ... 37 5 TROUBLESHOOTING ...
Page 89: ... 37 5 DISASSEMBLYANDASSEMBLY ...
Page 121: ... 37 5 ADJUSTMENTS ...
Page 156: ... 37 5 MAINTENANCE ...
Page 169: ... 37 5 APPENDIX ...
Page 179: ...EPSON Stylus COLOR 900 900N Chapter 7 Appendix 176 Figure 7 3 C265 Main Board Soldering side ...
Page 181: ...EPSON Stylus COLOR 900 900N Chapter 7 Appendix 178 Figure 7 6 C265 PNL Board ...
Page 195: ...06 03 01 02 for S E ASIA 03 03 05 03 04 EPSON STYLUS COLOR 900 No 7 10056 Rev 01 ...
Page 197: ......
Page 198: ......
Page 199: ......
Page 200: ......
Page 201: ......


