R4C626Setup Guide
Rev_C
A5 size
setup NO ARROWS.fm
9/8/00
Pass 0
R
Proof Sign-off:
Otsuka, CRE Moriyama_______
N.Nomoto
_______
_______
?
Caution:
❏
You must remove the yellow tape seals from the cartridges before
installing them; otherwise, a fatal error will occur and the
cartridges will become unusable.
❏
Do not remove the blue portion of the tape seals from the cartridges;
otherwise, the cartridges may become clogged and unable to print.
❏
Do not remove the tape seals from the bottom of the cartridges;
otherwise, ink will leak.
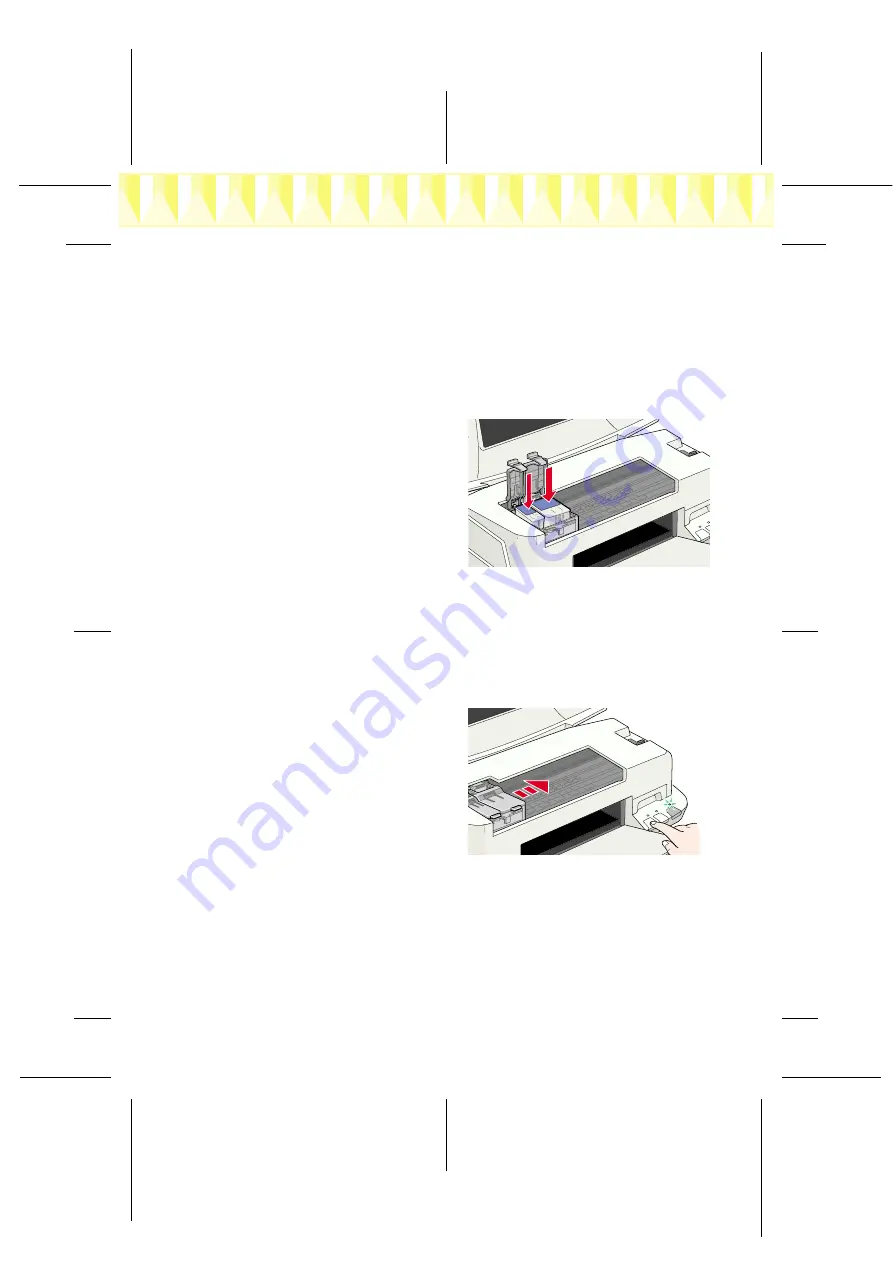
5.
Place the cartridges gently in
their holders with the labels
facing up. The color ink
cartridge, which is larger, goes
on the right and the black ink
cartridge goes on the left. Do not
press down on the cartridges.
Note:
Install both ink cartridges. If either
of the cartridges is not installed, the printer will not work.
6.
Lower the ink cartridge clamps until they lock in place.
?
Caution:
Once you install the ink cartridges, do not open their clamps again until
you replace the ink cartridges; otherwise, the cartridges may become
unusable.
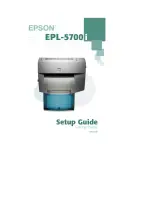
7.
Press the
*
)
cleaning button.
The printer moves the print
head and begins charging the
ink delivery system. This
process takes about one and a
half minutes.
While the ink is charging, the
2
power light flashes and the
printer produces a variety of
mechanical sounds. These sounds are normal. When the ink delivery
system has been charged, the print head returns to its home (far right)
position and the
2
power light comes on.
?
Caution:
Never turn off the printer while the
2
power light is flashing.
8.
Close the printer cover.


