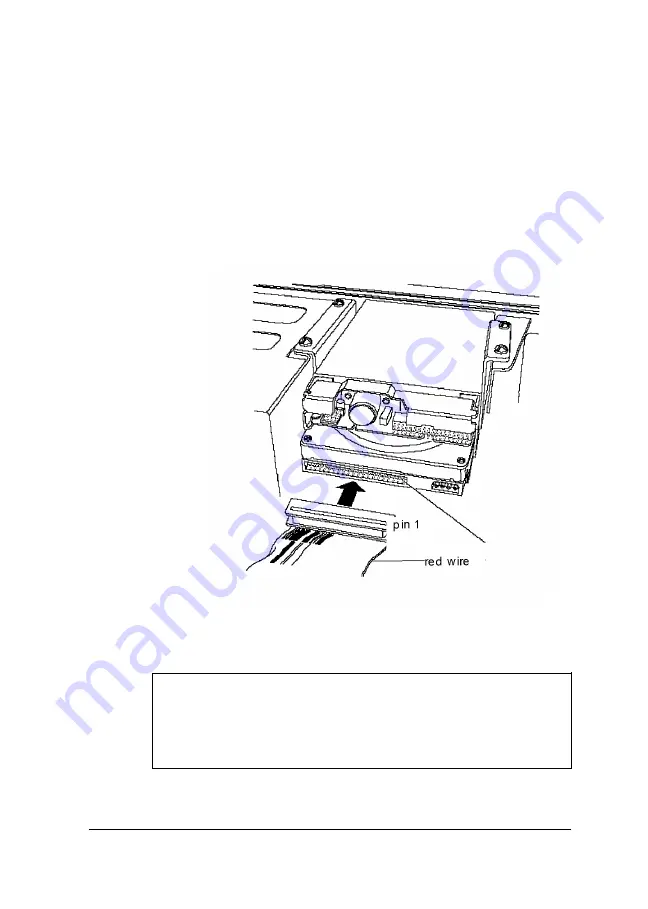
2.
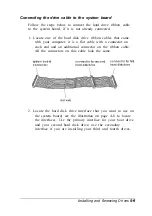
Locate pin 1 on the drive connector. If you do not see it on
the connector casing and you did not locate it before you
replaced the drive bracket, you may have to remove the
drive and turn it over to check the circuit board. See
page 5-14 for instructions on removing the drive and
page 5-6 for instructions on locating pin 1 on the drive
connector.
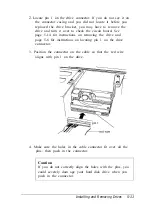
3. Position the connector on the cable so that the red wire
aligns with pin 1 on the drive.
4. Make sure the holes in the cable connector fit over all the
pins; then push in the connector.
Caution
If you do not correctly align the holes with the pins, you
could severely dam age your hard disk drive when you
push in the connector.
Installing and Removing Drives
5-11
Summary of Contents for ActionPC 6000
Page 1: ......
Page 24: ...1 10 Setting Up Your System ...
Page 42: ...2 18 Running SETUP and Installing Drivers ...
Page 121: ...Hard Disk Drive Types Hard disk drive types Specifications A 9 ...
Page 125: ...Hardware Interrupts System I O Address Map Specifications A 13 ...
Page 126: ...System I O address map continued A 14 Specifications ...
Page 128: ...A 16 Specifications ...
Page 140: ...8 Index ...


