4-6
Using Special Effects
Adjusting the Tone Correction
Adjusting the tone levels lets you change the pixel brightness in
the midtones, highlights, and shadows of an image without
dramatically changing it. This modifies the contrast in image
tones so they reproduce with greater detail.
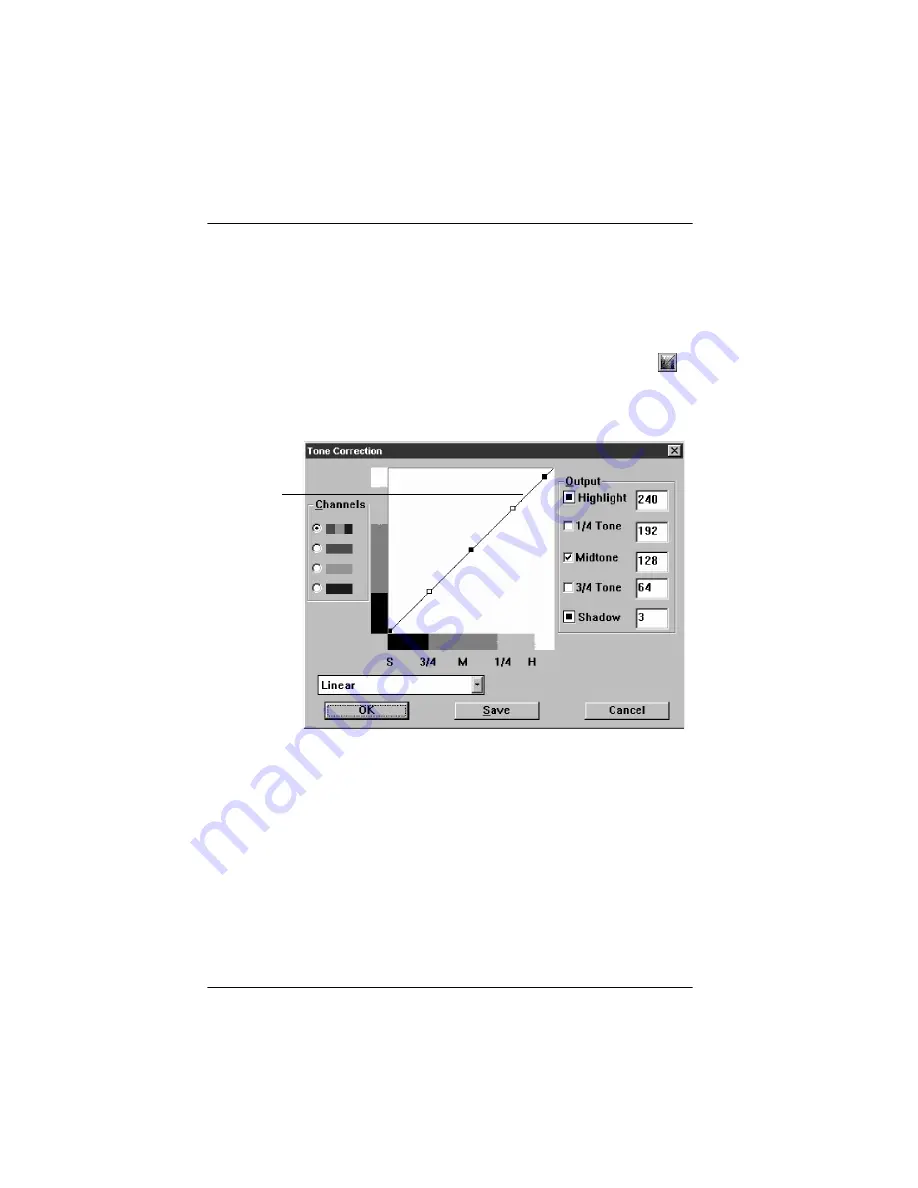
To adjust the tone correction, click the Tone Correction icon,
,
from the advanced screen when the preview window displays
your image. You see the following dialog box:
You can adjust the tone values by dragging points on the tone
curve. You see the effect of your new settings in the preview
window.
Using the
Channels
radio buttons, select the color(s) you want
to modify the tone correction for. You can select all colors (RGB)
or only red, green, or blue.
Tone
curve
Summary of Contents for ActionScanner II
Page 1: ...i Printed on recycled paper with at least 10 post consumer content ...
Page 6: ...vi ...
Page 14: ...8 Introduction ...
Page 20: ...1 6 Installing Your Software ...
Page 50: ...3 22 Capturing Images From Within Applications ...
Page 62: ...4 12 Using Special Effects ...
Page 70: ...5 8 Using EPSON Scan II ...
Page 90: ...A 4 Default Settings ...
Page 124: ...10 Term Glossary ...


