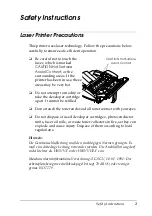
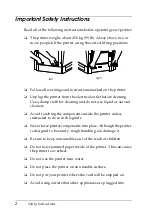


Summary of Contents for AcuLaser C1000
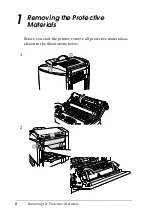
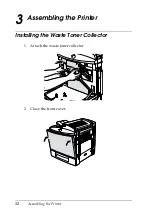
Page 13: ...Removing the Protective Materials 9 4 3 ...
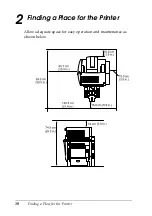
Page 40: ......
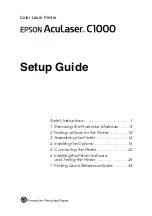
The Epson AcuLaser C1000 is a high-quality laser printer designed for professional use. Need help operating this impressive device? Look no further! Download the free Quick Reference Manual now from 88.208.23.73:8080 to get all the assistance you need in just a few clicks.
Page 13: ...Removing the Protective Materials 9 4 3 ...
Page 40: ......


