
Ready and Error Lights (1/1)
EPSON AcuLaser C7000 Quick Reference
Ready and Error Lights
The ready (green) and error (red) lights on
the top of the printer may be the first
indication of trouble. The status of the lights,
on, off, or flashing, indicates the status of
your printer as described below.
The Status Alert window in the EPSON
Status Monitor 3 utility indicates what type
of error has occurred and offers you a
possible solution. Look through this section
to find the kind of problem you have, then
try the recommended solutions in the order
they are presented until your problem is
solved.
Note:
If the problem remains after trying the
suggestions in this section, contact your dealer
for assistance.
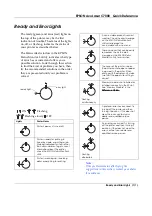
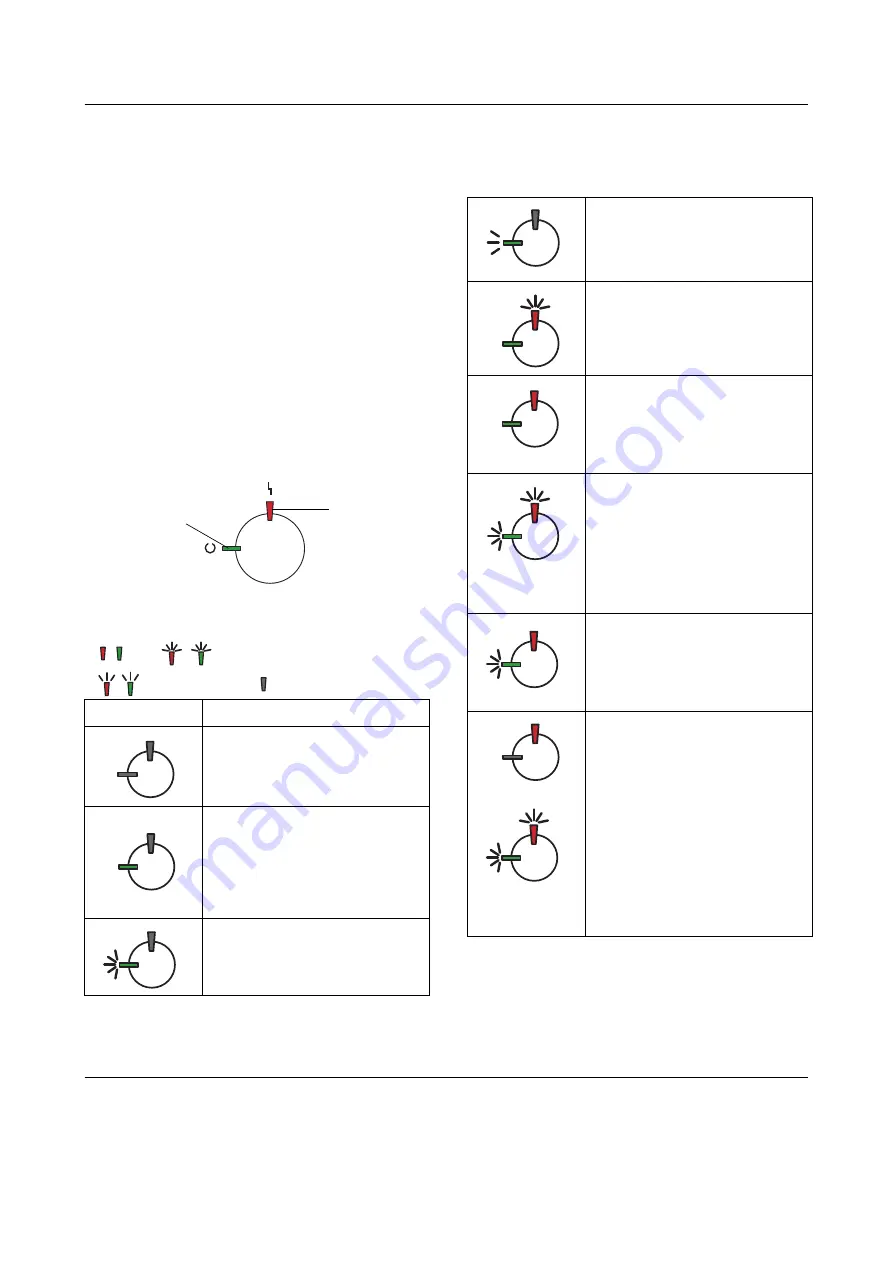
ON
Flashing
Flashing slowly OFF
Lights
Printer Status
Printer’s power is turned off.
Printer is ready for printing, in
stand-by mode, or printing a job.
Warning indicated for items other
than consumables. To get current
information about the printer,
check the EPSON Status Monitor 3
utility.
Printer is warming up, receiving
data, or adjusting for printing.
ready light
error light
A consumable product is almost
used up. Check the alert message
on the EPSON Status Monitor 3
utility and replace the
consumable with a new one.
There is an error that can be easily
remedied. Check the alert
message on the EPSON Status
Monitor 3 utility for a solution.
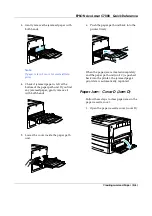
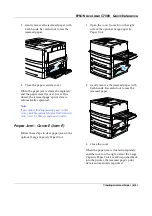
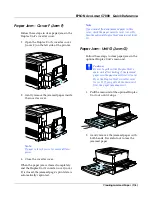
The cover of the printer is open,
the printer is out of paper, or paper
is jammed in the printer. When
printing with the duplex unit, make
sure that the paper size setting is
correct.
Flashing
simultaneously
Memory module is not installed or
installed incorrectly in the S0 slot.
See “Memory Module” in the
Reference Guide.
Reference Guide.
Reference Guide.
Reference Guide.
A protocol error has occurred. Try
turning off the printer and then
turning it back on. If this does not
clear the error, contact your
dealer or a qualified service
person.
Flashing
alternately
An error has occurred. Try turning
off the printer and then turning it
back on. If this does not clear the
error, contact your dealer or a
qualified service person.


