Installation Instructions
AN2 Series
11
Align Projector Image
Using remote control included with projector:
1.
Select
MENU
2.
Select
SETTINGS
3.
Select
PATTERN
4.
Select
TEST PATTERN
5.
Use the test pattern projected on the whiteboard to roughly
align image to whiteboard, and make the necessary
projector adjustments following instructions included with
Epson projector and using the following adjustment
instructions for the mount.
IMPORTANT ! :
The projected image should NEVER
project onto the whiteboard frame. An image overlapping
onto the whiteboard frame may prevent the projector
touch sensor from working properly.
Projector Adjustments
Roll Adjustment (Horizontal Tilt)
Adjust projector so that the left and right vertical lines of the test
pattern are parallel with each other and each side of
whiteboard.
1.
Loosen ROLL adjustment locking screw using a #2 Phillips
screwdriver. (See Figure 13)
2.
Turn ROLL micro-adjustment screw right or left using a #2
Phillips screwdriver until image is properly aligned on target.
3.
Tighten ROLL adjustment locking screw using a #2 Phillips
screwdriver.
Figure 13
Yaw Adjustment (Rotation)
Adjust projector so that the top and bottom horizontal lines of
the test pattern are parallel with each other and with top and
bottom of whiteboard.
1.
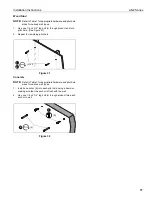
Loosen yaw adjustment locking screw using a #2 Phillips
screwdriver. (See Figure 14)
2.
Turn yaw micro-adjustment screw right or left using a #2
Phillips screwdriver until image is properly aligned on target.
3.
Tighten yaw adjustment locking screw using a #2 Phillips
screwdriver. (See Figure 14)
Figure 14
1
3
2
2
1
2
3
2


