AN2 Series
Installation Instructions
6
INSTALLATION
Determining Location
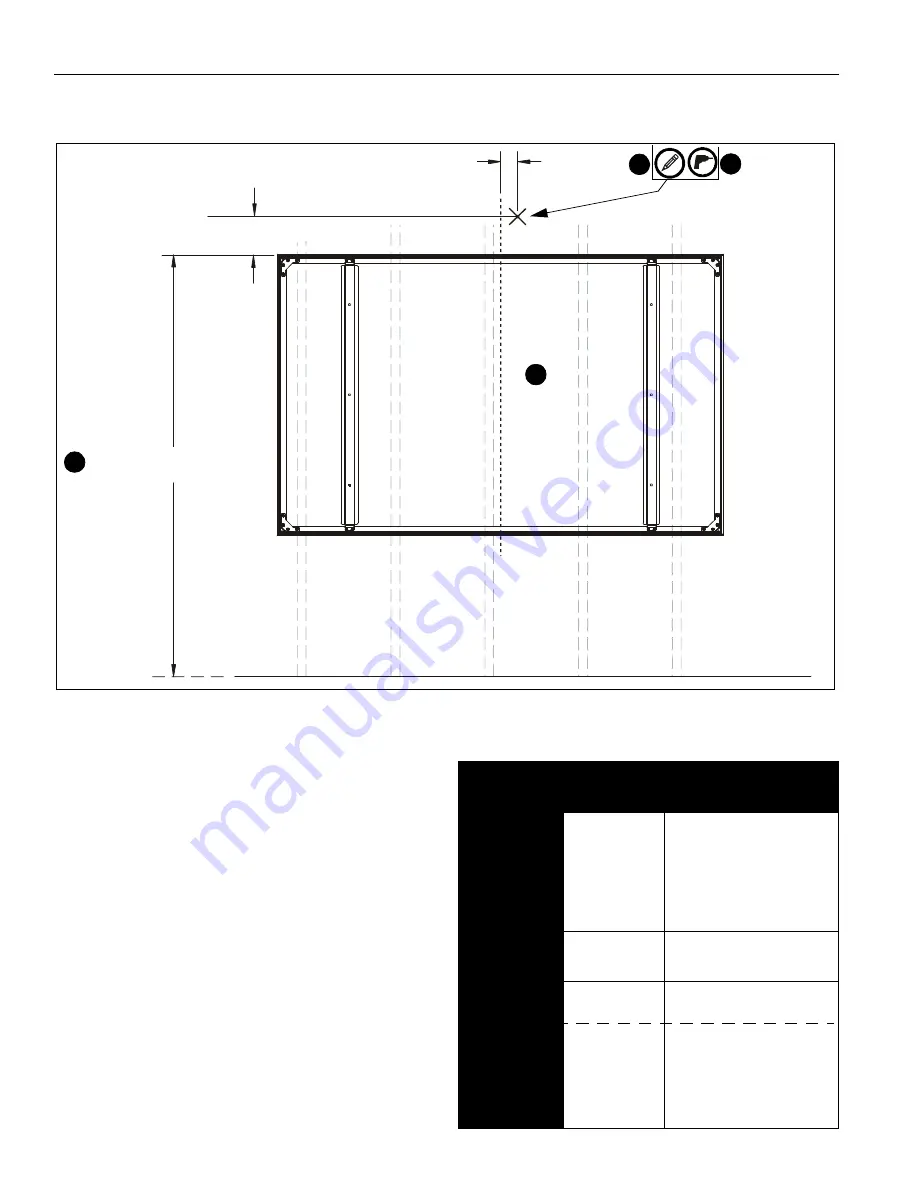
Figure 1
10 5/8”
HEIGHT FROM FLOOR
CEN
TER OF
SCR
EEN
FLOOR
2
2 3/4”
ST
U
DS
[70mm]
[270mm]
1
2
3
5
1.
Determine desired height of whiteboard (measured from
floor). (See Figure 1)
2.
Determine desired center of whiteboard. (See Figure 1)
3.
Measure
10-5/8 inches (270mm) up
from desired height
(top) of whiteboard and
2-3/4 inches (69mm) to the right
of center of whiteboard and mark location. (See Figure 1)
NOTE:
This pilot hole may be placed in drywall only, if
necessary.
4.
Determine location of studs behind drywall.
5.
Drill one pilot hole (see Table 1 for size) at location marked
in Step 3 (See Figure 1) and follow fastener information
(appropriate for wall type) located in Table 1.
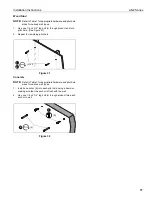
IMPORTANT ! :
See
Fastener Installation Methods
at
end of Installation Instructions for details on installing
product into various wall types.
Table 1: Fastener Information
WALL TYPE
PILOT
HOLE
FASTENERS (see
PARTS drawing)
Drywall only-
(boom attach
only) /
Steel studs
1/2"
1/4-20 Toggler anchor kit (
F,
G, H
)
- 1/4-20 x 1-3/4" Phillips
screw (
F
)
- 1/4" washer (
G
)
- 1/4-20 Snap toggler (
H
)
Wood stud
1/8"
1/4 x 2-1/2" hex head lag (
J
)
1/4" washer (
G
) -
OPTIONAL
Concrete
8mm x 80mm
(Only for
installing
whiteboard
bracket into
concrete)
6mm x 45mm
1/4 x 2-1/2" hex head lag (
J
)
Hilti Hud-L #8x60 anchor (
K
)
#8-9x1-1/2" Phillips screw (
Z
)
Toggler AF6
(BB)
or
(KK)


