234
8.
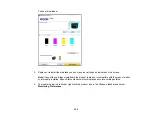
Lower the scanner unit, and select
Completed
on the LCD screen if necessary.
The print head moves to its home position and the printer starts charging the ink. This takes about
90 seconds. When you see a confirmation message on the screen, ink charging is finished.
Caution:
Never turn off the product while the power light is flashing or you will waste ink.
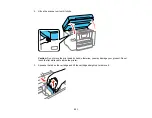
If you see an error screen telling you an ink cartridge is installed incorrectly, lift up the scanner unit
and press the ink cartridge down until it clicks into place. When you're finished, select
OK
.
If you remove a low or expended ink cartridge, you cannot re-install and use the cartridge.
Caution:
If you remove an ink cartridge for later use, protect the ink supply area from dirt and dust and
store it in the same environment as the printer. The valve in the ink supply port is designed to contain
any excess ink, but do not touch the ink supply port or surrounding area. Always store ink cartridges with
the label facing up; do not store cartridges upside-down.
Parent topic:
Replacing Ink Cartridges and Maintenance Boxes
Related concepts
Summary of Contents for C11CF74203
Page 1: ...EC 4020 EC 4030 User s Guide ...
Page 2: ......
Page 18: ...18 3 Select General Settings 4 Select Basic Settings 5 Select Date Time Settings ...
Page 29: ...29 Product Parts Inside 1 Document cover 2 Scanner glass 3 Control panel ...
Page 67: ...67 1 Pull out the paper cassette 2 Slide the edge guides outward ...
Page 85: ...85 1 Open the document cover ...
Page 156: ...156 You see an Epson Scan 2 window like this ...
Page 158: ...158 You see an Epson Scan 2 window like this ...
Page 160: ...160 You see this window ...
Page 246: ...246 You see a window like this 4 Click Print ...
Page 255: ...255 Related tasks Loading Paper in the Cassette ...
Page 257: ...257 5 Open the document cover ...
Page 259: ...259 8 Open the ADF cover ...


