134
9.
Do one of the following:
•
Windows 7
: Click
and select
Devices and Printers
.
•
Windows Vista
: Click
Start
and select
Control Panel
>
Hardware and Sound
>
Printers
.
10. Make sure that an icon appears for your product's name on the network.
When you use WSD, select your product name to scan over the network.
Parent topic:
Starting a Scan Using the Product Control Panel
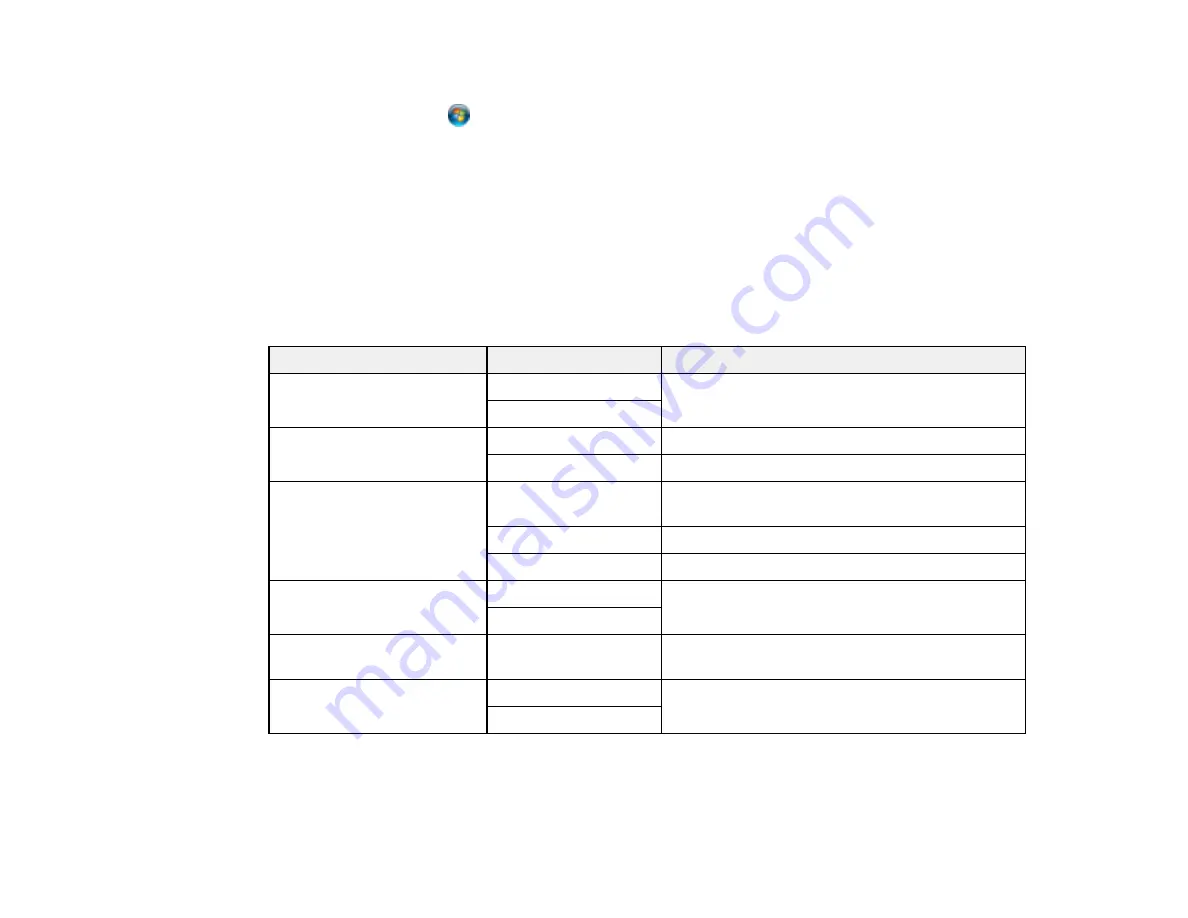
Control Panel Scanning Options
Select the options you want to use for scanning.
Note:
Not all options or settings may be available, depending on the
Scan to
option selected.
Scan to setting
Available options
Description
Color Mode
B&W
Select whether to scan images in color or black
and white
Color
File Format
JPEG
Select for photos
Select for documents
Scan Area
Various sizes
Select the page size for documents, then select
the orientation of the original
Auto Cropping
Select for photos with dark edges
Max Area
Select for most photos
Original Type
Text
Specifies the type of original you are scanning
Photo
Density
–4
to
+4
Adjusts the lightness or darkness of scanned
images
Clear All Settings
Yes
Select
Yes
to restore all scan settings to their
defaults
No
Parent topic:
Summary of Contents for C11CG31201
Page 1: ...WF 2850 User s Guide ...
Page 2: ......
Page 137: ...137 You see an Epson Scan 2 window like this ...
Page 139: ...139 You see an Epson Scan 2 window like this ...
Page 141: ...141 You see this window ...
Page 230: ...230 Print Head Cleaning ...
Page 249: ...249 3 Open the scanner unit 4 Carefully remove any paper jammed inside the product ...


