26
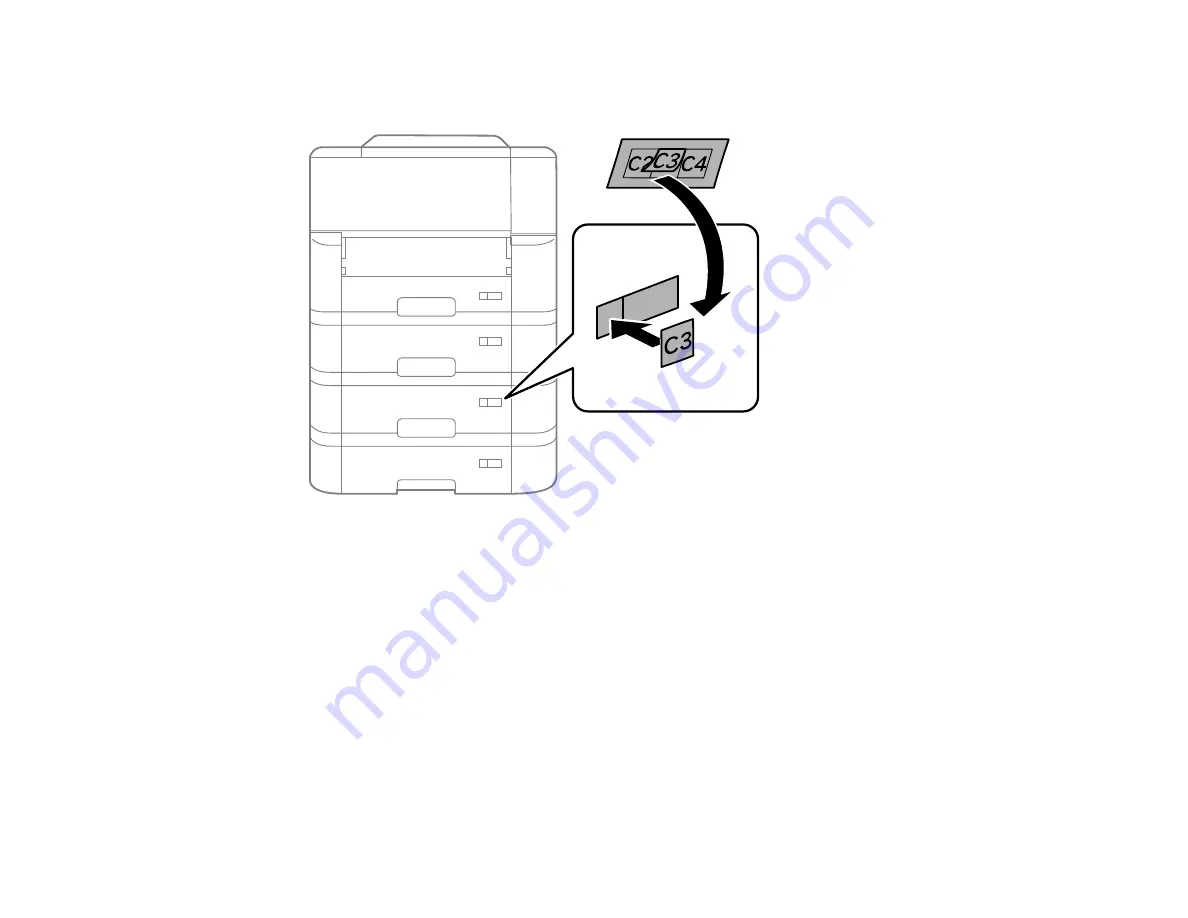
12. Insert the paper cassette and place the correct sticker on the cassette unit to indicate the cassette
number.
13. Attach the output tray.
14. Connect the power cord and other connection cables, then plug in the product.
15. Turn on the product.
16. Pull out and reinsert the paper cassettes in the optional paper cassette units and confirm that each
cassette unit number is displayed on the screen.
17. Enable the optional paper cassette units in the printer software.
Enabling the Optional Paper Cassettes - Windows
Enabling the Optional Paper Cassettes - Mac
Parent topic:
Installing the Optional Cabinet and Paper Cassettes
Enabling the Optional Paper Cassettes - Windows
You need to enable the optional paper cassette units before you can use them with the printer software.
Summary of Contents for C11CG70201
Page 1: ...WF C8190 User s Guide ...
Page 2: ......
Page 16: ...16 8 Attach the front cover to the stands 9 Remove the output tray from the product ...
Page 21: ...21 5 Remove the output tray 6 Remove the paper cassette from the product ...
Page 39: ...39 3 Optional cabinet 1 Rear paper feed edge guides 2 Paper support and extension ...
Page 116: ...116 You see the maintenance options 4 Click the Extended Settings button ...
Page 194: ...194 4 Pull out paper cassette 1 5 Open rear cover 1 D1 ...
Page 195: ...195 6 Pull out rear cover 2 D2 7 Remove the roller cover inside the product ...
Page 200: ...200 4 Pull out the paper cassette ...
Page 201: ...201 5 Open the rear cover E that matches with the paper cassette you removed ...


