36
1.
Press the
home button, if necessary.
2.
Select
Smartphone connect
.
• If your product is not connected to a wireless network, go to the next step.
• If your product is already connected to a wireless network, select
Other Methods
and then
continue to the next step.
3.
Select
Start Setup
.
4.
Select
Other Methods
.
5.
Do one of the following:
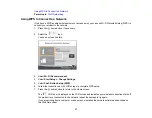
• For iOS devices, select
iOS
. Scan the QR code with the camera app on your device and follow the
instructions on your device.
• For other types of devices, select
Other OS Devices
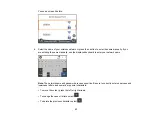
. Press the down arrow button to display the
product information, then use your device to select the Wi-Fi network name (SSID) displayed on
the LCD screen and enter the password shown.
6.
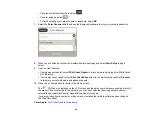
Open the Epson Smart Panel app (or another compatible Epson printing app) on your device, then
press the down arrow button on your product's control panel to view the product information. Use the
information on the product's LCD screen to select your product in the Epson Smart Panel app.
7.
Select
Complete
on the LCD screen.
The blue
Wi-Fi Direct icon is displayed on the LCD screen and indicates if Wi-Fi Direct is
enabled on the product.
Parent topic:
Related references
Related tasks
Using the Epson Smart Panel Mobile App
Wi-Fi Protected Setup (WPS)
If your network uses a WPS-enabled wireless router or access point, you can quickly connect your
product to the network using Wi-Fi Protected Setup (WPS).
Note:
To check if your router is WPS-enabled, look for a button labeled
WPS
on your router or access
point. If there is no hardware button, there may be a virtual WPS button in the software for the device.
Check your network product documentation for details.
Summary of Contents for C11CK61201
Page 1: ...XP 5200 User s Guide ...
Page 2: ......
Page 14: ...14 Product Parts Inside 1 Document cover 2 Scanner glass 3 Control panel 4 Front cover ...
Page 124: ...124 You see an Epson Scan 2 window like this ...
Page 126: ...126 You see an Epson Scan 2 window like this ...
Page 140: ...140 You see a screen like this 2 Click the Save Settings tab ...
Page 145: ...145 You see this window ...


