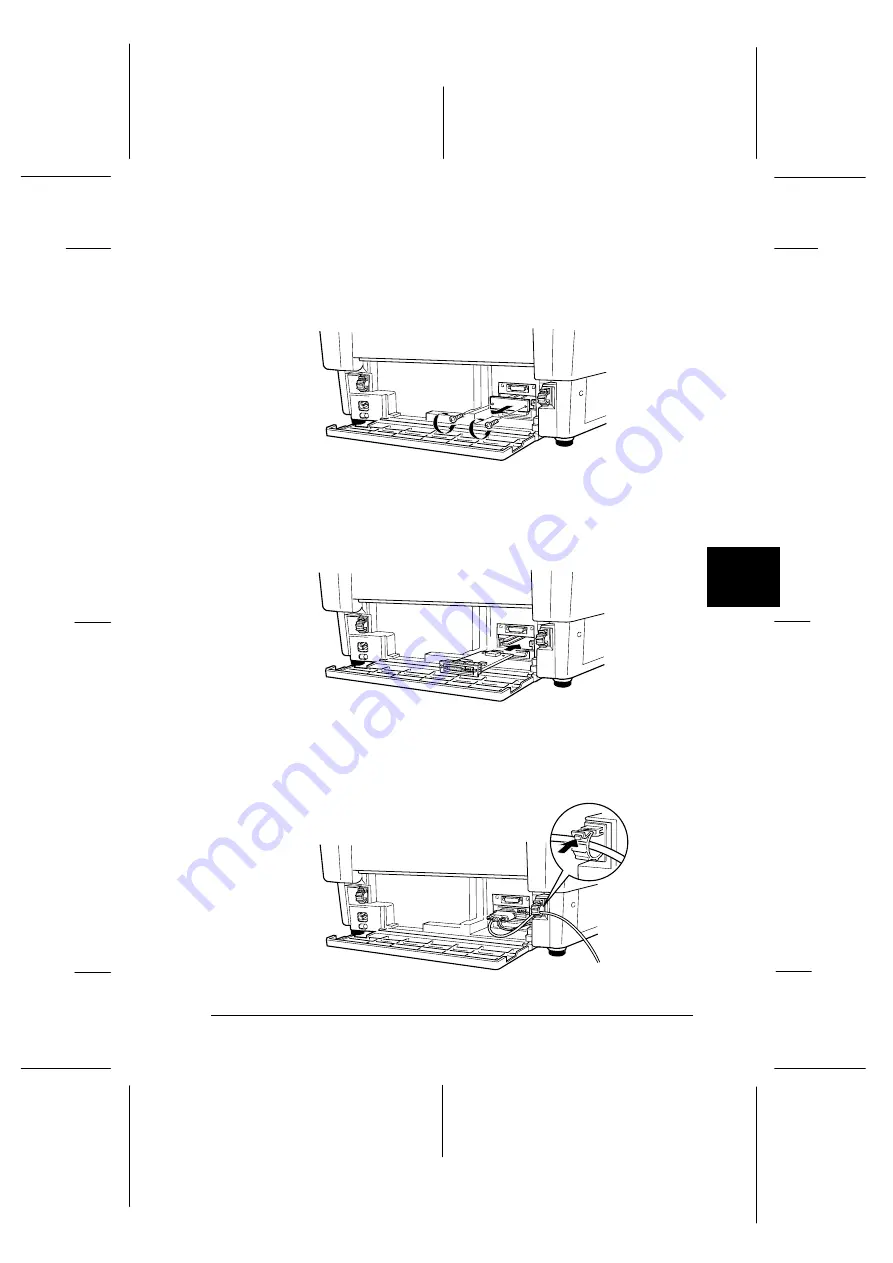
5. Use a screwdriver to remove the screws securing the
interface shield plate; remove the shield plate.
6. Slide the interface card into the grooves in the interface slot.
Push it in firmly to make sure it connects to the printer’s
internal socket.
7. Secure the interface with the screws provided with the card.
8. Plug the connector cable into the interface card as shown.
D-4-16-A
D-4-16-B
D-4-17
6
R
Peony
Rev.C
A5 size
Chapter 6
98/01/07
Pass 4
Using Printer Options
6-37
Summary of Contents for C204001 - DFX 8500 B/W Dot-matrix Printer
Page 1: ......
Page 34: ...L Peony Rev C A5 size Chapter 1 98 01 07 Pass 4 1 16 Setting Up the Printer ...
Page 56: ...L Peony Rev C A5 size Chapter 2 98 01 07 Pass 4 2 22 Setting Up Your Software ...
Page 90: ...L Peony Rev C A5 size Chapter 3 98 01 07 Pass 4 3 34 Paper Handling ...
Page 132: ...L Peony Rev C A5 size Chapter 5 98 01 07 pass 4 5 16 Using EPSON Status Monitor 2 ...
Page 176: ...L Peony Rev C A5 size Chapter 7 98 01 07 Pass 3 7 6 Maintenance and Transportation ...
Page 196: ...L Peony Rev C A5 size Chapter 8 98 01 07 DR pass 4 8 20 Troubleshooting ...
Page 246: ...L Peony Rev C A5 size Glossary 98 01 07 Pass 2 GL 6 Glossary ...
Page 252: ......


