background image

User’s Guide
(Abridged Version)

NPD4281-00 EN

Summary of Contents for C3900 Series

Page 1: ...User s Guide Abridged Version NPD4281 00 EN ...

Page 2: ...the control panel and the settings for each menu The abridged version contains an excerpt on how to use the control panel from this chapter See Printer Control Panel on page 3 4 Memory Direct Describes how to print from a USB memory device 5 Media Handling Describes supported paper and how to load paper into the paper tray 6 Replacing Consumables and Maintenance Parts Describes how to replace cons...

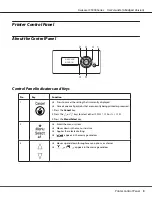
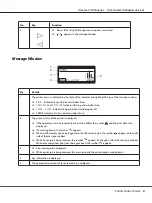
Page 3: ...urrently being printed or processed 1 Press the Cancel key 2 Press the or keys to select either CURRENT JOB or ALL JOBS 3 Press the Menu Select key 2 Enters the menu system Moves down in the menu structure Applies the selected setting appears in the message window 3 Moves up and down through menus options or choices appears in the message window AcuLaser C3900 Series User s Guide Abridged Version ...

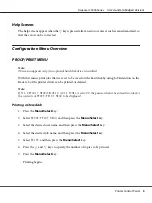
Page 4: ...displayed If the operator or service representative must be called the symbol and the error status are displayed If a warning occurs the symbol appears WhenaUSBmemorydeviceispluggedintotheUSBmemoryport thesymbol appearsontheright side of the message window While a print job is being received the symbol appears on the right side of the message window While a memory direct print job is being receive...

Page 5: ... DEFAULT MENU SECURITY LOCK PANEL is set to ON the password must be entered in order for the contents of PROOF PRINT MENU to be displayed Printing a Stored Job 1 Press the Menu Select key 2 Select PROOF PRINT MENU and then press the Menu Select key 3 Select the desired user name and then press the Menu Select key 4 Select the desired job name and then press the Menu Select key 5 Select PRINT and t...

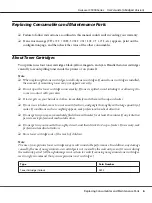
Page 6: ...h soap and water If toner was inhaled move to an area with fresh air and gargle thoroughly with a large quantity of water If conditions such as coughing appear seek professional medical attention If toner gets in your eyes immediately flush them with water for at least 15 minutes If any irritation persists seek professional medical attention If toner gets in your mouth thoroughly rinse it and then...

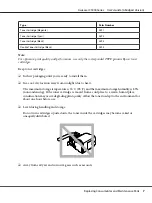
Page 7: ...e maximum storage temperature is 35 C 95 F and the maximum storage humidity is 85 noncondensing If the toner cartridge is moved from a cold place to a warm humid place condensation may occur degradingprintquality Allowthetonerto adapttotheenvironmentfor about one hour before use Level during handling and storage Do not turn cartridges upside down the toner inside the cartridges may become caked or...

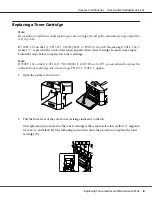
Page 8: ...rtridge Note IfTONER LOWontheSYS DEFAULT MENU ENABLE WARNINGissettoOFF youareadvisedtoreplacethe indicated toner cartridge when the message REPLACE TONER X appear 1 Open the printer s front cover 2 Pull the front lever of the color toner cartridge indicated to the left The replacement procedure for the toner cartridge is the same for all colors yellow Y magenta M cyan C and black K The following i...

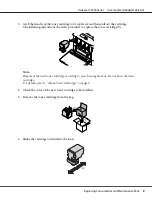
Page 9: ...ed toner cartridge according to your local regulations Do not burn the toner cartridge For details refer to About Toner Cartridges on page 6 4 Check the color of the new toner cartridge to be installed 5 Remove the toner cartridge from the bag 6 Shake the cartridge to distribute the toner 3 Z AcuLaser C3900 Series User s Guide Abridged Version Replacing Consumables and Maintenance Parts 9 ...

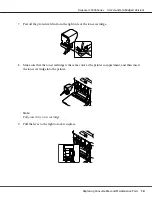
Page 10: ...ner cartridge is the same color as the printer compartment and then insert the toner cartridge into the printer Note Fully insert the toner cartridge 9 Pull the lever to the right to lock it in place AcuLaser C3900 Series User s Guide Abridged Version Replacing Consumables and Maintenance Parts 10 ...

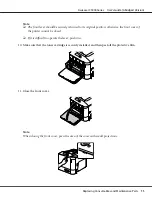
Page 11: ...ficult to operate the lever push it in 10 Make sure that the toner cartridge is securely installed and then peel off the protective film 11 Close the front cover Note When closing the front cover press the area of the cover with small projections AcuLaser C3900 Series User s Guide Abridged Version Replacing Consumables and Maintenance Parts 11 ...

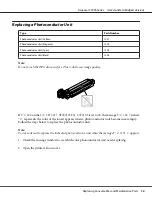
Page 12: ...ettoON themessageP U LOW X where X represents the color of the toner appears when a photoconductor unit becomes near empty Follow the steps below to replace the photoconductor unit Note You are advised to replace the indicated photoconductor unit when the message P U LIFE X appears 1 Check the message window to see which color photoconductor unit needs replacing 2 Open the printer s front cover Ac...

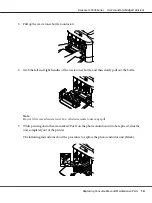
Page 13: ...agenta M cyan C and black K The following instructions show the procedure to replace the toner cartridge K Y M C K 4 Grab the handle of the toner cartridge to be removed and then pull out the cartridge Note Do not tilt removed toner cartridge otherwise toner may spill AcuLaser C3900 Series User s Guide Abridged Version Replacing Consumables and Maintenance Parts 13 ...

Page 14: ...ved waste toner box otherwise waste toner may spill 7 Whilepressing downthe area marked Push on the photoconductorunit to be replaced slide the unit completely out of the printer The following instructions show the procedure to replace the photoconductor unit Black AcuLaser C3900 Series User s Guide Abridged Version Replacing Consumables and Maintenance Parts 14 ...

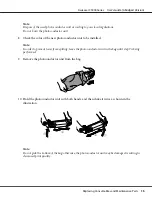
Page 15: ...he photoconductor unit in the bag until step 7 is being performed 9 Remove the photoconductor unit from the bag 10 Hold the photoconductor unit with both hands and then shake it twice as shown in the illustration Note Do not grab the bottom of the bag otherwise the photoconductor unit may be damaged resulting in decreased print quality AcuLaser C3900 Series User s Guide Abridged Version Replacing ...

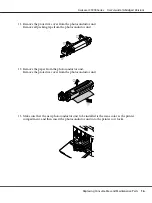
Page 16: ...oconductor unit Remove the protective cover from the photoconductor unit 13 Make sure that the new photoconductor unit to be installed is the same color as the printer compartment and then insert the photoconductor unit into the printer so it locks AcuLaser C3900 Series User s Guide Abridged Version Replacing Consumables and Maintenance Parts 16 ...

Page 17: ...artridge is the same color as the printer compartment and then insert the toner cartridge into the printer Note Fully insert the toner cartridge 16 Pull the lever to the right to lock it in place AcuLaser C3900 Series User s Guide Abridged Version Replacing Consumables and Maintenance Parts 17 ...

Page 18: ...losing the front cover press the area of the cover with small projections Replacing the Waste Toner Bottle When the waste toner bottle becomes full the message WASTE TONER FULL REPLACE BOTTLE appearsinthemessagewindow Theprinterstopsandwillnotstartagainuntilthewastetonerbottleis replaced 1 Open the printer s front cover AcuLaser C3900 Series User s Guide Abridged Version Replacing Consumables and ...

Page 19: ...the bottle Note Do not tilt removed waste toner box otherwise waste toner may spill 4 Remove the new waste toner bottle from its packaging Insert the used waste toner bottle into the plastic bag included in the box and then box it up AcuLaser C3900 Series User s Guide Abridged Version Replacing Consumables and Maintenance Parts 19 ...

Page 20: ... waste toner bottle until it locks into place 6 Close the front cover Note When closing the front cover press the area of the cover with small projections If the waste toner bottle is not fully inserted the front cover cannot be closed AcuLaser C3900 Series User s Guide Abridged Version Replacing Consumables and Maintenance Parts 20 ...

Page 21: ...ryimportanttoprotecttheprintercontroller board and any associated circuit boards from electrostatic damage In addition always handle circuit boards by the edges only 1 Turn off the printer and disconnect the power cord and interface cables 2 Using a screwdriver remove two screws 3 Slide the panel slightly to the down and lift it off the printer AcuLaser C3900 Series User s Guide Abridged Version R...

Page 22: ...s according to your local regulations Do not burn the backup battery 6 Reinstall the panel and tighten two screws 7 Reconnect all interface cables 8 Reconnect the power cord and turn on the printer 9 Use DATE on the SYS DEFAULT MENU CLOCK menu to set the date and use TIME on the SYS DEFAULT MENU CLOCK menu to set the time AcuLaser C3900 Series User s Guide Abridged Version Replacing Consumables an...

Page 23: ...the printer Note There are extremely hot parts within the machine Before replacing the fuser unit wait about 40 minutes after turning off the machine and then check that the fusing section has reached room temperature otherwise you may get burnt 2 Pull the lever and then open the right side cover Note Before opening the right side cover fold up Tray 1 3 Open the eject cover AcuLaser C3900 Series U...

Page 24: ...4 Open the fuser unit cover 5 Pull down the 2 levers 6 Remove the fuser unit AcuLaser C3900 Series User s Guide Abridged Version Replacing Consumables and Maintenance Parts 24 ...

Page 25: ...ul not to touch the surface of the fuser roller 8 Pull down the 2 levers of a new fuser unit 9 Insert the fuser unit until it locks into place AcuLaser C3900 Series User s Guide Abridged Version Replacing Consumables and Maintenance Parts 25 ...

Page 26: ...10 Lift up the two levers 11 Close the fuser unit cover 12 Close the eject cover AcuLaser C3900 Series User s Guide Abridged Version Replacing Consumables and Maintenance Parts 26 ...

Page 27: ... Close the right side cover 14 Reset the counter in the MAINTENANCE MENU SUPPLIES REPLACE FUSER UNIT menu AcuLaser C3900 Series User s Guide Abridged Version Replacing Consumables and Maintenance Parts 27 ...

Reviews: