Page 54
PServer Setup (Bindery Setup)
Use Bindery Setup if you have already configured one or more bindery servers (file servers
running NetWare 3.x or NetWare 4.x in bindery emulation) with a Print Server and a Print
Queue for RIP Station jobs (see Chapter 3 in the Administrator Guide). Before entering
bindery settings, be sure the RIP Station is connected to the network and the NetWare file
server is running. You’ll need a login name, and, if access to the file server or print server is
restricted, you’ll need a login password.
N
OTE
:
The terms NetWare server, Novell server, and IPX file server are in common use and
are used here interchangeably to mean the server on an IPX network running Novell Net-
Ware networking software.
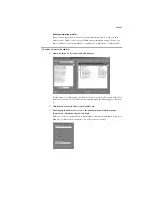
Add NDS Tree
You can have only one NDS tree, so the following process is
required to change trees:
1.
Select the current NDS tree and click Remove.
2.
Select the new NDS tree and click Add.
Your new NDS tree selection automatically overwrites
any previous tree selection. If you change the NDS tree
selection and there are also current Bindery settings, you
are alerted that they will be deleted. If you continue with
NDS Setup, you can replace Bindery settings afterwards.
To exit NDS Setup, choose
Cancel
.
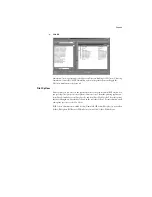
3.
Click OK.
The Select login user window appears.
Select Login
User
1.
Select the User Login object from the display in the Select
Login User window.
2.
Enter a password if necessary.
3.
Click OK.
The Select print server window appears.
Select Print
Server
1.
Select the print server from the display in the Select Print
Server window.
2.
Enter a password if necessary.
3.
Click OK.
The Select print queue root window appears.
Select Print
Queue Root
1.
Select the print queue root from the display in the Select
Print Queue Root window.
2.
Enter a password if necessary.
3.
Click Finish.
The NetWare Setup window reappears, showing the new
settings.
Enter Print
Server
Password
1.
Enter the Print Server password if necessary.
2.
Choose OK.


