background image

Page 29

6.

To clear the Job Log, choose Delete Job Log from the File menu or click the Delete button.

The system administrator can also print and clear the Job Log from the Control Panel.

Fiery Spooler

The Fiery Spooler interface and functionality are almost exactly the same as before. See the 
User Guide for more information. The Override Print Settings dialog box has changed.

Simulation

The processes of simulation and calibration have changed greatly from the previous 
software version as the result of a new utility, ColorWise Pro Tools. In addition, a number 
of new DuPont qualified simulations are now available. 

For information on installing and configuring a connection to ColorWise Pro Tools, see the 
Getting Started section of this addendum. 

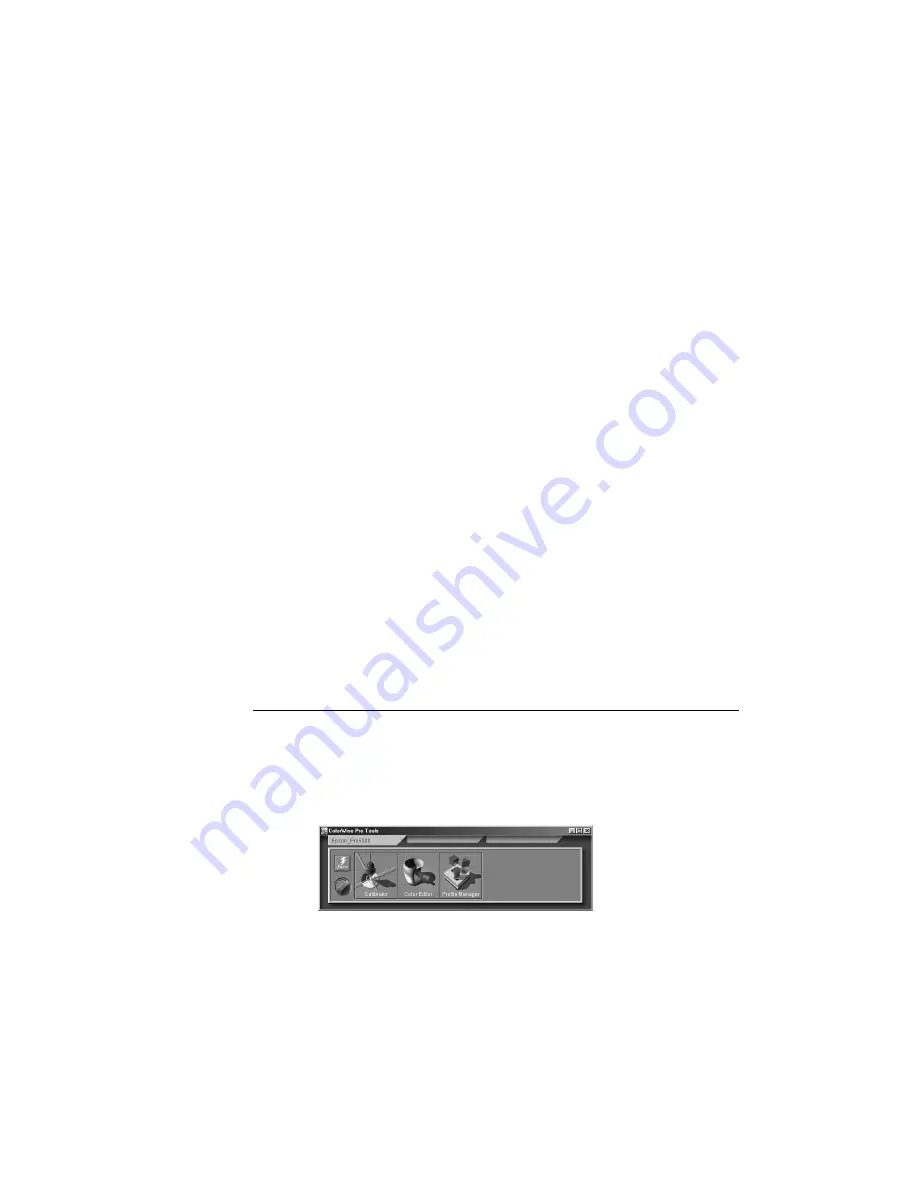
Using ColorWise Pro Tools

ColorWise Pro Tools, which includes Calibrator, Color Editor, and Profile Manager, allows 
for great control of color printing.

N

OTE

:

Only one user can be connected to ColorWise Pro Tools at a time. You will get an 

error message if you try to connect when another user is already using ColorWise Pro Tools.

N

OTE

:

ColorWise Pro Tools for Mac OS and Windows computers are fundamentally the 

same; differences are noted in this addendum. The windows and dialog boxes you see 
illustrated are the Windows version.

Calibrator

Calibrating the RIP Station ensures consistent, reliable color output. You can calibrate the 
RIP Station with Calibrator and the EPSON Color Calibrator colorimeter (available as an 
option). Using the colorimeter, you can quickly measure color patches and download these 
measurements to the RIP Station.

T

O


CALIBRATE


THE

 P

RO

5000 

USING

 C

ALIBRATOR

:

1.

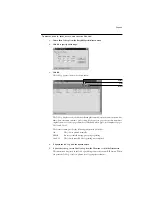
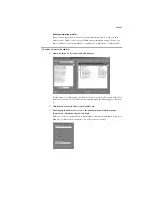
Start ColorWise Pro Tools and connect to the RIP Station.

For instructions on configuring the connection to the RIP Station, see “Configuring the 
connection” on page 15.

2.

Click Calibrator.

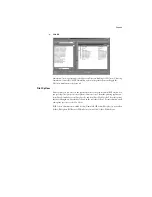
EPSON Color Calibrator should appear as the measurement method. This information is 
provided to Calibrator by the RIP Station. If EPSON Color Calibrator does not appear, 
make sure you are connected to the RIP Station.

Summary of Contents for C850071 - RIP Station 5000

Page 1: ...11 Installing the RIP Station ICM printer profiles for Windows 12 Installing the color reference files 13 Installing user software on a Mac OS computer 13 Installing ColorWise Pro Tools for Mac OS 13 Installing the color reference files 15 ColorWise Pro Tools connection for Windows and Mac OS 15 Configuring the connection 15 Modifying the configuration 18 Fiery WebTools 18 Managing Print Jobs 19 F...

Page 2: ...rt of Electronics for Imaging Inc The software described in this publication is furnished under license and may only be used or copied in accordance with the terms of such license Patents 5 666 436 5 553 200 5 543 940 5 537 516 5 517 334 5 506 946 5 424 754 5 343 311 5 212 546 4 941 038 4 837 722 4 500 919 EFI the EFI logo Fiery the Fiery logo Rip While Print and ColorWise are trademarks registere...

Page 3: ...d the operating systems supported Operating systems The new version of software supports Windows 95 Windows 98 Windows NT 4 0 and MacOS Windows 3 1x and Windows NT 3 51 are no longer supported The procedures for setting up printing with Windows 98 and installing utilities on Windows 98 computers are the same as the procedures described for Windows 95 in the Getting Started Any significant differen...

Page 4: ...ibrator and more The name of the PostScript Printer description file PPD displayed in screens such as the Printer Properties dialog box is now Fiery LX Stylus Pro 5000 v1 3 The name of the PPD file is Efme1012 ppd Setting up printing with Windows 95 98 The Setup exe icon for installing the Adobe PostScript printer driver for Windows 95 98 is located in the English Instalrs Ps_Drvr Win_9x folder on...

Page 5: ...on Configuration page You need information from the Configuration page to specify settings on your computer such as the Server Name and IP address of the WINS Name Server 3 Save any documents in open programs You are prompted to restart Windows after this procedure so be sure to save any documents TO PREPARE YOUR COMPUTER FOR SMB PRINTING 1 Click Start choose Settings and click Control Panel 2 Dou...

Page 6: ...lick OK at the Network dialog box You are prompted to restart Windows Click Yes and when Windows restarts continue with the following procedure TO SET UP SMB PRINTING 1 Click the Start button choose Settings and click Printers 2 Click the icon for the printer and choose Properties from the File menu 3 Click the Details tab in the Properties window and click Add Port A list of connection options is...

Page 7: ...lect the print connection under the printer and click OK 7 In the Add Port dialog box verify that the network path is correct and click OK 8 To confirm the connection click the General tab in the Properties dialog box 9 Click Apply then click Print Test Page 10 The Job Notes window appears Enter user and job identification information for accounting purposes or whatever information is required at ...

Page 8: ...Station You can also set up a Domain Name Server DNS for the IP address of the RIP Station in the HOSTS file and use that name See your Windows system documentation for information TO CONFIGURE THE FIERY DOWNLOADER CONNECTION 1 Launch Fiery Downloader by double clicking its icon or by choosing it from the Start Programs menu 2 Click OK 3 Enter the appropriate information for the RIP Station Nickna...

Page 9: ...e name Pro5000 selected in the list of Available Servers click OK to begin using the software TO MODIFY THE FIERY DOWNLOADER CONFIGURATION 1 To edit information for a RIP Station in the list of available servers select the RIP Station by its nickname and click Modify Edit information in the Modify Server Settings dialog box as necessary and click OK when finished 2 To add a new RIP Station to the ...

Page 10: ... selected in the Devices list click OK The RIP Station appears in a list of available servers 6 With the RIP Station selected in the list of available servers click OK to begin using Fiery Spooler TO MODIFY THE FIERY SPOOLER CONFIGURATION 1 In the Chooser dialog box click Configure 2 To edit information for a RIP Station select the RIP Station by its Server Name and click Modify Edit information i...

Page 11: ...ller names the folder Fiery TO INSTALL COLORWISE PRO TOOLS FOR WINDOWS 1 On the User Software CD open the ColorWise Pro Tools folder 2 Double click the Setup exe icon 3 Follow the instructions in the Setup dialog boxes to complete the installation of ColorWise Pro Tools Use the table below as a guide when installing ColorWise Pro Tools For specific instructions read the information in each dialog ...

Page 12: ...n ICM printer profiles for Windows 95 98 NOTE The ICM printer profiles should not be installed for printing with the Microsoft Office 97 suite of applications If you print from Microsoft Office with the ICM profile installed JPEG BMP and TIFF images print incorrectly For information on ICM profiles and color management see the Color Printing Guide Select Program Folder Specify a folder name for th...

Page 13: ...dows System Color folder and select Associate 2 In the Associate Device tab of the Profile dialog box click Add The device appears in the Associated Devices section of the tab Devices added to the list will be associated with the specific ICM profile until they are removed 3 Click OK Installing the color reference files There are two new PANTONE text files for Back Light Film Fiery Stylus Pro 5000...

Page 14: ...Some files are copied to your hard drive 5 When you are notified that installation was successful click Quit In order to use ColorWise Pro Tools you must have both ColorWise Pro Tools and Mac OS Runtime for Java MRJ 2 0 installed on your computer If you do not have MRJ 2 0 installed the ColorWise Pro Tools installer automatically initiates the MRJ 2 0 installation process see page 15 If you are no...

Page 15: ...Pro Tools you must configure the connection to the RIP Station Changes to your RIP Station or network may require you to modify the configuration NOTE Only one user can be connected to ColorWise Pro Tools at a time You will get an error message if you try to connect when another user is already using ColorWise Pro Tools Configuring the connection The first time you use ColorWise Pro Tools you are ...

Page 16: ...s connection to the RIP Station then you are ready to use ColorWise Pro Tools See Using ColorWise Pro Tools on page 29 If you have not previously configured a connection click Add 3 Enter the appropriate information for the RIP Station Nickname Enter a name for the RIP Station This name can be any name you wish it does not have to match the actual Server Name of the RIP Station NOTE The Nickname c...

Page 17: ...ou have entered all the information click Add 5 With the device name Pro5000 selected in the Devices list click OK The RIP Station appears in the list of available servers The first line of the entry displays the nickname you gave the server followed by the protocol The second line displays the device name 6 With the device name Pro5000 selected in the list of Available Servers click Select to beg...

Page 18: ... click Remove Fiery WebTools In order for network users to access and use Fiery WebTools you need to set certain RIP Station options in Setup The names of these options have changed since version 1 1 TO VERIFY THAT FIERY WEBTOOLS ARE SET UP ON THE RIP STATION 1 Print the Configuration page from the RIP Station Control Panel For Instructions see the User Guide 2 On the Configuration page check the ...

Page 19: ...Fiery WebTools have been added Using WebSetup WebSetup is discussed in detail in the Administrator Guide section of this addendum See Using Fiery WebSetup on page 46 for more information Using the Print Monitor The Print Monitor allows you to check on your printer s consumables without leaving your desk TO USE THE PRINT MONITOR 1 Click the Print Monitor button on the RIP Station homepage The Print...

Page 20: ...er functions and an interface from which you can control those functions TO LAUNCH FIERY WEBSPOOLER 1 From the RIP Station home page click WebSpooler For instructions on how to access the RIP Station home page see the Getting Started 2 If a login is required choose your login level To log in as Administrator enter the Administrator password and click OK To log in as Guest click OK without entering...

Page 21: ...ecified the password user options depend on your login level If you log in to Fiery WebSpooler as Guest you have the first option only If you log in as Administrator you have all three options For information about Setup and specifying passwords see the Administrator Guide You can use Fiery WebSpooler to perform the following functions from your workstation Override current job option settings Del...

Page 22: ...ese jobs were sent to the Print queue These PostScript files are saved on the server s hard disk PostScript files can come in packets from the network or from another place on the server hard disk Jobs are added to a queue in the order in which they arrive and they generally move to another queue in the same order unless someone intervenes to change the order RIPped jobs Jobs listed in the area be...

Page 23: ...n the Job Log To view the Job Log choose Show Job Log from the Window menu For more information on the Job Log see page 27 Menu bar The menu bar has four menus When an action is not available in the current context the command is dimmed Menu Choose this To do this File Print Job Log Print the Job Log Delete Job Log Delete the Job Log Exit Log out from the server and exit Fiery WebSpooler Job For m...

Page 24: ...tion disk Job icons There are two types of icons that are used for active jobs Spool area The job icon in the Spool area is described below The Spool area is the waiting area for jobs that will be RIPped jobs in the Spool queue Print queue jobs Network jobs sent to the Print queue appear in the Spool area where they are shown with a white printer icon When they reach the head of the queue they are...

Page 25: ...inted queue and are shown at the top of the list Jobs are saved in the Printed queue until the job limit is reached When the first job over the limit is printed the oldest job is deleted from the disk The default job limit is 10 jobs The value for Jobs Saved in Printed Queue can be changed in Setup by the administrator NOTE If you reprint a job in the Printed queue the job returns to its original ...

Page 26: ...ons To change settings for a duplicate of the original job To print a single copy of a job before printing the number of copies required by the user Choose this To do this Delete Job s Delete the job s Cancel Printing Cancel printing for selected job s Cancel RIPping Cancel RIPping for selected job s Duplicate Job s Duplicate one or more selected PostScript data jobs in the Spool or Print areas Yo...

Page 27: ...e Print Settings dialog box displays all the job settings encoded by the PostScript printer driver that can be decoded by the RIP Station If you as operator have not changed anything these are the settings a user entered before sending the job Using the Job Log From Fiery WebSpooler you can view and print a log of all jobs printed by the RIP Station including jobs downloaded with Fiery Downloader ...

Page 28: ...f color pages number of black and white pages total number of pages Note1 and Note2 The Status column provides the following information about jobs 4 To update the Job Log click the Update button 5 To print the Job Log choose Print Job Log from the File menu or click the Print button The information displayed in the Job Log window prints to the current RIP Station When you print the Job Log totals...

Page 29: ...ser can be connected to ColorWise Pro Tools at a time You will get an error message if you try to connect when another user is already using ColorWise Pro Tools NOTE ColorWise Pro Tools for Mac OS and Windows computers are fundamentally the same differences are noted in this addendum The windows and dialog boxes you see illustrated are the Windows version Calibrator Calibrating the RIP Station ens...

Page 30: ...d the measurements page data into a file See your EPSON Color Calibrator documentation for instructions 7 Under Get Measurements click From File and browse to the location of the file you created with the EPSON Color Calibrator 8 Select this file and click Open 9 When you are notified that the measurements were read successfully click OK then click Apply to implement the new calibration NOTE Chang...

Page 31: ...Color Editor you can fine tune a simulation on your RIP Station to meet your exact specifications You select a simulation first then you edit it Color Editor has two Edit Modes for editing simulations Master and TRI Use Master mode to a create custom master simulation that affects all print jobs to which it is applied regardless of which of the 15 Print Mode options see page 44 for a list you choo...

Page 32: ...it by clicking in the white box to the left of the color The eye icon indicates which channels are visible Cyan and Magenta in the example below on the graph and affected by changes to the curve s and the brightness and dot gain controls You can view all four channels Cyan Magenta Yellow and Black at a time or any combination of the channels Working with only one or two channels at a time helps yo...

Page 33: ...e marked so that you can adjust them NOTE You should only adjust points in this way after you have entered your desired Brightness and Dot Gain values 8 When you are finished click Save and enter a name for the new simulation This saves your custom simulation to the RIP Station If you edit one of the press standard targets for example SWOP COM M DIC or Euroscale you may want to include the origina...

Page 34: ... for use with the PQ Inkjet Paper 720 Print Option NOTE Simulations edited in TRI mode must be linked to a specific Print Mode 4 Edit and save the simulation as described in step 4 through step 8 on page 32 If you select this new simulation for a print job for which the Print Mode option is PQ Inkjet Paper 720 your TRI simulation is automatically applied If the Print Mode option is set to somethin...

Page 35: ...e RIP Station hard disk on page 40 If you have saved your edits under a new simulation name and want to undo the edits to one or more linked simulation see the following procedure TO UNDO EDITS MADE TO A CUSTOM LINKED SIMULATION 1 Open ColorWise Pro Tools and click either Color Editor or Profile Manager 2 Choose the simulation for which you wish to undo edits and click Select Color Editor or Edit ...

Page 36: ... master simulation exactly Testing simulations You can view a printed sample of a simulation before you save it to your RIP Station You can print Comparison Page This page is provided with ColorWise Pro Tools and shows a comparison of images and colored patches with and without simulation User defined CALIB PS in Hold Queue You can create a custom comparison page and save it as a PostScript or an ...

Page 37: ...fing standard for negative commercial printing DuPont Cromalin PUB MAT COM European proofing standard for offset printing DuPont Color Proofing The six DuPont qualified simulations DuPont WaterProof PUB MAT and COM and DuPont Cromalin PUB MAT and COM were created by DuPont These simulations were designed for precise color output that will match the color of these proofing products The DuPont Croma...

Page 38: ...indicates that these profiles cannot be deleted and can only be edited if they are saved under a new name The target icon indicates the default simulation profile in this case SWOP COM M 2 Click on the profile you want as the default simulation then click Profile Settings 3 In the Simulation Profile Settings dialog box select CMYK Input under Default for and click Apply 4 Click OK 5 In the main Pr...

Page 39: ...nt directory by clicking Browse NOTE You cannot browse using Mac OS To access an ICC profile it must be placed in the default directory 3 Browse to the directory containing the profile you want to download and click OK 4 When the profile you wish to download appears in the list in the main Profile Manager window select it 5 If the profile is compatible with the RIP Station a green arrow will indic...

Page 40: ...d always back up profiles before updating RIP Station software to ensure that no custom simulation profiles are lost TO BACK UP SIMULATION PROFILES 1 Launch ColorWise Pro Tools and click Profile Manager 2 Select the simulation profile on the RIP Station that you wish to backup The arrow in the middle of the Profile Manager window becomes green and points to the left indicating the profile is avail...

Page 41: ...ols and click Profile Manager For the purposes of this example assume DIC new is a custom profile created with Color Editor As you can see DIC new has no information under the heading Appear in Driver as 2 Click DIC new and choose Edit or double click DIC new 3 Under Appear in Driver as choose one of the predefined custom simulation names Simulation 1 Simulation 10 and click Apply Make sure to cho...

Page 42: ...f your printer and the RIP Station You can specify print options in several places from the server from the printing application from Fiery Downloader from Fiery Spooler and from Fiery WebSpooler The print options that have changed are described below and in the table that follows For information on all other print options see the User Guide RGB Source Gamma is now called Other Gamma RGB Source Ph...

Page 43: ...nd does not affect the default simulation on the RIP Station Custom simulations must be defined before users select them For information about defining custom simulations see Defining simulation profiles on page 41 When using the DuPont simulations choose one of the Print Mode settings for DuPont Epson or Com Prf Ppr and choose the appropriate page size Print Mode Com Prf Ppr 720 Com Prf Ppr 1440 ...

Page 44: ...the closest match to the device being simulated including rendering the paper color as the background Print mode Media Resolution Com Prf Ppr 720 Commercial Proofing paper 720 x 720 Com Prf Ppr 1440 1440 x 720 DuPont Epson MAT 720 DuPont Matte paper 720 x 720 DuPont Epson MAT 1440 1440 x 720 DuPont Epson PUB 720 DuPont Publication paper 720 x 720 DuPont Epson PUB 1440 1440 x 720 PQ InkJet Paper 72...

Page 45: ... Source EFIRGB sRGB PC Apple Standard Off EFIRGB The RGB source is the color space used to control color for conversion from screen to printed output EFIRGB is based on the reference points used in the creation of the RIP Station software sRGB is based on an average of a large number of PC monitors Apple Standard is the standard reference point for Apple s ColorSync software Rendering Style former...

Page 46: ...imize ink use for documents consisting of a mixture of color and black only pages With this option On black text and line art are printed with black ink only With the option Off black text and line art are printed using all four colors of ink Save Changes Yes No Yes Select Yes to activate any changes made in Color Setup select No to return to the main Setup menu without making any changes Using Fi...

Page 47: ...uld enter when you configure the connection to the server over IPX SPX See Getting Started Each time you change the Server Name you will need to modify the connection on other workstations that are using the Fiery utilities NOTE Do not use the device name Pro5000 as the server name Also if you have multiple RIP Station servers and give them the same name a unique number is appended to the name tha...

Page 48: ...ion hard disk Time Enter the correct system time based on a 24 hour clock in the form HH MM Hours Minutes The time is used on the cover page and on Job Logs Date Enter the correct system date The date is used on the cover page and on Job Logs If you enter a number that is out of range in either the Time or the Date field for example 17 in the month field you are prompted when you dismiss the Serve...

Page 49: ...tware This will clear the Administrator password and allow you to set a new one Job Log Setup Auto Print Job Log every 55 Jobs Specify whether you want the RIP Station to print the Job Log after every 55 jobs The Job Log displays a list of the last 55 jobs processed on the RIP Station with accounting information about each one including user name document name time and date printed number of pages...

Page 50: ...allel port You can connect a single Windows computer to the parallel port and print directly to the RIP Station NOTE Enabling the parallel port does not conflict with using Ethernet communication with the RIP Station Ignore EOF Character Available only if Enable Parallel Port is selected this option specifies that the RIP Station should ignore end of file EOF messages Check this box to print PostS...

Page 51: ...ting from Windows NT 4 0 workstations enabling TCP IP here also enables you to use Fiery utilities from Windows NT 4 0 workstations using TCP IP proto cols IP Address Ethernet Enter the RIP Station IP address for Ethernet You must change the default 127 0 0 1 to a valid address for your network For information about setting up printing with TCP IP see Chapter 3 in the Administrator Guide Subnet Ma...

Page 52: ...eTalk zones in your network segment Scroll through the list to select the AppleTalk zone in which you want the RIP Station to appear If your segment has only one zone the RIP Station is assigned to that zone automatically If no AppleTalk zone can be found your network may have no defined zones or else the network cable has not been connected see Chapter 4 in the Administrator Guide Protocol Setup ...

Page 53: ... connected You can however change the PServer polling interval and then modify either Bindery Setup or NDS Configuration PServer Setup NDS Configuration In initial setup the RIP Station was connected to the network and an NDS directory tree with a Printer a Print Server and one or more Print Queue objects for RIP Station jobs see Chapter 3 in the Administrator Guide was configured You can make any...

Page 54: ... 2 Select the new NDS tree and click Add Your new NDS tree selection automatically overwrites any previous tree selection If you change the NDS tree selection and there are also current Bindery settings you are alerted that they will be deleted If you continue with NDS Setup you can replace Bindery settings afterwards To exit NDS Setup choose Cancel 3 Click OK The Select login user window appears ...

Page 55: ...MB printing LPD Printing Service enables lpd printing on TCP IP networks Web Services enables the http protocol and therefore use of Fiery WebTools Bindery Setup Click the Bindery Setup button to bring up the Add Connections Window Add Connections 1 Click the server you want to add 2 Click Add 3 Enter your user name and password 4 Click OK The Add Server password window appears 5 Enter your name a...

Page 56: ...n Server Setup see Chap ter 2 in the Administrator Guide and page 47 of this addendum Comment Server comments optional can contain information about the printer Lower case letters are allowed in this field Domain or Workgroup Enter the workgroup or domain in which you want the RIP Station to appear Use WINS Server Select to use a WINS name server Broadcasts from SMB devices cannot be routed beyond...

Page 57: ...The Direct connection must be published to download fonts Publish Hold Queue Select to enable users to print jobs to the Hold queue Jobs printed to the Hold queue are not processed until the administrator releases them for printing from Fiery Spooler or WebSpooler To enable Fiery utilities you must publish the Hold queue regardless of whether users send jobs to the Hold queue Publish Print Queue S...

Page 58: ...n the RIP Station hard disk will not print due to a PostScript error Print to PS Error Specify whether the RIP Station should print the available portion of a print job when it encounters a PostScript error Select Yes to print the portion of the job that was processed before the error occurred select No to cancel the job entirely whenever a PostScript error is encountered RGB Source The RGB source...

Page 59: ...eet this goal See Using ColorWise Pro Tools on page 29 RIP Station color management As discussed elsewhere in this addendum some of the RIP Station color management options have changed for version 1 3 of the software RIP Station color print options and settings What it does Rendering Style Photographic Presentation Color Proofing Photo Color Proofing Solid Default set at Setup Applies a RIP Stati...

Page 60: ...tyles With None as the CMYK Simulation the CMYK data is converted to device ready color data using a default PostScript conversion scheme RIP Station rendering style Best used for Equivalent ICC rendering style Photographic Preserves tonal relationships in images rather than exact colors This rendering style maps out of gamut RGB colors to printable colors in a way that retains differences in ligh...

Reviews: