background image

Summary of Contents for ColorPage EPL-C8000

Page 1: ......

Page 2: ...embling the printer s parts and installing the printer s software User s Guide this manual Provides you with detailed information on the printer s functions maintenance troubleshooting and technical specifications Quick Reference Provides you with information on replacing consumables clearing jammed paper and a panel message list This guide can be hung on the printer with a hook provided Online He...

Page 3: ...rred by purchaser or third parties as a result of accident misuse or abuse of this product or unauthorized modifications repairs or alterations to this product or excluding the U S failure to strictly comply with SEIKO EPSON CORPORATION s operating and maintenance instructions SEIKO EPSON CORPORATION shall not be liable against any damages or problems arising from the use of any options or any con...

Page 4: ...ii Cardinal U G Rev C A5 size FRONT FM 11 6 98 Pass 0 L Proof Sign off Kimura _______ Nishi _______ Hoadley _______ ...

Page 5: ...5 Controlling the Printer 1 6 Accessing the printer driver 1 6 The Control Panel 1 7 Chapter 2 Control Panel Function The Control Panel 2 2 Overview 2 2 Display 2 2 Indicator Lights 2 3 Buttons 2 4 When to use SelecType 2 6 SelecType 2 7 Buttons 2 7 Using the buttons in SelecType Mode 2 7 SelecType menus 2 8 Using the OneTouch Modes 2 12 OneTouch mode 1 2 12 OneTouch mode 2 2 13 Understanding Sele...

Page 6: ...y printed paper 3 5 Paper Sources 3 6 MP Tray 3 6 Standard Lower Paper Cassette Unit 3 7 250 Sheet Lower Paper Cassette Unit A3W 3 7 Large Capacity Paper Unit 3 7 Selecting a Paper Source 3 8 Output trays 3 10 Face down Tray 3 10 Face up Tray 3 11 How to select an output tray 3 12 Loading Paper 3 12 Loading in MP tray 3 12 Loading the paper cassette 3 15 Printing on Special Paper Media 3 20 EPSON ...

Page 7: ...alling EPSON Status Monitor 2 5 2 Accessing EPSON Status Monitor 2 5 3 Checking Printer Status Information 5 4 Using the EPSON Status Monitor 2 window 5 4 Using the Printer Status window 5 9 Making Monitoring Preference Settings 5 10 Turning on background monitoring 5 10 Using the background monitoring icon 5 11 Chapter 6 Using Options 250 Sheet Lower Paper Cassette Unit A3W 6 2 Large Capacity Pap...

Page 8: ...essages for paper jam 8 2 Precautions for clearing jammed paper 8 3 Clearing the paper cassette 8 3 Clearing the MP tray 8 6 Clearing the fuser unit 8 9 Clearing the output path cover 8 13 Clearing the optional large capacity paper unit 8 14 Problems and Solutions 8 16 Operational problems 8 16 Printout problems 8 18 Print quality problems 8 20 Memory problems 8 25 Paper handling problems 8 26 Err...

Page 9: ...r unit A 17 Fuser oil roll A 18 Waste toner collector A 18 Appendix B Symbol Sets Introduction to Symbol Sets B 2 In LJ4 Emulation Mode B 3 International Set for ISO sets B 21 In ESC P 2 or FX Modes B 22 International Character Sets B 26 Characters available with the ESC command B 27 In I239X Emulation Mode B 28 In EPSON GL 2 Mode B 28 Appendix C Command Summary LaserJet 4 LJ4 Emulation Commands C...

Page 10: ...D 3 Adding More Fonts D 6 Downloading fonts D 6 Selecting Fonts D 6 Appendix E Contacting Customer Support For United Kingdom and the Republic of Ireland users E 2 For Australian users E 4 For Singapore users E 5 For Hong Kong users E 6 For Philippines users E 7 For Hong Kong Users E 7 For Philippines Users E 8 Appendix F Map of SelecType Menus Switching between SelecType Menus F 2 Glossary Index ...

Page 11: ...peration Because the printer weighs approximately 70 kg 154 lb you should not lift or carry it by yourself Four people should carry it lifting from the correct positions as shown below Follow the instructions in the Unpacking Guide carefully Be careful not to touch the fuser which is marked CAUTION HIGH TEMPERATURE If the printer has been in use the fuser can be very hot 4 3 1 2 4 CAUTION HIGH TEM...

Page 12: ...f used parts properly and in accordance with all rules and regulations in your area Do not use a cartridge for at least one hour after moving it from a cool to a warm environment When removing the photoconductor unit avoid exposing it to room light any longer than necessary The unit contains a light sensitive drum which is the green cylinder that can be seen through the opening on the unit Exposur...

Page 13: ...r humidity Also be sure to keep all consumable components out of the reach of children Do not leave paper jams in the printer it causes heat build up inside the printer Avoid using outlets that other appliances are plugged into Only use an outlet that meets the power requirements of this printer Warnings Cautions and Notes w Warnings must be followed carefully to avoid bodily injury c Cautions mus...

Page 14: ...4 Cardinal U G Rev C A5 size INTRO FM 11 6 98 Pass 0 L Proof Sign off Kimura _______ Nishi _______ Hoadley _______ ...

Page 15: ...8 Pass 0 R Proof Sign off Kimura _______ Nishi _______ Hoadley _______ Chapter 1 Getting to Know Your Printer Printer Parts 1 2 Options and Consumable Products 1 4 Options 1 4 Consumable products 1 5 Controlling the Printer 1 6 Accessing the printer driver 1 6 The Control Panel 1 7 ...

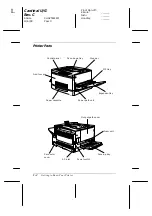
Page 16: ...11 6 98 Pass 0 L Proof Sign off Kimura _______ Nishi _______ Hoadley _______ Printer Parts Control panel Face down tray Stopper MP tray Front cover Paper cassette Paper path unit Expansion tray Output path cover Fuser unit Face up tray Power switch AC inlet Connector cover ...

Page 17: ...Proof Sign off Kimura _______ Nishi _______ Hoadley _______ Control panel Toner cartridge Photoconductor unit Fuser Fuser oil roll Waste toner collector Paper Source Menu RITech Page Size Item Copies Manual Feed Value MP Tray Size Orientation Enter Out Bin Alt Reset Continue Form Feed On Line ...

Page 18: ...s three paper cassettes It increases paper feeding capacity The 250 Sheet Lower Paper Cassette Unit A3W C81302 lets you use up to 250 sheets of A3W size paper The Optional memory module expands your printer s memory Optional interface cards provide your printer with a serial parallel coax twinax Ethernet or GPIB connections EPSON RIP Station 5000 Series II enables you to print documents formatted ...

Page 19: ...nter The printer lets you know when replacements are needed Toner Cartridge Yellow S050016 Toner Cartridge Magenta S050017 Toner Cartridge Cyan S050018 Toner Cartridge Black S050019 Waste Toner Collector S050020 Photoconductor Unit S051061 Fuser Oil Roll S052002 The EPSON special media listed below provide you the best quality printouts EPSON Color Laser Transparencies A4 S041175 EPSON Color Laser...

Page 20: ...e printer settings For information on using the control panel see Chapter 2 Accessing the printer driver You can access your printer driver directly from most Windows based applications or from your Windows operating system as explained below The printer driver settings made from many Windows applications override settings made when the driver is accessed from the operating system so in most cases...

Page 21: ...ll you about the current status of the printer and you can use the buttons to select printer settings and functions However settings that you make with the buttons will be overridden by settings made by software Becoming familiar with the way your printer s control panel works may help you get more from your printer For more information on the SelecType settings available from the controls includi...

Page 22: ...1 8 Getting to Know Your Printer Cardinal U G Rev C A5 size CHAPTER1 FM 11 6 98 Pass 0 L Proof Sign off Kimura _______ Nishi _______ Hoadley _______ ...

Page 23: ...ttons 2 4 When to use SelecType 2 6 SelecType 2 7 Buttons 2 7 Using the buttons in SelecType Mode 2 7 SelecType menus 2 8 Using the OneTouch Modes 2 12 OneTouch mode 1 2 12 OneTouch mode 2 2 13 Understanding SelecType Settings 2 14 Test menu 2 14 Emulation menu 2 15 Printing menu 2 15 Tray Size menu 2 18 Config menu 2 19 Setup menu 2 22 Parallel menu 2 24 AUX1 menu AUX2 menu 2 25 LJ4 menu 2 25 GL2...

Page 24: ...ol panel gives you easy control over most common printer operations The panel is made up of three elements a liquid crystal display indicator lights and buttons The display and indicator lights tell you the current status of the printer and you can use the buttons to select printer settings and functions Display The display shows the following Status messages such as Warming Up which indicate the ...

Page 25: ...rint data When the printer is off line this light is off The light flashes as the system switches between on line and off line status Form Feed On when data is received and stored in the printer s buffer but not yet printed Flashing indicates the printer is processing data When no data remains in the printer buffer the section of memory reserved for receiving data this light is off Continue Flashe...

Page 26: ...neTouch mode see OneTouch mode 2 on page 2 13 SelecType On when the printer is in SelecType mode See When to use SelecType on page 2 6 for details of how to use the SelecType menus etc On Line Switches the printer between on line and off line status SelecType ALT Selects a OneTouch mode or a SelecType mode Press this button once to enter OneTouch mode 1 Press this button again to enter OneTouch mo...

Page 27: ...in the current item after entering the item in the SelecType mode Enter Status Sheet Selects the corresponding OneTouch mode option listed above this button or accepts the setting currently shown on the display as a new setting when in SelecType mode Press this button two times when the printer is on line to print a status sheet Form Feed When the printer is off line and data remains in the printe...

Page 28: ...lation Switching mode Specifying the channel and configuring the interface Choosing the size of the memory buffer used to receive data You should keep the following points in mind when using SelecType settings A number of SelecType settings can also be made using the OneTouch modes and the printer driver Applicationprogramsmaysend commands to theprinterthat override SelecType settings If you are n...

Page 29: ...Type Mode Note You can directly access certain menu items using the OneTouch modes For more information see Using the OneTouch Modes on page 2 12 1 To enter SelecType mode press Menu while the printer is online or press SelecType repeatedly if necessary until the SelecType light comes on 2 To change the settings press Menu Item or Value To select a new menu menu category press Menu Examples of men...

Page 30: ...der going back through the list See Appendix F for a map showing the order in which SelecType menus etc are displayed 3 To exit SelecType mode press OnLine or SelecType SelecType menus This section gives a brief description of the menus in SelecType and lists the item settings available on each menu Test Menu These settings select and begin the printer s internal test print With a test print you c...

Page 31: ...ther details Tray Size Menu These settings display the paper size loaded in each paper tray This paper size may be different from the size set in the Page Size menu which specifies the size of the image that the printer produces See Tray Size Menu on page 2 18 for further details Config Menu These settings affect the performance of the printer See Config menu on page 2 19 for further details Paral...

Page 32: ...tails AUX1 Menu AUX2 Menu If the optional Type B interface has been installed these settings control the communication between the two units using this interface See the manual supplied with the interface for further details LJ4 Menu These settings control the fonts and symbol sets when the printer is in LJ4 emulation mode See LJ4 menu on page 2 25 for further details Interface Time Out Standby La...

Page 33: ...en in FX emulation mode See ESCP2 and FX menu on page 2 31 for further details I239X Menu These settings control the behavior of the printer when in I329X emulation mode See I239X menu on page 2 34 for further details GL Mode Scale Origin Pen End Join Pen0 Pen1 Pen 2 Pen3 Pen4 Pen5 Pen6 Available only when in GLlike mode Font Pitch Condensed T Margin Text CG Table Country Auto CR Auto LF Bit Image...

Page 34: ...mode 1 settings for Paper Source Page Size Manual Feed and Orientation are shown on the display above the corresponding setting For example Port or Land is shown above Orientation Paper Source Specifies whether paper feeds into the printer from the MP Tray the lower paper cassette or the optional Large Capacity Paper Unit if installed If you select Auto the paper source containing the paper that m...

Page 35: ... and Out Bin are shown onthe displayabove the corresponding setting For example On or Off is shown above RITech mode RITech Turns the RITech setting on or off RITech produces smoother and crisper lines text and graphics If you change this setting you can check the print quality with the RITech setting by printing a status sheet from the SelecType Test menu Note RITech is available only for monochr...

Page 36: ...ing Value c Caution After you print these samples user defined data stored in the printer such as downloaded fonts may be erased depending on which sample you printed Status Sheet Prints a sample describing the current printer features Use these options to check the current printer s settings and to see if your printer is working correctly Color Test Sheet Prints a color sample Use this option to ...

Page 37: ...FX GL2 or I239X menus as necessary The options available are the same for every interface Printing menu The settings in the Printing Menu can be set from within your software Settings made with software will override any settings made by SelecType Setting Parameters Parallel AUX1 AUX2 If optional interface is installed Auto LJ4 ESCP2 FX I239X GL2 Setting Parameters Paper Source Auto MP LC1 LC2 LC3...

Page 38: ... Size setting Note You can also make the Paper Source setting from OneTouch Mode 1 Page Size Specifies the paper size Note You can also make the Paper Size setting from OneTouch Mode 1 Wide A4 This setting specifies whether the printer accepts wide A4 paper for printing or not Orientation Specifies whether the page is printed in portrait Port or landscape Land orientation This manual is printed in...

Page 39: ...irectly from OneTouch Mode 2 Manual Feed This item selects manual feed mode For further details about the manual feed mode see the section Manually Loading Paper on page 3 9 Note You can also make the Manual Feed setting from OneTouch Mode 1 Resolution Switches the resolution between 300 and 600 dpi Skip Blank Page If the printer comes across a page in the job it is currently printing which is bla...

Page 40: ...rrently loaded paper size in the lower paper cassette LC2 Size LC3 Size LC4 Size These menus are only available if you have installed the optional Large Capacity Paper Unit It allows you to view the currently loaded paper size in each cassette of Large Capacity Paper Unit Setting Parameters MP Tray Size A4 A3 A5 B4 B5 LT B HLT LGL GLT GLG EXE F4 MON C10 DL C6 IB5 A3W LC1 Size When installing stand...

Page 41: ...ke the RITech setting from OneTouch Mode 2 RITech is available only for monochrome black white printing Toner Save Turns the Toner Save mode on When on the printer saves toner by substituting a gray shade for the black inside part of printed characters The characters are outlined in full black on their right and lower edges Setting Parameters RITech Off On Toner Save Off On Top Offset 5 0 to 6 0 m...

Page 42: ...he left edge of the paper Otherwise you may damage the printer Size Ignore Selects whether or not to ignore a paper size error Turning this item on causes the printer to print even if the image size exceeds the printable area for the specified size of paper This may cause smudges because of toner that is not properly transferred onto the paper When this item is off the printer stops printing if a ...

Page 43: ... to send the print job but it will allow you to print complex jobs Page Protect usually works best if set to Auto You will need to increase your printer s memory if memory errors continue to occur Note Changing the Page Protect setting reconfigures the printer s memory which causes any downloaded fonts to be erased Image Optimum Reduces the amount of graphics data when the data reaches the memory ...

Page 44: ... from the interface which you have selected here Time Out Sets the length of time that the printer waits when it is on line and no new data is received When this time is up the printer searches for new print data on other print channels interfaces Setting Parameters Interface Auto Parallel AUX1 AUX2 This setting is only available if the optional interface has been installed Time Out 0 5 to 300 in ...

Page 45: ...t to send print data it is ready to print in about 60 seconds level1 or 300 seconds level2 Lang Specifies the language displayed on the control panel and printed the status sheet Printer Name Displays the printer name instead of Ready when the printer is standing by Y Toner M Toner C Toner K Toner Displays the amount of toner left in the imaging cartridge E F 100 76 E F 75 51 E F 50 26 E F 25 1 E ...

Page 46: ...llel interface see Appendix A Bi D Enables or disables bidirectional communication between the printer and the computer Make the setting according to the parallel port on your computer Note Your computer s parallel interface must support bidirectional communication for this setting to be effective Buffer Size Determines the amount of memory to be used for receiving and printing data If set to Maxi...

Page 47: ...h the optional interface If set to Maximum more memory is allocated to receiving data If set to Minimum more memory is allocated to printing data The factory default setting is Normal LJ4 menu This menu allows you to make various parameter settings while the printer is in LJ4 emulation mode Setting Parameters Buffer Size Normal Maximum Minimum Setting Parameters Font Source Resident DIMM Download ...

Page 48: ...9 ISO IBM DN PcMultiling PcE Europe PcTk437 WiAnsi WiE Europe WiTurkish DeskTop PsText VeInternati VeUS MsPublishin Math 8 PsMath VeMath PiFont Legal UK ANSI ASCII Swedis2 Italian Spanish German Norweg1 French2 Windows PcIcelandic PcLt774 PcTurk1 PcPortugues PcEt850 PcTurk2 PcCanFrench PcSl437 PcNordic 8859 3 ISO 8859 4 ISO WiBaltic WiEstonian WiLatvian Mazowia CodeMJK BpBRASCII BpAbicomp PcGk437 ...

Page 49: ... used in the print job See Appendix B for details of the different symbol sets available in this printer If you select a symbol set which is not available for the font selected with the Font Source and Font Number settings the printer uses the default symbol set Form Selects the number of lines for the selected paper size and orientation This causes a line spacing VMI change as well and this new V...

Page 50: ...e as well as two additional commands GL Mode Selects whether the emulation is similar to the GL 2 or the HP LaserJet 4 emulation of the GL 2 Setting Parameters GL Mode LJ4GL2 GLlike Scale Off A0 A1 A2 A3 Origin Corner Center Pen Pen0 Pen1 Pen2 Pen3 Pen4 Pen5 Pen6 Available only when in GLlike mode End Butt Square Triangular Round Join Mitered Miteredbeveled Triangular Round Beveled None Pen0 0 05 ...

Page 51: ... factor is calculated based on the output paper size of the software application Origin Selects whether the logical origin of the plotter is from the corner or the center of the paper Pen Selects the logical pen which is used to plot the drawing End Selects the way in which lines end Join Selects the way in which lines are joined Pen0 Pen1 Pen2 Pen3 Pen4 Pen5 Pen6 Selects the thickness of the seve...

Page 52: ...int Check the following items the information may be necessary later Paper size Printer s paper size setting Driver plotter selection HP GL 2 or HP GL plotters Pen cofiguration Pen number pen width Plot origin Center or Corner Orientation GLlike landscape only LJ4GL2 landscape or portrait If you need to configure the printer settings first switch the emulation and then change the settings using th...

Page 53: ...R A OCR B ESCP2 menu only Pitch 10 12 15 Prop cpi Condensed Off On T Margin 0 40 to 1 50 inch in 0 05 inch steps Text From 1 upwards maximum of 111 lines CGTable PcUSA Italic PcMultilin PcPortugue PcCanFrenc PcNordic PcTurkish2 PcE Europe BpBRASCII BpAbicomp PcSl437 PcTurkish1 PcIcelandic 8859 9 ISO Mazowia CodeMJK PcGk437 PcGK851 PcGk869 8859 7 ISO PcCy855 PcCy866 Bulgarian PcUkr866 Hebrew7 Hebre...

Page 54: ...s For this option a line is assumed to be 1 pica 1 6 inch If you change the Orientation Page Size or T Margin settings the page length setting automatically returns to the default setting for each paper size CG Table Use the character generator table option to select the graphics character table or the italics table The graphics table contains graphic characters for printing lines corners shaded a...

Page 55: ...et to On a line feed command is sent with each carriage return You should set this to On if your text lines overprint each other Bit Image If you set this parameter to Dark or Light the printer is able to emulate the graphics densities set with the printer commands If you select Dark the bit image density is high and if you select Light the bit image density is low If you select BarCode the printe...

Page 56: ...d symbols used by different languages The printer prints text based in the selected character table Alt Graphic Turns the Alternate Graphics option on or off The default setting is OFF Character Set Selects character table 1 or 2 Setting Parameters Font Courier Prestige Gothic Orator Script Presentor Sans serif Pitch 10 12 15 17 20 24 Prop all fixed pitches are in cpi Code Page 437 850 860 863 865...

Page 57: ...per Sources 3 6 MP Tray 3 6 Standard Lower Paper Cassette Unit 3 7 250 Sheet Lower Paper Cassette Unit A3W 3 7 Large Capacity Paper Unit 3 7 Selecting a Paper Source 3 8 Output trays 3 10 Face down Tray 3 10 Face up Tray 3 11 How to select an output tray 3 12 Loading Paper 3 12 Loading in MP tray 3 12 Loading the paper cassette 3 15 Printing on Special Paper Media 3 20 EPSON Color Laser Transparen...

Page 58: ... Besuretostore yourpaper in a dry environment EPSON Special Media EPSON provides special media that are created especially for this printer EPSON Color Laser Transparencies This media is designed specifically for this printer You can load this media only from MP tray S041175 A4 S041174 Letter c Caution Do not use other EPSON media such as the EPSON special media for ink jet printers as it can caus...

Page 59: ...ck before purchasing largequantities or printing largejobs You may use paper with preprinted letterheads provided that the paper and ink are both of laser printer types Paper type Description Plain paper Recycled paper is available Weight 60 to 105 g m2 16 to 28 lb Use recycled paper under normal conditions Envelopes No paste and no tape No plastic window unless it is specially designed for laser ...

Page 60: ...for ink jet printers Paper that has been printed by any other laser printer Paper that has been printed by an ink jet printer or thermal transfer printer Carbon paper no carbon paper thermal sensitive paper pressure sensitive paper or acid paper Overly thick or thin paper Moist or dampened Coated paper or special surface colored paper Paper too smooth or too slick paper too rough or paper that has...

Page 61: ...t cover the backing sheet completely Paper that has paste staples paper clips or tape on it Paper that is attracted to static electricity Uneven paper Paper that uses high temperature sensitive ink around 150 C Priviously printed paper Do not use paper that has been printed by this printer or any other printer as it can cause poor print quality paper jams and printer damage ...

Page 62: ...etter LT Half Letter HLT Legal LG Executive EXE Government Legal GLG Government Letter GLT Ledger B F4 Custom size paper 90 x 139 7 mm minimum 330 2 x 483 mm maximum These sizes should be loaded short edge first Up to 150 sheets Total thickness less than 16 mm Envelopes Monarch MON C10 DL C6 Up to 20 sheets Labels 90 x 139 7 mm minimum 330 2 x 483 mm maximum Up to 75 sheets Thick paper 90 x 139 7 ...

Page 63: ... B4 B5 Letter LT Legal LG Executive EXE Ledger B These sizes should be loaded short edge first Available depending on country of purchase Up to 250 sheets Total thickness less than 28 mm Paper type Paper size Capacity Plain Paper A3W 328 x 453 mm This size should be loaded short edge first Up to 250 sheets Total thickness less than 28 mm Paper type Paper size Capacity Plain Paper A3 A4 B4 B5 Lette...

Page 64: ...items See Chapter 2 Auto selection If you select Auto Selection from the printer driver or Auto from the SelecType mode the paper source that contains paper matching the page size setting will be used When there is no paper in the selected paper source the printer will search for a paper source containing the same size paper in the following order Lower paper cassette LC1 Paper cassette 1 on Large...

Page 65: ...driver from your application software click the Print or Page Setup command on the File menu You also need to click Setup Options Properties or a combination of these buttons To access the driver from Windows 95 or Windows NT 4 0 click Start select Settings and click Printers Next right click the icon of your EPSON printer and click Properties in Windows 95 or Document Defaults in Windows NT 4 0 2...

Page 66: ...s On Line again to print the next page of print data if necessary Repeat these steps for each page you print Output trays There are two trays for printed paper stacks the Face down tray and the Face up tray Face down Tray If you use the face down tray your printouts will be stacked facing down If you print on large paper you should raise the stopper to avoid having your printouts slip off of the p...

Page 67: ... Laser Transparencies Envelopes Thick paper Labels Face up Tray Your printout also can be stacked facing up The Face up tray is available for all types of paper that can be used with this printer Capacity Up to 150 sheets smaller than A4 size paper Up to 50 sheets A4 or more size paper Note If you want to output your printouts to the face up tray you need to make the Reverse Order setting in the p...

Page 68: ...select either the FaceDown Tray or the FaceUp Tray check box Then click OK Using SelecType mode with the control panel Select FD face down tray or FU face up tray as the Out Bin setting Loading Paper This section describes how to load paper in the MP tray and paper cassettes If you use special media such as EPSON Color Laser Transparencies or envelopes also see the section Printing on Special Pape...

Page 69: ... R Proof Sign off Kimura _______ Nishi _______ Hoadley _______ 2 If you want to load A3W size paper lay the inside left edge guide down If you want to load media other than A3W size paper make sure the guide is standing up 3 Slide the right edge guide all the way to the right ...

Page 70: ...____ 4 Load a stack of paper with the printable surface up with the leftedgeof thepaperrestingagainsttheleftpaperguide Then slide the right paper guide against the right edgs of the paper 5 Select the paper size that matches the paper loaded by OneTouch mode 2 SelecType from the control panel See Chapter 2 for using SelecType mode ...

Page 71: ... load paper the same way for the standard paper cassette and the optional Large Capacity Paper Unit If you use the special media such as EPSON Color Laser Transparencies or envelopes see the section Printing on Special Paper later in this chapter 1 Turn on the printer 2 Pull the paper cassette out until it stops 3 Press the metal plate in the cassette down until it clicks ...

Page 72: ...G Rev C A5 size CHAPTER3 FM 11 6 98 Pass 0 L Proof Sign off Kimura _______ Nishi _______ Hoadley _______ 4 Slide the two edge guides while holding the clips on the guides with your fingers until the guides match the size of the paper ...

Page 73: ...eets from sticking together and tap the edge of the stack on a firm surface to line up the edges of the paper 6 Insert the stack into the cassette lining it up with the right side of the cassette Make sure that all the paper is under the metal retaining clip c Cautions If you load the printer with too much paper it may cause paper jams A3 A3 A4 17 B4 B4 B5 LT A4 A4 8 5 14 17 B5 ...

Page 74: ...Slidetheedge guides until they just touch the edgeof thestack of paper Make sure to adjust the small edge guide so that it points to the size mark that matches paper loaded Note The printer automatically knows the size of loaded paper from the position of small edge guide so you need to adjust it the correct position A3 A4 17 B4 B5 LG LT ...

Page 75: ...3 Paper Handling 3 19 Cardinal U G Rev C A5 size CHAPTER3 FM 11 6 98 Pass 0 R Proof Sign off Kimura _______ Nishi _______ Hoadley _______ 8 Push the paper cassette in all the way ...

Page 76: ... Transparencies thick paper envelopes and labels EPSON Color Laser Transparencies You should only print on EPSON Color Laser Transparencies Do not use any other transparencies for this printer The following table shows the inportant information about using transparencies Please note the following tips for handling this media Hold each sheet by its edges as fingerprints and do not touch or damage t...

Page 77: ...erstops feeding itinorder to preventprinter damage If you load EPSON Color Laser Transparencies the wrong direction or wrong with the wrong faces up the printer stops to feeding When this type error occurs the message Check OHP Sheet appears on the control panel Pull out the jamed sheet from theloading entranceand check the paper path unit at theright side of the printer be sure if there is no jam...

Page 78: ... unless they are specially designed for laserprinters Theplastic on most window envelopeswill melt when it comes in contact with the fuser The following table shows important information about using envelopes Please note the following tips for handling this media Open the flap of envelopes and load envelopes with the flap facing out as shown below Paper source MP tray only up to 20 envelopes MP Tr...

Page 79: ...most types of label sheet in the MP tray at a time however you may need to feed some sheets one at a time in the paper tray or load them manually You should only use labels designed for laser printers or plain paper copiers To prevent the label adhesive from coming into contact with printer parts always use labels that completely cover the backing sheet with no gaps between the individual labels Y...

Page 80: ...Basic Settings tab Select User Defined Size from the Paper Size list In the User Defined Paper Size dialg box adjust the Width Height and Unit settings to match your custom paper Then click the OK button and your custom paper size will be saved Access SelecType mode and set page size to CTM custom Paper source MP tray only up to 75 sheets MP Tray Size setting in SelecType mode Select appropriate s...

Page 81: ...__ Chapter 4 Functions of the Printer Driver The Printer Software 4 2 Accessing the Printer Software 4 3 Using the Automatic Setting 4 4 Using the Predefined Settings 4 5 Customizing the Print Settings 4 7 Saving your settings 4 8 Making the Media Type Setting 4 9 Modifying the Printout Style 4 9 Using the Layout menu 4 10 Using the Overlay menu 4 12 ...

Page 82: ...om your printer The printer utility lets you check the status of your printer There are four levels of settings Automatic setting The quickest and easiest way to start printing See page 4 6 Predefined settings Give you more control over printer settings optimized by the type of printout See page 4 5 Custom settings Fit your individual needs See page 4 7 Printout style settings Convenient functions...

Page 83: ...nter software from your application to make sure that the settings are appropriate for the document you want to print Note Online help is available for details about the printer driver settings To access the printer driver from your application software click the Print or Page Setup command on the File menu You also need to click Setup Options Properties or a combination of these buttons To access...

Page 84: ...ons feature paper size and page layout settings which override similar settings on the printer driver but if your application does not you should verify the settings on the printer driver Note Depending on the color setting you make in the Basic Setting menu when Automatic is selected a slide bar may appear in the Mode Setting box that lets you choose Text Graph or Photo Select Text Graph when you...

Page 85: ...documents or images taken by a video or digital camera 1 Click Advanced on the Basic Settings menu You will find the predefined settings in the list near the Advanced button 2 Select the most appropriate setting from the list according to the type of document or image you will print When you choose a predefined setting other settings such as Printing Mode Resoution Screen and Color adjustment meth...

Page 86: ...ured using video input a digital camera orscanner EPSONPhotoEnhance2 automaticallyadjusts the contrast saturation and brightness of the original image data to produce sharper more vivid color printouts This setting does not affect your original image data ICM for Windows 95 and 98 only ICM means Image Color Matching This feature automatically adjusts printout colors to match colors on your screen ...

Page 87: ...over the driver want to make the most detailed settings available or just want to experiment see below 1 Click Advanced on the Basic Settings menu and then click More Settings The Advanced Settings dialog box appears 2 First choose Color or Black as the Color setting Then make other settings For details of each setting see online help 3 Click OK to apply your settings and return to the Basic Setti...

Page 88: ...Basic Settings menu Note You cannot use a predefined setting name for your custom settings To delete a custom setting click Save Settings in the Main menu select the setting in the Custom Settings dialog box and then click Delete You cannot delete the predefined settings If you change any setting in the Advanced Settings dialog box when one of your custom settings is selected in the Advanced setti...

Page 89: ...etermine the Media setting for your paper First find your paper then click the corresponding Media setting Normal Plain paper Thick Envelopes Labels Thick paper Transparency EPSON Color Laser Transparencies Modifying the Printout Style The Layout menu and the Overlay menu allow you to make variousprintsettings thataffectthewayyourdocumentisprinted and the look of your printout This section describ...

Page 90: ...he Layout menu Zoom Options Normal Prints your document at its normal size Custom Allows you to manually define the percentage you want to enlarge or reduce an image Click the arrows to select a scaling ratio from 50 to 200 Fit to Page Proportinally enlarges or reduces the size of your document to make it fit the paper size you select in the Output Paper list ...

Page 91: ...ure is active if a check appears in the check box Watermark Check theWatermark check box to activate thecurrently selected watermark and to enable the Watermark Setting button which opens the Watermark dialog box In the Watermark dialog box you can select from a list of predefined watermarks or you can select a bitmap BMP file as your own custom watermark The Watermark dialog box also allows you t...

Page 92: ...11 6 98 Pass 0 L Proof Sign off Kimura _______ Nishi _______ Hoadley _______ Using the Overlay menu In this menu you can use the form overlay function The form overlay function prints form data overlaid with data made by another application You can create form data and save it ...

Page 93: ...atus Monitor 2 About the EPSON Status Monitor 2 Utility 5 2 Installing EPSON Status Monitor 2 5 2 Accessing EPSON Status Monitor 2 5 3 Checking Printer Status Information 5 4 Using the EPSON Status Monitor 2 window 5 4 Using the Printer Status window 5 9 Making Monitoring Preference Settings 5 10 Turning on background monitoring 5 10 Using the background monitoring icon 5 11 ...

Page 94: ...ith this card See the manual that comes with the interface card for instructions on using the Status Monitor in a network environment Before using the Status Monitor be sure to read the README file in the EPSON Status Monitor 2 folder located in the EPSON folder on your hard drive This file contains the latest information on the Status Monitor Installing EPSON Status Monitor 2 Note If you installe...

Page 95: ...or starts automatically and adds a printer shaped background monitoring icon to the taskbar at the bottom of your computer screen This icon appears only when the Status Monitor is active Accessing EPSON Status Monitor 2 To open the EPSON Status Monitor 2 window shown below double click the printer shaped background monitoring icon on the taskbar at the bottom of your computer screen You can also o...

Page 96: ...at the bottom of the EPSON Status Monitor 2 window The main features of the EPSON Status Monitor 2 window are described below Installed Printers list This list displays information about the EPSON printers connected directly to your computer If you select List from the View menu the list displays only the printer names and icons If you select Details the list displays the printer name status and j...

Page 97: ...er and the Job Count column displays the number of jobs waiting to print on each printer Note You can arrange the printers in the Installed Printers list according to the information in the Printer Name Status or Job Count column Click the Printer Name Status or Job Count title bar to change the printer order Icon appearance Description Green The printer is ready to print or currently printing Yel...

Page 98: ...ed Printers list select a printer from the list then select from the Printer menu options described below Printer Status Opens the Printer Status window which provides detailed information on the selected printer s status To use the Printer Status window see page 5 9 Job Status Provides information about all jobs waiting to print on the selected printer Select Paper Memory Not available Close Clos...

Page 99: ... described below Toolbar Status Bar Shows or hides the toolbar and status bar in the EPSON Status Monitor 2 window Large Icons Small Icons Changes the size of the printer icons in the Installed Printers list List Displays only the printer names and icons in the Installed Printers list Details Displays the printer name and icon status and number of jobs waiting to print for each printer in the Inst...

Page 100: ...onitoring settings for the selected printer For more information see Turning on background monitoring on page 5 10 Add Printer Delete Printer Allows you to select the printers you want to monitor by adding or deleting printers in the Installed Printers list Background Monitoring Activates the Status Monitor A printer shaped icon appears on the taskbar at the bottom of your computer screen Note The...

Page 101: ...g the Details button in the Status Alert dialog box For information on the Status Alert dialog box see Making Monitoring Preference Settings on page 5 10 The Printer Status window contains three menus the Current Status Consumables and Printer Information menus To open the menus click the tabs at the top of the Printer Status window Current Status menu The printer illustration and message boxes on...

Page 102: ...ext page When you turn on background monitoring the Status Monitor updates the status information for the selected printer in the background whenever you are using your computer A Status Alert dialog box is displayed in the lower right corner of your computer screen It provides short messages and a Details button that allows you to open the Printer Status window Turning on background monitoring Fo...

Page 103: ...lected printer and view the Status Alert options 5 Click the Status Alert options to specify when you want the Status Alert dialog box to appear 6 Click OK to save your settings and close the Monitoring Preferences dialog box Using the background monitoring icon A printer shaped background monitoring icon appears on the taskbar on your computer screen when the Status Monitor is active To activate ...

Page 104: ...5 12 Using EPSON Status Monitor 2 Cardinal U G Rev C A5 size CHAPTER5 FM 11 6 98 Pass 0 L Proof Sign off Kimura _______ Nishi _______ Hoadley _______ ...

Page 105: ... 6 98 Pass 0 R Proof Sign off Kimura _______ Nishi _______ Hoadley _______ Chapter 6 Using Options 250 Sheet Lower Paper Cassette Unit A3W 6 2 Large Capacity Paper Unit 6 3 Memory Module 6 4 ROM Module 6 4 Interface Cards 6 5 EPSON RIP Station 5000 Series II 6 5 ...

Page 106: ...ze paper up to 250 sheets To install this option see Setup Guide To load paper in the paper cassette see page 3 15 in this manual You can use the following types and size of paper with the optional cassette unit c Caution This paper cassette cannot be installed in the optional Large Capacity Paper Unit Attempting to force it will damage the paper cassette and large capacity paper unit Note You can...

Page 107: ...e Setup Guide or the option s documentation You can use paper that matches the following specifications in either paper cassette in this unit c Caution The Optional 250 Sheet Lower Paper Cassette Unit A3W cannot be installed in this paper unit Attempting to force it will damage the paper unit and paper cassette Note You can insert the paper cassette in any slot However you cannot insert the option...

Page 108: ...ts the following requirements Note The total printer memory is the default 64 MB plus all installed DIMM For example if you install a 32MB DIMM the total printer memory is 96 MB However if you install two 128MB DIMMs the total available printer memory is 256 MB though the installed memory is more than 256 MB ROM Module In some locations there are optional ROM modules that can expand your printer s...

Page 109: ...ontact your dealer To install an interface card see Setup Guide Note There are two slots for optional interface cards You can install two different types of the interface cards at the same time EPSON RIP Station 5000 Series II This option is a hard ware RIP color print server It lets you print documents that are formatted Adobe PostScript 3 To install the EPSON RIP Station 5000 Series II and conne...

Page 110: ...6 6 Using Options Cardinal U G Rev C A5 size CHAPTER6 FM 11 6 98 Pass 0 L Proof Sign off Kimura _______ Nishi _______ Hoadley _______ ...

Page 111: ...ation Replacing Consumable Products 7 2 Precautions when replacing consumable products 7 2 Replacement messages 7 3 Toner cartridge 7 5 Fuser oil roll 7 10 Photoconductor unit 7 13 Waste toner collector 7 18 Cleaning the Printer 7 21 Cleaning the outside of the printer 7 21 Cleaning the paper path roller 7 21 Transporting the Printer 7 23 For long distances 7 23 For short distances 7 23 ...

Page 112: ...mable products please be sure to Clear enough space for the replacement procedure You will have to open someparts such as thefront cover of the printer when you are replacing consumables Do not remove consumable products from the printer unless they need to be replaced Do not put used consumable products in the printer w Warning Be careful not to touch the fuser which is marked CAUTION HIGH TEMPER...

Page 113: ... consumable product needs to be replaced at the same time each message will appear after you press the Continue button Control panel message EPSON Status Monitor 2 message Description XXXX Toner Low Letter s of Y M C and or K that should be replaced displays For exmaple the message Y Toner Low means that you need to replace yellow toner cartridge There is no more X or X toner Amount of remaining t...

Page 114: ...er replacing the consumable product check the control panel display for replacement messages about other consumables products Control panel message EPSON Status Monitor 2 message Description XXXX Toner Out Letter s of Y M C and or K indicate what color toner should be replaced For exmaple the message Y Toner Low means that you need to replace yellow toner cartridge The X and X toner has run out Th...

Page 115: ...ner Cartridge Magenta S050017 Toner Cartridge Cyan S050018 Toner Cartridge Black S050019 Handling precautions Do not put a used toner cartridge in the printer Do not install a cartridge for at least one hour after moving it from a cool to a warm environment w Warning Try not to touch the toner and avoid all contact with your eyes If the toner gets on your skin or clothes wash it off with soap and ...

Page 116: ..._______ Replacing a toner cartridge 1 Confirm the color of the toner cartridge that needs to be replaced by checking the control panel display 2 Open the front cover 3 See which color currently appears in the cartridge installment window If you can see the color that you need to replace go to step 5 If you see a different color go to next step ...

Page 117: ...window Turn it clockwise until it stops The switch drops down to lower position automatically and the next cartridge slot appears in the installation window Repeat this step until the cartridge that you want to replace appears Note If the knob cannot be turned check if the switch is up Do not turn the knob by force 5 Turn the cartridge knob counterclockwise 90 degrees so that the O symbol on the k...

Page 118: ...CHAPTER7 FM 11 6 98 Pass 0 L Proof Sign off Kimura _______ Nishi _______ Hoadley _______ 6 Pull the cartridge out of the slot 7 Take a new cartridge out of package and gently shake it back and forth and from front to back as shown below to distribute toner evenly ...

Page 119: ...ay into the cartridge slot 9 Turn the cartridge knob clockwise 90 degrees so that the O symbol on theknobis in theposition shown below By turning knob the cartridge is inserted and locked into the slot c Caution Make sure to turn the knob all the way to the set position otherwise you may have toner problems or leakage 10 If you need to replace another cartridge repeat steps 3 to 9 11 Close the fro...

Page 120: ... not touch the white roll surface If the oil gets your skin or clothes wash it off immediately The roll should be always kept horizontally Do not tilt or lean it against something Doing so can cause oil leakage and reduced print quality Keep the fuser oil roll out of the reach of children w Warning Do not dispose of the used fuser oil roll in fire as it can explode and cause injury Replacing the f...

Page 121: ...__ Nishi _______ Hoadley _______ 2 Hold the handle of the fuser unit and pull it all the way out w Warning Be careful not to touch the fuser or the area around the fuser which are marked CAUTION HIGH TEMPERATURE If the printer has been in use the fuser can be very hot 3 Hold the handle of the fuser oil roll and remove it ...

Page 122: ...f Sign off Kimura _______ Nishi _______ Hoadley _______ 4 Take a new fuser oil roll from the box and remove the cover and two shipping pins as shown below Note Do not touch the white roll surface 5 Hold the roll handle and insert it into the fuser unit matching the green marks on the roll and unit ...

Page 123: ..._______ 6 Push the roll down firmly until it clicks into place 7 Push the fuser unit into the printer until it clicks Photoconductor unit Prepare the photoconductor unit S051061 for replacement The photoconductor unit includes the waste toner collector When you replace the photoconductor unit the waste toner collector is replaced at the same time ...

Page 124: ...amage its surface and may affect print quality To get the best print quality do not store the photoconductor unit in an area subject to direct sunlight dust salty air or corrosive gasses such as ammonia Avoid locations subject to extremes or rapid changes in heat or humidity Keep the photoconductor unit out of the reach of children w Warning Do not dispose of the used photoconductor unit in fire a...

Page 125: ... Rev C A5 size CHAPTER7 FM 11 6 98 Pass 0 R Proof Sign off Kimura _______ Nishi _______ Hoadley _______ 3 Turn the large lever counterclockwise 90 degrees 4 Turn the small lever to the right 5 Pull the photoconductor unit about 30 cm out of the printer ...

Page 126: ... handle at the top of the photoconductor unit and gently pull it all the way out 7 Take a new photoconductor unit out of its package and remove the protective sheet by holding the handle as shown below c Caution Be sure not to scratch or touch the surface of the drum When replacing the photoconductor unit avoid exposing it to room light any longer than necessary ...

Page 127: ...ss 0 R Proof Sign off Kimura _______ Nishi _______ Hoadley _______ 8 Hold the handle at the top of the photoconductor unit and place the unit on the guide rails Insert it all the way into the printer c Caution Be sure not to touch the surface of the drum 9 Turn the small lever to the left ...

Page 128: ...collector S050020 for replacement The waste toner collector is a part of the photoconductor unit and it is replaced during photoconductor unit replacement however sometimes you may need to replace the waste toner collector seperately Handling precautions Do not reuse toner found in the waste toner collector Keep the waste toner collector out of the reach of children w Warning Do not dispose of the...

Page 129: ...rdinal U G Rev C A5 size CHAPTER7 FM 11 6 98 Pass 0 R Proof Sign off Kimura _______ Nishi _______ Hoadley _______ Replacing the waste toner collector 1 Open the front cover 2 Grasp thehandleand tab ofthewastetonercollectorto release the lock ...

Page 130: ...M 11 6 98 Pass 0 L Proof Sign off Kimura _______ Nishi _______ Hoadley _______ 3 Pull out the waste toner collector 4 Take out a new waste toner collector 5 Hold the handle of the collector and insert it into the slot all the way until the tab clicks 6 Close the front cover ...

Page 131: ...g the outside of the printer If the printer s outer case is dirty or dusty turn off the printer and clean it with a soft clean cloth dampened with a mild detergent c Caution Never use alcohol or thinner to clean the printer cover these chemicals can damage the components and the case Be careful not to get water on the printer mechanism or any electronic components Cleaning the paper path roller If...

Page 132: ...imura _______ Nishi _______ Hoadley _______ 2 Pull out the paper path unit on the right side of the printer 3 Wipe the upper side of two paper path rollers gently with a clean dampened cloth c Caution Be careful not to get water on the printer mechanism or any electronic components 4 Close the paper path unit ...

Page 133: ...er a long distance the printer should be repacked using the original box packing materials and protective materials Contact your dealer for assistance For short distances When you need to move the printer a short distance note the following points When you move the printer only 1 First turn off the printer and remove the following parts Power cord Interface cable Paper in the MP tray and the paper...

Page 134: ...should lift the printer to un install the MP tray because the printer weighs approximately 70 kg 154 lb Make sure to lift it from the correct positions c Caution Do not hold the MP tray 3 When moving the printer always keep it horizontal To move the printer together with the large capacity paper unit 1 Unlock the four casters at the bottom of the paper unit 1 2 3 4 ...

Page 135: ... 7 25 Cardinal U G Rev C A5 size CHAPTER7 FM 11 6 98 Pass 0 R Proof Sign off Kimura _______ Nishi _______ Hoadley _______ 2 Slide the printer together with the paper unit c Caution Do not slide the printer on angled or uneven surfaces ...

Page 136: ...7 26 Maintenance and Transportation Cardinal U G Rev C A5 size CHAPTER7 FM 11 6 98 Pass 0 L Proof Sign off Kimura _______ Nishi _______ Hoadley _______ ...

Page 137: ...ns for clearing jammed paper 8 3 Clearing the paper cassette 8 3 Clearing the MP tray 8 6 Clearing the fuser unit 8 9 Clearing the output path cover 8 13 Clearing the optional large capacity paper unit 8 14 Problems and Solutions 8 16 Operational problems 8 16 Printout problems 8 18 Print quality problems 8 20 Memory problems 8 25 Paper handling problems 8 26 Error Messages 8 27 Resetting the Prin...

Page 138: ...Checkthepaper cassette MP tray paper path unit and optional large capacity paper unit Exiting Paper Jam Paper is jammed in the output area Check the face up tray or face down tray Check OHP Sheet If you load transparencies the wrong direction or facing the wrong side up or you try to load a transparency other than EPSON Color Laser Transparencies the printer stops loading in order to avoid printer...

Page 139: ...ains in the printer or if paper is jammed in a place not mentioned in this chapter contact your dealer w Warning Be careful not to touch the fuser or the area around the fuser which is marked CAUTION HIGH TEMPERATURE If the printer has been in use the fuser can be very hot Clearing the paper cassette This section describes how to clear the printer s paper cassette If you use the optional large cap...

Page 140: ...ura _______ Nishi _______ Hoadley _______ 2 Remove the jammed or crumpled paper If the paper is torn check to make sure you remove all pieces 3 Replace the paper stock in the paper cassette and close it 4 Pull the paper path unit out slowly until it stops Be careful not to tear the jammed paper ...

Page 141: ... 5 Cardinal U G Rev C A5 size CHAPTER8 FM 11 6 98 Pass 0 R Proof Sign off Kimura _______ Nishi _______ Hoadley _______ 5 Pull out the jammed paper from the bottom of the paper path unit 6 Close the paper path unit firmly ...

Page 142: ... A5 size CHAPTER8 FM 11 6 98 Pass 0 L Proof Sign off Kimura _______ Nishi _______ Hoadley _______ Clearing the MP tray 1 Pull the jammed paper out gently 2 Pull the paper path unit out until it stops Be careful not to tear the jammed paper ...

Page 143: ...C A5 size CHAPTER8 FM 11 6 98 Pass 0 R Proof Sign off Kimura _______ Nishi _______ Hoadley _______ 3 Open unit cover by grasping the handle and pulling up 4 Turn the knob on the unit clockwise as shown below The jammed paper should come out ...

Page 144: ...Cardinal U G Rev C A5 size CHAPTER8 FM 11 6 98 Pass 0 L Proof Sign off Kimura _______ Nishi _______ Hoadley _______ 5 After the jammed paper is ejected halfway pull the paper up as shown below 6 Close the cover of the unit ...

Page 145: ... _______ Hoadley _______ 7 Close the paper path unit firmly Clearing the fuser unit c Caution When the paper is jammed in the path to the face up tray clear it from the fuser unit Do not pull jammed paper from the face up tray 1 Pull the fuser unit out gently until it stops Be careful not to tear the jammed paper ...

Page 146: ... oil roll and remove it c Caution Do not touch the fuser which is marked CAUTION HIGH TEMPERATURE If the printer has been in use the fuser can be very hot Reattach the fuser oil roll as soon as you clear any jammed paper The roll should be always kept horizontally Do not tilt or place it against something Doing so can cause oil leakage and reduced print quality Handle ...

Page 147: ...11 Cardinal U G Rev C A5 size CHAPTER8 FM 11 6 98 Pass 0 R Proof Sign off Kimura _______ Nishi _______ Hoadley _______ 3 Turn the knob in the fuser unit to eject the jammed paper as shown below 4 Pull out the jammed paper ...

Page 148: ...8 12 Troubleshooting Cardinal U G Rev C A5 size CHAPTER8 FM 11 6 98 Pass 0 L Proof Sign off Kimura _______ Nishi _______ Hoadley _______ 5 Reattach the fuser oil roll 6 Close the fuser unit firmly ...

Page 149: ...n the paper is jammed in the path to the face down tray clear it from the fuser unit Do not pull jammed paper from the face down tray 1 Open the output path cover on the left side of the printer 2 Remove all jammed paper If paper has jammed at the top of the output path gently lift it out If it has jammed near the bottom of the output path cover carefully pull it out of the printer ...

Page 150: ...v C A5 size CHAPTER8 FM 11 6 98 Pass 0 L Proof Sign off Kimura _______ Nishi _______ Hoadley _______ 3 Close the output path cover Clearing the optional large capacity paper unit 1 Open the feeder cover on the right side of the paper unit ...

Page 151: ...FM 11 6 98 Pass 0 R Proof Sign off Kimura _______ Nishi _______ Hoadley _______ 2 Pull the jammed paper out gently Be careful not to tear the paper 3 Close the feeder cover Note If the paper is jammed in the paper cassette mounted in the paper unit see page 8 3 ...

Page 152: ...stance Operational problems The On Line light does not turn on when you turn the printer on Cause What to do The power cord may be not properly plugged into the electrical outlet Turn off the printer and check the power cord connections between the printer and the electrical outlet then turn the printer back on The electrical outlet may be controlled by an outside switch or automatic timer Make su...

Page 153: ...e the connector using the wire retaining clips You may not be using the correct interface cable Make sure that if you are using a parallel interface the cable is a double shielded twisted pair interface cable no longer than six feet in length Some error may have occurred Check the control panel display if an error massage appears Your software is not properly set up for your printer Make sure that...

Page 154: ...er Be sure you have installed the correct font See Appendix D for more information Some or all of the printout is garbled or printed as asterisks Cause What to do The interface cable may not be plugged in securely Make sure that both ends of the interface cable are plugged in securely You may not be using the correct interface cable Make sure you use a double shielded twisted pairparallelinterface...

Page 155: ...t page length and margin settings in your software program Graphics don t print correctly Cause What to do The printer emulation setting in your software program may be incorrect Make sure that your software program is set for the printer emulation you are using For example if you are using the LJ4 emulation mode be sure that your software program is set to use a LaserJet 4 printer You may need mo...

Page 156: ...nal printer components by printing three pages with only one character per page If this does not solve the problem there may be a problem with the photoconductor unit Replace the photoconductor unit See Replacing the photoconductor unit on page 7 14 You may not be using the correcttype of paperforyour printer If the surface of your paper is too rough printed characters may appear distorted or brok...

Page 157: ...printing three pages with only one character per page There may be aproblemwith the photoconductor unit Replace the photoconductor unit See Replacing the photoconductor unit on page 7 14 Uneven print quality on the page Cause What to do Your paper may be moist or damp Do not store paper in a humid or damp environment There may be aproblemwith the photoconductor unit Replace the photoconductor unit...

Page 158: ...by printing three pages with only one character per page If the problem persists replace the photoconductor unit See Replacing the photoconductor unit on page 7 14 Missing areas on printed image Cause What to do Yourpapermaybemoistor damp Printing is sensitive to moisture absorbed by the paper The higher the moisture content in the paper the lighter the printed output Do not store paper in a humid...

Page 159: ...a toner cartridge starting on page 7 6 There may be aproblemwith the photoconductor unit Replace the photoconductor unit See Replacing the photoconductor unit on page 7 14 The problem may be with your software program or interface cable Print out a status sheet by pressing the control panel button If blank pages continue to appear the problem may be with the printer Turn off the printer and contac...

Page 160: ..._______ Theremay be aproblemwith the photoconductor unit Replace the photoconductor unit See Replacing the photoconductor unit on page 7 14 Non printed side of the page is dirty Cause What to do Toner may have spilled in the paper feed path Clean internal printer components by printing three pages with only one character per page ...

Page 161: ...lso clear this message by turning the printer off waiting 10 seconds and then turning it back on You may need to increase the amount of printer memory See Memory Module onpage 6 4 for more information on adding memory The message Image Optimum appears on the control panel display Cause What to do The printer has insufficient memory to print the page using the specified print quality The printer au...

Page 162: ...ve selected the proper paper source in your software There may be no paper in the paper cassette or MP tray Load it with paper Too many sheets may be loaded in the paper cassette or MP tray Be sure that you have not tried to load too many sheets of paper The paper cassette can hold a maximum of 250 sheets of 75g m2 20lb paper If you use the optional large capacity unit the unit may not be installe...

Page 163: ... Laser Transparencies The printer stops loading in order to avoid printer damage You need to clear any jammed sheets from the MP tray or paper path unit See Clearing Jammed Paper in this chapter Exiting Paper Jam Paper is jammed at an output area such as the face up tray See Clearing the Jammed Paper in this chapter Paper Jam Paper is jammed at the fuser unit See Clearing the Jammed Paper in this ...

Page 164: ...n page 7 14 Insert Waste T Box The waste toner collector is not installed See Replacing the waste toner collector on page 7 19 for installing Insert Oil Roll The fuser oil roll is not installed See Replacing the fuser oil roll on page 7 10 for installing Wrong Photoconductor You have installed a correct photoconductor that has not been designed for this printer Turn off the printer then remove the...

Page 165: ... T Box The waste toner collector has become full Replace it with a new waste toner collector See Replacing the waste toner collector on page 7 19 Replace Oil Roll No oil is left in the fuser oil roll Replace it with a new fuser oil roll See Replacing the fuser oil roll on page 7 10 Front Cover Open The front cover is open Close it Exit Cover Open The output path cover is open Close it Fuser Unit O...

Page 166: ...annot load paper short edge first Turn the paper 90 degrees and load it you need to load long edge first Manual Feed XXX YYYY XXX The selected paper source is indicated YYYY The selected paper size is indicated The printer is waiting for media to be inserted manually Insert XXX XXX The selected paper source is indicated The indicated XXX paper source is open Close it Paper Out XXX YYYY XXX The sel...

Page 167: ...nt data exceeds the print engine speed because the current page is too complex Press the Continue button to resume printing If this message appears again turn on Page Protect in the Config Menu of the SelecType setting If you continue to receive this message when printing a particular page try simplifying the page by limiting the number of graphics or reducing the number and size of fonts You can ...

Page 168: ...you try to change a printer setting when the buttons have been locked Check Paper Size The paper size setting is different from the size loaded in the printer Check to see if the correct size of paper is loaded in the tray then press the Continue button Image Optimum There is insufficient memory to print the page using the specified print quality The printer automatically reduces the print quality...

Page 169: ...cement To clear this error either press the Continue button or turn off the printer and remove the DIMM Maintenance Req XXXX XXXX Any number is indicated Some part inside the printer should be replaced Contact your dealer and inform them what number XXXX appears Warning Photocondctr The photoconductor unit is near the end of its service life You can continue to print until there is no remaining se...

Page 170: ...M C and or K is indicated The amount of remaining toner in the indicated XXXX toner cartridge s is very small Early replacement with the new toner cartridge is recommended See Replacing a toner cartridge on page 7 4 Service req eXXXX XXXX Any number is indicated A controller error or a print engine error has been detected Write down the error number listed on the display and turn off the printer W...

Page 171: ...set appears on the display Your printer is now reset and ready to receive a new print job Reset all Reset all stops printing clears the printer memory and returns the printer settings to the default values The print jobs received in printer memory from all interfaces are erased Current settings and downloaded fonts are also erased To reset all hold down the Alt and the Reset button until Reset All...

Page 172: ...8 36 Troubleshooting Cardinal U G Rev C A5 size CHAPTER8 FM 11 6 98 Pass 0 L Proof Sign off Kimura _______ Nishi _______ Hoadley _______ ...

Page 173: ...A 2 Paper type specifications A 3 Printable area A 4 Printer A 5 General A 5 Environmental A 6 Mechanical A 7 Electrical A 7 Interfaces A 8 Parallel interface A 8 Using the ECP mode in Windows 95 A 15 Options and Consumables A 16 250 Sheet Lower Paper Cassette Unit A3W C81302 A 16 Large Capacity Paper Unit C81301 A 16 Toner cartridges A 17 Photoconductor unit A 17 Fuser oil roll A 18 Waste toner c...

Page 174: ...r Types Paper type Description Plain paper General copier paper Recycled paper is acceptable Use recycled paper only under normal temperature and humidity conditions Poor quality paper may reduce print quality cause paper jams and other problems Envelopes No paste and no tape No plastic window unless specially designed for laser printers Labels The backing sheet should be covered completely with n...

Page 175: ... Letter 5 5 8 5 inches Government Letter 8 5 10 5 inches Government Legal 8 5 13 inches Executive 7 25 10 5 inches Ledger B 11 17 inches F4 210 mm 330 mm Custom 90 to 330 2 mm 139 7 to 483 mm Paper Sources MP tray for all sizes Standard lower paper cassette unit for A3 A4 B4 B5 Letter Legal Executive and Ledger B Optional lower paper cassette unit A3W for A3W Optional large capacity paper unit for...

Page 176: ...ansparencies Printable area 4 mm minimum margin on all sides Note The printable area varies depending on the emulation mode in use Weight 105 to 220 g m2 28 to 58 5 lb Size 90 to 330 2 mm 139 7 to 483 mm Paper Source MP tray Weight 105 to 220 g m2 28 to 58 5 lb Size 90 to 330 2 mm 139 7 to 483 mm Paper Source MP tray Size A4 210 mm 297 mm Letter 8 5 11 inches Paper Source MP tray ...

Page 177: ... up tray Less than 42 6 seconds To face down tray Less than 47 6 seconds Black only printing To face up tray Less than 20 seconds To face down tray Less than 24 9 seconds Warm up time About 300 seconds at normal temperature Paper feed Automatic or manual feed Paper feed alignment Left alignment for all sizes Input paper supply MP tray Up to 150 sheets for plain paper Up to 20 sheets for envelopes ...

Page 178: ...s A4 size or more paper Internal emulation HP listed LaserJet 4 emulation LJ4 mode HP GL 2 emulations GL2 mode ESC P2 24 pin printer emulation ESCP2 mode ESC P 9 pin printer emulation FX mode IBM Proprinter emulation I239Xmode Resident fonts 49 scalable fonts and seven bitmap fonts RAM 64MB expandable up to 256MB Temperature Operation 10 to 32 C 50 to 90 F Storage 0 to 35 C 32 to 95 F Humidity Ope...

Page 179: ... all trays 1367 4 mm 53 8 inches Depth 641 mm 25 2 inches Weight Approx 70 kg about 154 lbs excluding options Durability 5 years or 180 000 sheets whichever comes first 110 V 120 V model 220 240 V model Voltage 110 V 120 V 10 220 V 240 V 10 Rated frequency 50 Hz to 60 Hz 3 Hz 50 Hz to 60 Hz 3 Hz Rated current Less than 10 A Less than 5 A Power consumption Less than1100 W Less than 1100 W Power con...

Page 180: ... heading Direction refers to the direction of signal flow as viewed from the printer Pin No Direction IEEE 1284 B connector Compatibility Nibble ECP 1 IN nStrobe HostClk 2 IN OUT DATA1 3 IN OUT DATA2 4 IN OUT DATA3 5 IN OUT DATA4 6 IN OUT DATA5 7 IN OUT DATA6 8 IN OUT DATA7 9 IN OUT DATA8 10 OUT nACK PtrClk PeriphClk 11 OUT Busy PrtBusy PeriphAck 12 OUT PError AckDataReq nAckReverse 13 OUT Select ...

Page 181: ...GND 34 NC 35 5V 36 IN nSelectln IEEE1284 Active Compatibility mode Latch pulse used to read in print data When low DATA is valid Negotiation phase Latch pulse used to read in extensibility request values Nibble mode Always high ECP mode Used to transfer data and addresses from the host to the printer with handshaking via PeriphAck Busy Compatibility mode Forward channel data Negotiation phase Exte...

Page 182: ...ates that the nibble data is valid Reverse idle phase When switched from low to high generates an interrupt that notifies the host that there is data available ECP mode Used to transfer data from the printer to the host with handshaking via HostAck nAutoFd Compatibility mode High signal indicates that the printer is not ready to receive data Negotiation phase Reflects the BUSY status of the forwar...

Page 183: ...er phase In nibble mode this signal serves as nibble data bit 2 and then 6 Reverse final phase High until the host requests a data transfer Afterwards this signal conforms with NDataAvail nFault ECP mode LowsignalauthorizesnReverseRequest The host looks at thissignalin order to determine whether or not it has permission to drive the data signals Compatibility mode Always high Negotiation phase Xfl...

Page 184: ... is set low Reverse data transfer phase In nibble mode setting this signal low indicates to the printer that the host is ready to receive data When this signal is subsequently set high it indicates that the host received the data Reverse idle phase This signal is set high in response to a PtrClk nAck low pulse in order to return to be reverse data phase If this signal is set high at the same time ...

Page 185: ...when this signal is low and 1284active is high Compatibility mode Low signal indicates that an error occurred Negotiation phase This signal is set high in order to authorize 1284 compatibility In nibble mode after the host sets HostBusy nAutoFd high this signal is set low in order to indicate that the transmission data is ready Reverse data transfer phase This signal is set low in order to indicat...

Page 186: ...ility mode Always low Negotiation phase This signal is set high at the same time that HostBusy is low in order to request 1284 mode Reverse data transfer phase This signal is set high to indicate that the bus direction is from the printer to the host This signal is set low to terminate 1284 mode setting the bus direction from the host to the printer Reverse idle phase Same as reverse data transfer...

Page 187: ... BIOS setting program that comes with your computer for details of the settings and how to use the program consult your computer s documentation 2 Click the Start button point to Settings and then click Control Panel 3 Right click the System icon and click Open in the menu that appears 4 Select the Device Manager tab 5 Select the ECP Printer Port under Ports COM LPT then click the Properties butto...

Page 188: ...ght 108 mm 4 3 inches 560 mm 22 0 inches 547 mm 21 5 inches 2 7 kg 5 9 lb Paper size A3 A4 Letter Legal B4 B5 Executive and Ledger B Available depending on country of purchase Paper weight 60 to 105 g m2 16 to 28 lb Paper feed Three paper cassettes mounted Automatic feed delivery system Cassette capacity up to 250 sheets for each cassette Paper feed speed A4 paper 4 pages per minute for color prin...

Page 189: ... The number of pages you can print with a photoconductor unit varies depending on the type of printing Storage temperature 0 to 35 C 32 to 95 F Storage humidity 15 to 80 RH Life under the conditions of A4 size paper continuous printing and 5 print ratio Black Up to 4500 images Yellow Megenta Cyan Up to 6000 images Storage temperature 0 to 35 C 32 to 95 F Storage humidity 15 to 80 RH Life under the...

Page 190: ...e number of pages you can print with a waste toner box varies depending on the type of printing Storage temperature 0 to 35 C 32 to 95 F Storage humidity 15 to 80 RH Life average 120 pages or more use a day 20 000 pages Storage temperature 0 to 35 C 32 to 95 F Storage humidity 15 to 80 RH Life under the conditions of A4 size paper continuous printing and 5 print ratio 20 000 pages ...

Page 191: ...i _______ Hoadley _______ Appendix B Symbol Sets Introduction to Symbol Sets B 2 In LJ4 Emulation Mode B 3 International Set for ISO sets B 21 In ESC P 2 or FX Modes B 22 International Character Sets B 26 Characters available with the ESC command B 27 In I239X Emulation Mode B 28 In EPSON GL 2 Mode B 28 ...

Page 192: ...anguage Note Normally your software handles fonts and symbols so you probably never need to adjust the printer s settings If you are writing your own printer control programs or if you are using older software that cannot control fonts refer to the following sections for symbol set details When you are considering which font to use you should also considerwhich symbol set to combine with the font ...

Page 193: ... 3 9 EAN UPC 8U 0E 0N 1U 2N 5M 5N 5T 6J 6M 7J 8M 9E 9T 9U 10J 10U 11U 12J 12U 13J 14J 15U 17U 19M 19U 579L 0O 1O 3Q 0Y 8Y 43 typefaces bitmap bitmap 43 typefaces bitmap 43 typefaces bitmap 43 typefaces bitmap 35 typefaces 43 typefaces bitmap 43 typefaces 35 typefaces 35 typefaces 43 typefaces 35 typefaces 43 typefaces 43 typefaces 43 typefaces 43 typefaces 43 typefaces bitmap 43 typefaces bitmap 4...

Page 194: ...s refer to those shown in the table below Typefaces 35 43 Flareserif 821 SWC Incised 901 SWC Clarendon Condensed SWC Ribbon 131 SWC Original Garamond SWC Audrey Two SWC Zapf Humanist 601 SWC Swiss 742 Condensed SWC N N N N N N N N N N N N N N N N Swiss 721 SWM Dutch 801 SWM N N Courier SWC Letter Gothic SWC Dutch 801 SWC Swiss 742 SWC N N N N N N N N ...

Page 195: ...B Symbol Sets B 5 Cardinal U G Rev C A5 sizeAPPB FM 11 6 98Pass 0 R Proof Sign off Kimura _______ Nishi _______ Hoadley _______ Roman 8 8U Roman Extension 0E ...

Page 196: ...B 6 Symbol Sets Cardinal U G Rev C A5 size APPB FM 11 6 98 Pass 0 L Proof Sign off Kimura _______ Nishi _______ Hoadley _______ ECM94 1 0N Legal 1U ...

Page 197: ...B Symbol Sets B 7 Cardinal U G Rev C A5 sizeAPPB FM 11 6 98Pass 0 R Proof Sign off Kimura _______ Nishi _______ Hoadley _______ 8859 2 ISO 2N PsMath 5M ...

Page 198: ...B 8 Symbol Sets Cardinal U G Rev C A5 size APPB FM 11 6 98 Pass 0 L Proof Sign off Kimura _______ Nishi _______ Hoadley _______ 8859 9 ISO 5N WiTurkish 5T ...

Page 199: ...B Symbol Sets B 9 Cardinal U G Rev C A5 sizeAPPB FM 11 6 98Pass 0 R Proof Sign off Kimura _______ Nishi _______ Hoadley _______ MsPublishing 6J VeMath 6M ...

Page 200: ...B 10 Symbol Sets Cardinal U G Rev C A5 size APPB FM 11 6 98 Pass 0 L Proof Sign off Kimura _______ Nishi _______ Hoadley _______ DeskTop 7J Math 8 8M ...

Page 201: ...B Symbol Sets B 11 Cardinal U G Rev C A5 sizeAPPB FM 11 6 98Pass 0 R Proof Sign off Kimura _______ Nishi _______ Hoadley _______ WiE Europe 9E PcTk437 9T ...

Page 202: ...B 12 Symbol Sets Cardinal U G Rev C A5 size APPB FM 11 6 98 Pass 0 L Proof Sign off Kimura _______ Nishi _______ Hoadley _______ Windows 9U PsText 10J ...

Page 203: ...B Symbol Sets B 13 Cardinal U G Rev C A5 sizeAPPB FM 11 6 98Pass 0 R Proof Sign off Kimura _______ Nishi _______ Hoadley _______ IBM US 10U IBM DN 11U ...

Page 204: ...B 14 Symbol Sets Cardinal U G Rev C A5 size APPB FM 11 6 98 Pass 0 L Proof Sign off Kimura _______ Nishi _______ Hoadley _______ McText 12J PcMultilingual 12U ...

Page 205: ...B Symbol Sets B 15 Cardinal U G Rev C A5 sizeAPPB FM 11 6 98Pass 0 R Proof Sign off Kimura _______ Nishi _______ Hoadley _______ VeInternational 13J VeUS 14J ...

Page 206: ...B 16 Symbol Sets Cardinal U G Rev C A5 size APPB FM 11 6 98 Pass 0 L Proof Sign off Kimura _______ Nishi _______ Hoadley _______ PiFont 15U PcE Europe 17U ...

Page 207: ...B Symbol Sets B 17 Cardinal U G Rev C A5 sizeAPPB FM 11 6 98Pass 0 R Proof Sign off Kimura _______ Nishi _______ Hoadley _______ Symbol 19M WiAnsi 19U ...

Page 208: ...B 18 Symbol Sets Cardinal U G Rev C A5 size APPB FM 11 6 98 Pass 0 L Proof Sign off Kimura _______ Nishi _______ Hoadley _______ Wingdings 579L OCR A 0O ...

Page 209: ...B Symbol Sets B 19 Cardinal U G Rev C A5 sizeAPPB FM 11 6 98Pass 0 R Proof Sign off Kimura _______ Nishi _______ Hoadley _______ OCR B 1O OCR B Extension 3Q ...

Page 210: ...B 20 Symbol Sets Cardinal U G Rev C A5 size APPB FM 11 6 98 Pass 0 L Proof Sign off Kimura _______ Nishi _______ Hoadley _______ Code 3 9 0Y EAN UPC 8Y ...

Page 211: ... listed below substitute the characters in the ANSI ASCII sets with the characters in the table below Iso set ASCII code hex 23 24 40 5B 5C 5D 5E 60 7B 7C 7D 7E ANSI ASCII 0U Norweg 1 0D French 0F HP German 0G Italian 0l JlS ASCII 0K Swedis 2 0S Norweg 2 1D UK 1E French 2 1F German 1G HP Spanish 1S Chinese 2K Spanish 2S IRV 2U Swedish 3S Portuguese 4S IBM Portuguese 5S IBM Spanish 6S ...

Page 212: ... Nishi _______ Hoadley _______ In ESC P 2 or FX Modes PC 437 850 860 863 865 857 852 BRASCII Abicamp PC 437 OCR A EPSON Roman N Courier SWC N N EPSON Sans serif N EPSON Prestige N EPSON Script N Letter Gothic SWC N N Swiss 721 SWM N N Dutch 801 SWM N N OCR B N OCR A N Available only in ESC P 2 mode ...

Page 213: ...B Symbol Sets B 23 Cardinal U G Rev C A5 sizeAPPB FM 11 6 98Pass 0 R Proof Sign off Kimura _______ Nishi _______ Hoadley _______ PC437 U S Standard Europe PC850 Multilingual PC860 Portuguese ...

Page 214: ...B 24 Symbol Sets Cardinal U G Rev C A5 size APPB FM 11 6 98 Pass 0 L Proof Sign off Kimura _______ Nishi _______ Hoadley _______ PC863 Canadian French PC865 Norwegian PC857 PcTurk2 PC852 East Europe ...

Page 215: ...s B 25 Cardinal U G Rev C A5 sizeAPPB FM 11 6 98Pass 0 R Proof Sign off Kimura _______ Nishi _______ Hoadley _______ BRASCII Abicomp Italic No characters are available for hex code 15 in the italic character table ...

Page 216: ... character sets using either SelecType or the ESC R command For example when you select Italic France in SelecType the characters in the France row in the table below are used in the italic character table Country ASCII code hex 23 24 40 5B 5C 5D 5E 60 7B 7C 7D 7E USA France Germany UK Denmark Sweden Italy Spain Japan Norway DenmarkII Spain II Latin America Korea Legal Available for ESC P 2 emulat...

Page 217: ...27 Cardinal U G Rev C A5 sizeAPPB FM 11 6 98Pass 0 R Proof Sign off Kimura _______ Nishi _______ Hoadley _______ Characters available with the ESC command To print the characters in the table below use the ESC command ...

Page 218: ...ts in I239X mode are PC437 PC850 PC860 PC863 and PC865 Refer to ESC P 2 or FX modes in the previous section Available fonts are EPSON Sans Serif Courier SWC EPSON Prestige EPSON Gothic EPSON Presentor EPSON Orator and EPSON Script In EPSON GL 2 Mode Available symbol setsin EPSON GL 2modearethe sameasthoseinLaserJet 4 emulation mode Refer to the section on LaserJet 4 mode ...

Page 219: ...______ Nishi _______ Hoadley _______ Appendix C Command Summary LaserJet 4 LJ4 Emulation Commands C 3 GL 2 context commands C 6 ESC P 2 and FX Commands C 9 ESC P 2 mode C 9 FX mode C 12 PJL Commands C 15 I239X Emulation Commands C 16 Page format C 16 Text C 17 Auxiliary Functions C 18 AGM Mode C 19 ...

Page 220: ... LX 100 9 pin GL 2 Hewlett Packard GL 2 graphics language In addition the following printer control languages are supported PJL Printer Job Language EJL EPSON Job Control Language This appendix lists the printer commands for these modes Most of the commands closely emulate the original printer or the control language however some have operational differences because the printers use different tech...

Page 221: ...ge left offset registration ESC l U Short edge right offset registration ESC l Z Unit of measure ESC u D Page control Paper source ESC l H Page size ESC l A Page length ESC l P Orientation ESC l O Print direction ESC a P Top margin ESC l E Text length ESC l F Left margin ESC a L Right margin ESC a M Clear horizontal margins ESC 9 Perforation skip ESC l L Horizontal Motion Index HMI ESC k H Vertica...

Page 222: ... s S Primary font stroke weight ESC s B Secondary font stroke weight ESC s B Primary typeface family ESC s T Secondary typeface family ESC s T Primary font default ESC 3 Secondary font default ESC 3 Enable underline ESC d D Disable underline ESC d Transparent print data ESC p X data Font management Assign font ID ESC c D Font and character control ESC c F Set symbol set ESC c R Define symbol set E...

Page 223: ...t current pattern ESC v T Select source transparency mode ESC v N Select pattern transparency mode ESC v O Rectangle width PCL unit ESC c A Rectangle width decipoints ESC c H Rectangle height PCL unit ESC c B Rectangle height decipoints ESC c V Fill rectangular area ESC cP User defined pattern management creation Pattern ID ESC c G Define pattern ESC c W data User defined pattern control ESC c Q S...

Page 224: ...ot vertical size ESC c L Set picture frame anchor point ESC c0T Picture frame horizontal size ESC c X Picture frame vertical size ESC c Y GL 2 context commands Dual context extensions Enter PCL mode ESC A Reset ESC E Primary font FI Secondary font FN Scalable or bitmapped fonts SB Palette extensions Transparency mode TR Screened vectors SV Number of Pens NP Vector Group Arc absolute AA Arc relativ...

Page 225: ...font SS Select alternate font SA Absolute direction DI Relative direction DR Absolute character size SI Relative character size SR Character slant SL Extra space ES Standard font definition SD Alternate font definition AD Character fill mode CF Label origin LO Label LB Define label terminator DT Character plot CP Transparent data TD Define variable text path DV Line and fill attribute group Line t...

Page 226: ...FM 11 6 98 Pass 0 L Proof Sign off Kimura _______ Nishi _______ Hoadley _______ Configuration and status group Scale SC Input window IW Input P1 and P2 IP Input relative P1 and P2 IR Default values DF Initialize IN Rotate coordinate system RO Comment CO ...

Page 227: ...ading ejecting ESC EM n Paper feeding Carriage return CR Form feed FF Line feed LF Select 1 8 inch line spacing ESC 0 Select 1 6 inch line spacing ESC 2 Set n 180 inch line spacing ESC 3 n Set n 360 inch line spacing ESC n Page format Set page format ESC c nn Set page length in defined units ESC C nn Set page length in lines ESC C n Set page length in inches ESC C 0 n Set bottom margin for continu...

Page 228: ...l tabs ESC D nn Tab horizontally HT Set vertical tabs ESC B nn Tab vertically VT Advance paper n 180 inch ESC J n Reverse paper n 180 inch ESC j n Font selection Select typeface ESC k n Select font by pitch and point ESC X nn Select 10 5 point 10 cpi ESC P Select 10 5 point 12 cpi ESC M Select 10 5 point 15 cpi ESC g Turn proportional mode on off ESC p 1 0 Select LQ or draft ESC x n Select italic ...

Page 229: ...C T Select line score ESC nn Turn underline on off ESC 1 0 Select character style ESC q n Spacing Set intercharacter space ESC SP n Define unit ESC U nn Character handling Assign character table ESC t nn Select character table ESC t n Select an international character set ESC R n Define download character ESC nn Copy ROM to RAM ESC 0 n 0 Select user defined set ESC n Enable printing of upper contr...

Page 230: ...et skip over perforation ESC N n Cancel skip over perforation ESC O Line feed LF Select 1 8 inch line spacing ESC 0 Select 7 72 inch line spacing ESC 1 Select 1 6 inch line spacing ESC 2 Select n 216 inch line spacing ESC 3 n Perform n 216 inch line spacing ESC J Tab vertically VT Set vertical tabs ESC B nn Note Your printer will not print characters beyond one page length set with the ESC C or ES...

Page 231: ... p 1 0 Select condensed mode SI Cancel condensed mode DC2 Select double width mode one line SO Cancel double width mode one line DC4 Turn double width mode on off ESC W 1 0 Turn double height printing on off ESC w 1 0 Font enhancement Select emphasized mode ESC E Cancel emphasized mode ESC F Select double strike mode ESC G Cancel double strike mode ESC H Note The ESC G and ESC E commands produce i...

Page 232: ... upper control codes ESC 7 User Defined Characters Define user defined characters ESC nn Note The appearance of characters defined using ESC may differ slightly from an actual FX printer Copy ROM to RAM ESC 0 n 0 Select user defined set ESC n Printable code area expansion ESC I n Bit image Select graphics mode ESC m n Selection and printing of bit image ESC m n 8 bit single density bit image ESC K...

Page 233: ...EFAULT PJL DEFAULT LPARM variable value CR LF DINQUIRE PJL DINQUIRE LPARM variable CR LF ECHO PJL ECHO Words CR LF ENTER PJL ENTER LANGUAGE CR LF EOJ PJL EOJ NAME CR LF INFO PJL INFO read only variable CR LF INITIALIZE PJL INITIALIZE CR LF INQUIRE PJL INQUIRE LPARM variable CR LF JOB PJL JOB NAME START END CR LF OPMSG PJL OPMSG DISPLAY CR LF RDYMSG PJL RDYMSG DISPLAY CR LF RESET PJL RESET CR LF SE...

Page 234: ...Set page length in lines ESC C n Set page length in inches ESC C NUL n Set skip perforation ESC N n Cancel skip perforation ESC O Set horizontal margins ESC X Line spacing Set line space to 1 8 inch ESC 0 Set line space to 7 72 inch ESC 1 Activate line spacing for text ESC 2 Set line spacing for graphics n 180 n 216 or n 360 inch ESC 3 n Set line spacing for text n 72 inch ESC A n Unit definition ...

Page 235: ...e BS Space SP Horizontal tab HT Vertical tab VT Move current print position 1 120 inch ESC d Set top of form ESC 4 Text Font selection Select 10 pitch font DC2 Select 12 pitch font ESC Start 17 cpi printing SI Start 17 cpi printing ESC SI Proportional spacing ESC P Begin subscript superscript ESC S End subscript superscript ESC T Select font and pitch ESC I Select print or font ESC I Select charac...

Page 236: ...Double width printing ESC W Begin empahsized bold print ESC E End empahsized bold print ESC F Begin double strike print ESC G End double strike print ESC H Bit image Normal density bit image graphics ESC K Double density bit image graphics half speed ESC L Double density bit image graphics normal speed ESC Y High density bit image graphics ESC Z Graphic print mode ESC g Bar code Bar code set up ES...

Page 237: ... n 360 inch ESC 3 Set line spacing for text n 60 inch ESC A Paper feeding print position motion Move paper vertically n 180 n 216 or n 360 inch ESC J Line feed LF Bit image Normal density bit image graphics ESC K Double density bit image graphics half speed ESC L Double density bit image graphics normal speed ESC Y High density bit image graphics ESC Z Graphic print mode ESC g Select graphic mode ...

Page 238: ...C 20 Command Summary Cardinal U G Rev C A5 size APPC FM 11 6 98 Pass 0 L Proof Sign off Kimura _______ Nishi _______ Hoadley _______ ...

Page 239: ...ev C A5 size APPD FM 11 6 98 Pass 0 R Proof Sign off Kimura _______ Nishi _______ Hoadley _______ Appendix D Working with Fonts Printer and Screen Fonts D 2 Available Fonts D 3 Adding More Fonts D 6 Downloading fonts D 6 Selecting Fonts D 6 ...

Page 240: ...nter and the computer The printer fonts which reside in printer memory are used by the printer to print text Screen fonts which are stored on your computer s media are used to display text on screen to represent the fonts that will print Two separate sets of fonts are needed because the monitor and printer have different requirements for producing fonts The monitor normally uses bitmap fonts that ...

Page 241: ...Dutch 801 SWC Roman Bold Italic Bold Italic CG Times Zapf Humanist 601 SWC Demi Bold Demi Italic Bold Italic CG Omega Ribbon 131 SWC Coronet Clarendon Condensed SWC Claredon Condensed Swiss 742 SWC Medium Bold Italic Bold Italic Condensed Bold Condensed Condensed Italic Bold Condensed Italic Univers Incised 901 SWC Medium Black Italic Antique Olive Original Garamond SWC Medium Bold Italic Bold Ita...

Page 242: ...e listed in the HP equivalent column ESC P 2 and FX modes Font name Bitmap font HP equivalent Line Printer Line Printer OCR A OCR B Code 3 9 EAN UPC Bold Font name Scalable font EPSON Roman EPSON Sans serif Courier SWC Medium Bold EPSON Prestige EPSON Script Swiss 721 SWM Roman Bold Dutch 801 SWM Roman Bold Letter Gothic SWC Roman Bold Available only in ESC P 2 mode Font name Bitmap font OCR B OCR...

Page 243: ...les use the Test Menu in SelecType 1 Make sure that paper is loaded 2 Press Menu while the printer is on line 3 Press Item until the font sample you want appears 4 Press Enter a Font Sample sheet is printed Font name Scalable font EPSON Sans serif Courier SWC Medium Bold EPSON Prestige EPSON Gothic EPSON Presentor EPSON Orator EPSON Script Font name Bitmap font OCR B ...

Page 244: ...ake sure your printer has sufficient memory Downloading fonts Most font packages make it easy to install fonts by providing their own installer The installer gives you the option of having the fonts automatically downloaded whenever you start your computer or having fonts downloaded only when you need to print a particular font If you re runningWindows you can also installfonts byclicking on the F...

Page 245: ...gn off Kimura _______ Nishi _______ Hoadley _______ Appendix E Contacting Customer Support For United Kingdom and the Republic of Ireland users E 2 For Australian users E 4 For Singapore users E 5 For Hong Kong users E 6 For Philippines users E 7 For Hong Kong Users E 7 For Philippines Users E 8 ...

Page 246: ...nter software version Click About on the printer driver s Main menu Windows version 95 3 1 NT etc you are using Version of software applications you normally use with your printer For United Kingdom and the Republic of Ireland users If you purchased your printer in the UK or the Republic of Ireland EPSON UK LTD provides a range of customer services and technical support World Wide Web Faxon EPSON ...

Page 247: ...479 from the Republic of Ireland No membership is required Make sure that your communications software is set to 8 data bits 1 stop bit no parity bit ANSI terminal mode emulation and a modem speed of up to 28 8 Kbps Downloading protocols supported include Xmodem Ymodem and Zmodem See the documentation that came with your communications software and modem for more information When you first connect...

Page 248: ...ou with a high level of Customer Service As well as this User s Guide we provide the following sources for obtaining information EPSON FAXBACK EPSON FAXBACK will fax you the latest specifications and pricing for most EPSON products offered in Australia There is also technical information including details of the latest software and drivers available Phone 02 9903 9075 and the system will guide you...

Page 249: ...erators on the Helpdesk can aid you in diagnosing hardware and software problems They can also advise you on the latest EPSON products and where the nearest dealer or service agent is located Many types of queries are answered here The Helpdesk numbers are Phone 02 9903 9040 Fax 02 9903 9189 We encourage you to have all the relevant information on hand when you ring The more information you prepar...

Page 250: ...ide users with the following information Product information Answers to Frequently Asked Questions FAQs Latest versions of EPSON printer drivers Users can access our World Wide Web home page at http www epson com hk Electronic bulletin board system An electronic bulletin board system BBS is also available to obtain printer information and the latest versions of printer drivers You can log on to th...

Page 251: ...s other after sales services users are welcome to contact EPSON Hong Kong Limited Internet home page EPSON Hong Kong has established a local home page in both Chinese and English on the Internet to provide users with the following information Product information Answers to Frequently Asked Questions FAQs Latest versions of EPSON scanner drivers Users can access our World Wide Web home page at http...

Page 252: ...ou can also contact our technical staff at the following telephone and fax numbers Phone 852 2585 4399 Fax 852 2827 4383 For Philippines Users To obtain technical support as well as other after sales services users are welcome to contact the EPSON Philippines Representative Office at the telephone and fax numbers below Phone 632 813 6552 Fax 632 813 6545 BBS 632 814 0595 ...

Page 253: ... of SelecType Menus F 1 Cardinal U G Rev c A5 size APPF FM 11 6 98 Pass 0 R Proof Sign off Kimura _______ Nishi _______ Hoadley _______ Appendix F Map of SelecType Menus Switching between SelecType Menus F 2 ...

Page 254: ...f Kimura _______ Nishi _______ Hoadley _______ Switching between SelecType Menus The following menu maps show the possible menus and options in SelecType KEY Pressing the Menu button displays the next menu Pressing the Alt Menu buttons displays the prior menu This is only available with option ...

Page 255: ...F Map of SelecType Menus F 3 Cardinal U G Rev c A5 size APPF FM 11 6 98 Pass 0 R Proof Sign off Kimura _______ Nishi _______ Hoadley _______ ...

Page 256: ...F 4 Map of SelecType Menus Cardinal U G Rev C A5 size APPF FM 11 6 98 Pass 0 L Proof Sign off Kimura _______ Nishi _______ Hoadley _______ ...

Page 257: ...r set A collection of letters numbers and symbols used in a particular language cpi characters per inch A measure of the size of fixed width text characters default A value or setting that takes effect when the printer is turned on reset or initialized dots per inch dpi The number of dots per inch is a measure of printer resolution The higher the number of dots the higher the resolution download T...

Page 258: ...omputer A parallel interface transmits data one character or code at a time and a serial interface transmits data one bit at a time landscape Printing that is oriented sideways on the page This orientation gives you a page that is wider than it is high and is useful for printing spreadsheets memory The part of the printer s electronic system that is used to store information Some information is fi...

Page 259: ...eted and acted upon Printer emulations replicateexisting printers such as the HP LaserJet 4 proportional font A font whose characters have varying amounts of horizontal space depending on the width of the character Thus the uppercase M takes up more horizontal space than the lowercase l RAM Random Access Memory RAM is where temporary information is stored reset To refresh the printer s memory and ...

Page 260: ...ter status sheet A report that lists the printer settings and other printer information symbol set A collection of symbols and special characters Symbols are assigned to specific codes in a character table TrueType An outline font format that was developed jointly by Apple Computer and Microsoft Corporation TrueType fonts are outline fonts that can be easily resized for screen display or for print...

Page 261: ...otoconductor unit 7 13 A 17 replacement messages 7 3 replacing 7 2 specifications A 17 Toner cartridges 7 5 A 17 Transparencies 1 5 3 2 3 20 Waste toner collector 7 18 A 18 Continue 2 3 2 5 Control panel buttons 2 7 display 2 2 error messages 8 27 indicator lights 2 3 overview 1 7 2 2 SelecType 2 6 Controlling the printer 1 6 Copies 2 13 2 17 Customer support E 2 D Display 2 2 E ECP mode A 15 Emul...

Page 262: ... specifications A 8 Item 2 5 J Jam error messages 8 2 in fuser unit 8 9 in large capacity paper unit 8 14 in MP tray 8 6 in output path cover 8 13 in paper cassette 8 3 L Labels 3 3 3 23 Large capacity paper unit 6 3 A 16 LaserJet 4 LJ4 emulation mode command C 3 LJ4 Menu 2 10 2 25 Loading paper in MP tray 3 12 manually 3 9 non standard paper size 3 24 paper cassette 3 15 Lower paper cassette unit...

Page 263: ...e specifications A 8 Parallel Menu 2 24 PhotoEnhance2 4 6 PJL command C 15 Plain paper 3 3 A 3 Precautions safety 1 replacing consumable products 7 2 Peintable area A 4 Print overrun 8 31 Printer controlling 1 6 driver 1 6 4 2 parts 1 2 specifications A 5 Printer driver accessing 1 6 4 3 Advanced settings 4 7 Automatic setting 4 4 customising the print settings 4 7 Layout menu 4 10 media type sett...

Page 264: ...r A 5 Standby 2 23 Symbol Sets B 2 T Test Menu 2 8 2 14 Thick paper 3 3 3 24 A 4 Toner Low 7 3 8 34 Toner Out 7 4 8 30 Toner Save mode 2 19 Transparencies 1 5 3 2 3 20 Transporting the printer 7 23 Tray Size Menu 2 9 2 18 Troubleshooting error messages 8 27 paper jam 8 2 problems and solutions 8 16 V Value 2 5 W Warming up 2 2 2 23 A 5 Watermark 4 11 Weight 250 Sheet Lower Paper Cassette Unit A3W ...

Page 265: ... No 1 Temasek Avenue 36 00 Millenia Tower Singapore 039192 Phone 065 33 77 911 Fax 065 33 41 185 EPSON HONG KONG LTD Rooms 4706 10 47 F China Resources Bldg 26 Harbour Road Wanchai Hong Kong Phone 2585 4300 Fax 2827 7083 EPSON TAIWAN TECHNOLOGY TRADING LTD 10F No 287 Nanking E Road Sec 3 Taipei Taiwan R O C Phone 02 717 7360 Fax 02 712 9164 EPSON ITALIA S p A V le F lli Casiraghi 427 20099 Sesto S...

Page 266: ......

Reviews: