
RENTAL EQUIPMENT
SETUP GUIDE
Setup Video Guide:
Scan this QR code
with your phone
camera for video.
Contact our Support Team:
www.choose2rent.com/help
+1 (800) 622-6484 Ext. 3 (USA)
+49 40 226 360 - 590 (Europe)
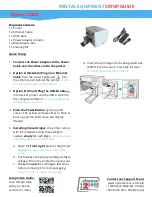
Epson C3500
Shipment Content:
1 x Printer
1 x Ethernet Cable
1 x USB cable
1 x Power Adapter (2 parts)
1 x Maintenance Box
1 x Cleaning Kit
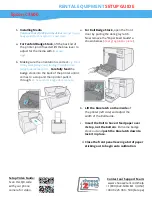
Quick Setup:
1.
Connect the Power Adapter to the Power
Cable and the other end to the printer.
2.
Option A: (Network) Plug in an Ethernet
Cable
from the
router’s
LAN port into
the ethernet port behind the printer.
Careful
not to insert the cable into the USB port.
3.
Option B: (Direct)
Plug the USB-B cable
into back of printer and the USB-A end into
the computer USB port.
Driver compatible only
with Windows computers.
4.
Push the Power Button
by the top left
corner. The printer will take 20sec to 5min to
boot up and the LCD screen will display
“Ready”.
5.
Installing Ink cartridges
, the printer comes
with Ink installed. Follow these steps to
replace
empty
Ink cartridges.
Only while printer
is not being used and in “ready” state.
a.
Open the
front right
panel of the printer.
Do not
send any commands or turn off the
printer.
b.
Push-release the empty cartridge softly to
release it from the printer then pull it out.
c.
Shake the
new
Ink cartridge a few times
before removing it from its packaging.
Do not touch the IC chip in the cartridge.
d.
Insert the cartridge into the designated slot.
(KCMY) Push to secure. Close the ink door.
The printer will proceed to run the ink.


