background image

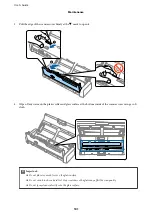
3.

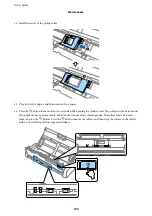
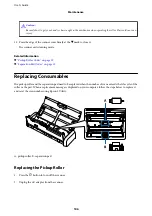
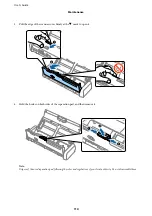
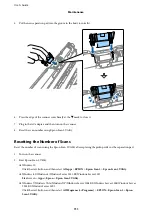
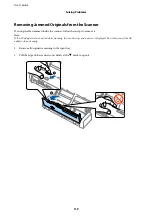
Pull the edge of the scanner cover firmly at the 

d

 mark to open it.

4.

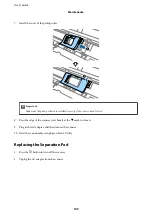
Remove the cover of the pickup roller.

User's Guide

Maintenance

107

Summary of Contents for DS-310

Page 1: ...User s Guide NPD5554 03 EN ...

Page 2: ...urred by the purchaser or third parties as a result of accident misuse or abuse of this product or unauthorized modifications repairs or alterations to this product or excluding the U S failure to strictly comply with Seiko Epson Corporation s operating and maintenance instructions Seiko Epson Corporation and its affiliates shall not be liable for any damages or problems arising from the use of an...

Page 3: ...te and sell this software and its documentation for any purpose is hereby granted without fee provided that i the above copyright notices and this permission notice appear in all copies of the software and related documentation and ii the names of Sam Leffler and Silicon Graphics may not be used in any advertising or publicity relating to the software without the specific prior written permission ...

Page 4: ...eneral Specifications for Originals being Scanned 24 Types of Originals that Require Attention 26 Types of Originals that Must Not be Scanned 27 Specifications for Plastic Cards for Scanning from the Card Slot 28 Types of Cards that Require Attention 28 Placing Standard Size Originals in the ADF 28 Specifications of Standard Size Originals 28 Placing Standard Size Originals 30 Placing Long Paper i...

Page 5: ...aning Inside the Scanner 100 Replacing Consumables 106 Replacing the Pickup Roller 106 Replacing the Separation Pad 109 Resetting the Number of Scans 111 Energy Saving 112 Carrying the scanner 113 Updating Applications and Firmware 114 Solving Problems Scanner Problems 116 Scanner Lights Indicate an Error 116 The Scanner Does Not Turn On 116 The Scanner Turns Off when Running on the Battery 117 Th...

Page 6: ...35 Standards and Approvals for European Models 135 Standards and Approvals for Australian Models 136 Where to Get Help Technical Support Web Site 137 Contacting Epson Support 137 Before Contacting Epson 137 Help for Users in Europe 137 Help for Users in Taiwan 138 Help for Users in Australia 138 Help for Users in Singapore 139 Help for Users in Thailand 139 Help for Users in Vietnam 139 Help for U...

Page 7: ...n the various Epson applications Marks and Symbols Caution Instructions that must be followed carefully to avoid bodily injury cImportant Instructions that must be observed to avoid damage to your equipment Note Provides complementary and reference information Related Information Links to related sections Descriptions Used in this Manual Screenshots for the applications are from Windows 10 or Mac ...

Page 8: ...stem Service Pack 3 Microsoft Windows XP Professional x64 Edition operating system Service Pack 2 Microsoft Windows Server 2012 R2 operating system Microsoft Windows Server 2012 operating system Microsoft Windows Server 2008 R2 operating system Microsoft Windows Server 2008 operating system Microsoft Windows Server 2003 R2 operating system Microsoft Windows Server 2003 operating system Service Pac...

Page 9: ...h other equipment may result in fire or electric shock Use only the AC adapter and the USB cable supplied with your product Using any other adapter or a USB cable could cause fire electrical shock or injury The AC adapter is designed for use with the product with which it was included Do not attempt to use it with other electronic devices unless specified Use only the type of power source indicate...

Page 10: ...ttery If the battery is not fully charged within the specified time stop charging Otherwise the battery could become hot emit smoke rupture or catch fire Do not place the product in a microwave oven or a high pressure container Otherwise the battery could become hot emit smoke rupture or catch fire If liquid leaks from the product or the product emits a bad odour move the product away from flammab...

Page 11: ...where they have implemented equivalent regulations For other countries please contact your local government to investigate the possibility of recycling your product Restrictions on Copying Observe the following restrictions to ensure the responsible and legal use of your product Copying of the following items is prohibited by law Bank bills coins government issued marketable securities government ...

Page 12: ...Scanner Basics Part Names and Functions Front A Input tray Slide the input tray open lever to the left and then raise the input tray to open it B Input tray open lever User s Guide Scanner Basics 12 ...

Page 13: ...tray extension if originals are too big for the input tray This prevents paper from curling and causing paper jams Do not load a plastic card in the input tray Insert it into the card slot F Input tray G ADF Automatic Document Feeder Feeds loaded originals automatically H Connection mode switch Selects the interface to connect to the scanner To set the interface turn off the scanner set the connec...

Page 14: ... Pickup roller Feeds originals This needs to be replaced when the number of scans exceeds the service number of papers C Separation pad Feeds originals separately one by one This needs to be replaced when the number of scans exceeds the service number of papers Related Information Cleaning Inside the Scanner on page 100 User s Guide Scanner Basics 14 ...

Page 15: ...dy light On The scanner is ready to be used When originals are loaded in the ADF the light becomes brighter Flashing The scanner is scanning waiting to scan processing or sleeping Off The scanner cannot be used because the power is off or an error has occurred F Start button Starts scanning Press this when cleaning the inside of the scanner G Wi Fi connect button Hold down the button for more than...

Page 16: ...astic Cards on page 49 Cleaning Inside the Scanner on page 100 Error Indicators on page 16 Using the Scanner on the Battery on page 21 Error Indicators Scanner errors Indicators Situation Solutions On Ready light Flashing A paper jam or double feed has occur red Open the scanner cover and then re move jammed originals Close the cov er to release the error Load the origi nals again The scanner cove...

Page 17: ...ture of 8 C to 35 C The battery cannot be fully charged It may be damaged or has reached the end of its service life Contact your local dealer Network connection errors Indicators Situation Solutions On Flashing An access point settings error has oc curred Restart the scanner and access point move them closer together and then make network settings again Flashing Flashing Flashing simultaneously A...

Page 18: ...or adding business cards without typing Use the BizCard recognition system to scan business cards edit and synchronize the information to the most frequently used personal database management software You can easily save and manage your contact information EPSON Software Updater EPSON Software Updater is an application that checks for new or updated applications on the internet and installs them Y...

Page 19: ...a rough surface that may shorten the life cycle Related Information Replacing the Pickup Roller on page 106 Resetting the Number of Scans on page 111 Separation Pad Codes Parts should be replaced when the number of scans exceeds the service number You can check the latest number of scans in Epson Scan 2 Utility Part name Codes Life cycle Separation Pad B12B819271 B12B819281 China only B12B819321 I...

Page 20: ...Related Information Replacing the Separation Pad on page 109 Resetting the Number of Scans on page 111 User s Guide Scanner Basics 20 ...

Page 21: ...he battery We recommend turning off the scanner when not in use to save the battery You can also set the scanner to turn off automatically after a specified period of time The battery s usable time is shorter in low temperature environments even if you have charged the battery fully You do not need to wait for the battery to run out before charging it The battery may be hot right after it is charg...

Page 22: ... is charging When charging is complete the light turns blue if the scanner is on if the scanner is off the light turns off It takes approximately 3 hours to fully charge the battery Charging the Battery with a USB Connection You can charge the battery from a computer with a USB connection 1 Make sure that the computer is on Wake the computer if it is in hibernate or sleep mode User s Guide Using t...

Page 23: ... 20 hours It takes much longer to charge the battery if the scanner is off You can charge the battery even if the scanner is turned off If you do not want to consume the computer s battery disconnect the USB cable Battery rated capacity 2090 mAh 3 6 V The battery charging light turns orange when the battery is charging When charging is complete the light turns blue if the scanner is on if the scan...

Page 24: ...to 100 148 mm 2 2 8 in to 3 9 5 8 in 51 8 to 230 g m2 Maximum 215 9 1 117 6 mm 8 5 44 in Minimum 50 8 70 mm 2 0 2 8 in The loadable size varies depending on the type of originals Note All originals must be flat at the leading edge Make sure that curls on the leading edge of the originals are kept within the following range A and B must be 2 mm or less when C is equal to or more than 30 mm Specific...

Page 25: ...m 0 07 in 190 g m2 8 sheets 220 g m2 6 sheets Post Cards 100 148 mm 3 9 5 8 in 128 to 230 g m2 Plain paper Fine paper Recycled paper Thickness of the originals stack under 2 mm 0 07 in 190 g m2 8 sheets 220 g m2 6 sheets You can refill the originals up to the maximum capacity during scanning Specifications of Long Paper These are the specifications for long paper that you can load into the scanner...

Page 26: ... in 128 to 230 g m2 Thickness of the originals stack under 2 mm 0 07 in 190 g m2 8 sheets 220 g m2 6 sheets Vertical Portrait Specifications of Envelopes These are the specifications for envelopes that you can load into the scanner Measurement Thickness Loading Capacity 120 235 mm 4 72 9 25 in 0 38 mm 0 015 in or less 1 envelope 92 165 mm 3 62 6 50 in Types of Originals that Require Attention The ...

Page 27: ...etal foil Originals with staples or paper clips Originals with glue attached Ripped originals Heavily wrinkled or curled originals Transparent originals such as OHP film Originals with carbon paper on the back Originals with wet ink Originals with sticky notes attached Perforated originals Plastic cards complying with ISO781A ID 1 type Laminated cards with ISO781A ID 1 size These cards can be scan...

Page 28: ... 2 1 3 3 in Without embossing 1 0 mm 0 04 in or less 1 card Vertical Portrait Types of Cards that Require Attention The following types of cards may not be successfully scanned ISO781A ID 1 Type plastic cards with emboss the thickness should be 1 24 mm 0 05 in or less ISO781A ID 1 size laminated cards the thickness should be 0 6 mm 0 02 in or less Related Information Placing Plastic Cards in the C...

Page 29: ... 14 in B5 182 257 mm 7 2 10 1 in A5 148 210 mm 5 8 8 3 in B6 128 182 mm 5 0 7 2 in A6 105 148 mm 4 1 5 8 in Business Card 55 89 mm 2 1 3 4 in 128 to 230 g m2 Thickness of the originals stack under 2mm 0 07 in 190 g m2 8 sheets 220 g m2 6 sheets Post Cards 100 148 mm 3 9 5 8 in 128 to 230 g m2 Plain paper Fine paper Recycled paper Thickness of the originals stack under 2 mm 0 07 in 190 g m2 8 sheet...

Page 30: ...e input tray and then pull out the input tray extension Note Make sure there is enough space in front of the scanner for the ejected originals 2 Make sure that the feed selector is set to ADF and the scanner is turned on User s Guide Specifications of Originals and Placing Originals 30 ...

Page 31: ... out 4 Fan the originals Hold both ends of the originals and fan them a few times 5 Align the edges of the originals with the printed side facing down and slide the leading edge into a wedge shape User s Guide Specifications of Originals and Placing Originals 31 ...

Page 32: ...into the ADF until they meet resistance and the Ready light becomes brighter 7 Slide the edge guides to fit the edge of the originals making sure there are no gaps between the originals and the edge guides Otherwise the originals may be fed skewed User s Guide Specifications of Originals and Placing Originals 32 ...

Page 33: ...age and the rest of the originals Also if you cancel scanning in the middle of scanning a batch of originals the next page will be fed a little bit into the ADF and scanning stopped You need to open the scanner cover to remove the page Related Information Basic Scanning on page 52 Advanced Scanning on page 63 Placing Long Paper in the ADF Specifications of Long Paper These are the specifications f...

Page 34: ...ray open lever to the left and open the input tray Note Do not pull out the input tray extension 2 Make sure that the feed selector is set to ADF and the scanner is turned on User s Guide Specifications of Originals and Placing Originals 34 ...

Page 35: ...out 4 Load the original straight into the input tray facing down with the top edge facing into the ADF Slide the original into the ADF until it meets resistance and the Ready light becomes brighter User s Guide Specifications of Originals and Placing Originals 35 ...

Page 36: ...es to fit the edge of the long paper making sure there are no gaps between the edge of the paper and the edge guides Otherwise the originals may be fed skewed User s Guide Specifications of Originals and Placing Originals 36 ...

Page 37: ... of the paper You can either enter the width and height of the paper or use Detect paper length instead of entering the paper height Support the long paper on the input side so that it does not drop out of the ADF and on the output side so that the ejected paper does not fall from the output slot Related Information Required Settings for Special Originals in Epson Scan 2 on page 55 Basic Scanning ...

Page 38: ...g Automatic Feeding Mode Only one receipt should be loaded at once and you need to hold the receipt for a good quality scan Placing Receipts 1 Slide the input tray open lever to the left and open the input tray Note Do not pull out the input tray extension 2 Make sure that the feed selector is set to ADF and the scanner is turned on User s Guide Specifications of Originals and Placing Originals 38...

Page 39: ...g Mode and then click Scan on the Main Settings tab The Automatic Feeding Mode light on the scanner turns on 4 Raise the edge guides and slide to adjust to the width of the receipt User s Guide Specifications of Originals and Placing Originals 39 ...

Page 40: ...e ADF until it is fed automatically into the ADF 6 The receipt is automatically fed into the scanner and scanning starts Support the receipt by hand while it is scanned You can load the next receipt into the ADF to start the next scan while the scanner is in Automatic Feeding Mode User s Guide Specifications of Originals and Placing Originals 40 ...

Page 41: ...3 6 mm 34 inches you need to select Customize and enter the size of the paper You can either enter the width and height of the paper or use Detect paper length instead of entering the paper height Related Information Scanning Different Sizes or Types of Originals One by One Automatic Feeding Mode on page 63 Required Settings for Special Originals in Epson Scan 2 on page 55 Basic Scanning on page 5...

Page 42: ...nput tray open lever to the left open the input tray and then pull out the input tray extension 2 Make sure that the feed selector is set to ADF and the scanner is turned on User s Guide Specifications of Originals and Placing Originals 42 ...

Page 43: ... 4 Load the thick originals into the input tray facing down with the top edge facing into the ADF Slide the thick originals into the ADF until they meet resistance and the Ready light becomes brighter User s Guide Specifications of Originals and Placing Originals 43 ...

Page 44: ...in together with the rest of the originals If you set a batch of originals and perform previewing the second page will be fed a little bit into the ADF Open the scanner cover to remove it from the ADF and then load the page again together with the first page and the rest of the originals Also if you cancel scanning in the middle of scanning a batch of originals the next page will be fed a little b...

Page 45: ...for envelopes that you can load into the scanner Measurement Thickness Loading Capacity 120 235 mm 4 72 9 25 in 0 38 mm 0 015 in or less 1 envelope 92 165 mm 3 62 6 50 in Placing Envelopes 1 Slide the input tray open lever to the left open the input tray and then pull out the input tray extension User s Guide Specifications of Originals and Placing Originals 45 ...

Page 46: ...hat the feed selector is set to ADF and the scanner is turned on 3 Raise the edge guides and slide the edge guides on the input tray all the way out User s Guide Specifications of Originals and Placing Originals 46 ...

Page 47: ...pened edge flap side facing up Slide the envelope into the ADF until they meet resistance and the Ready light becomes brighter cImportant Do not load envelopes with adhesives on them Note Envelopes that are not opened by cutting sharply at the flap edge may not be scanned correctly Envelopes that have not yet been sealed can be loaded with the flap open and facing up User s Guide Specifications of...

Page 48: ... Slot These are the specifications for plastic cards that you can load into the scanner from the card slot Note You can scan plastic cards from the card slot at the front You cannot scan from the ADF Although you cannot scan card from ADF you can leave the ADF as the Document Source setting in Epson Scan 2 Size Card Type Thickness Loading Capacity Loading Direction ISO781A ID 1 Type 54 0 85 6 mm 2...

Page 49: ...ormation Placing Plastic Cards in the Card Slot on page 48 Placing Plastic Cards 1 Slide the input tray open lever to the left and open the input tray 2 Make sure that the feed selector is set to card and the scanner is turned on User s Guide Specifications of Originals and Placing Originals 49 ...

Page 50: ...Load the plastic cards vertically into the card slot facing up until the leading edge of the card is pulled in a little bit by the scanner User s Guide Specifications of Originals and Placing Originals 50 ...

Page 51: ...n Scan 2 When scanning starts the card is taken into the scanner protrudes slightly from the slot at the back and then returns through the scanner and is ejected from the card slot at the front Do not touch the card until it is ejected Related Information Basic Scanning on page 52 Advanced Scanning on page 63 User s Guide Specifications of Originals and Placing Originals 51 ...

Page 52: ...indows 8 1 Windows 8 Windows Server 2012 R2 Windows Server 2012 Enter the application name in the search charm and then select the displayed icon Windows 7 Windows Vista Windows XP Windows Server 2008 R2 Windows Server 2008 Windows Server 2003 R2 Windows Server 2003 Click the start button and then select All Programs or Programs EPSON Epson Scan 2 Epson Scan 2 Mac OS X Select Go Applications Epson...

Page 53: ...solution Select the resolution Note ADF is set as the Document Source automatically 4 Make other scan settings if necessary You can preview the scanned image Load only the first page of your originals into the input tray and click the Preview button The preview window opens the previewed image is displayed and the page is ejected from the ADF Replace the ejected page together with the rest of orig...

Page 54: ...es smooth when performing black and white scanning for a document that contains images Note Some items may not be available depending on other settings you made 5 Set the file saving settings Image Format Select the save format from the list You can make detailed settings for each save format except BITMAP and PNG After selecting the save format select Options from the list File Name Check the sav...

Page 55: ...ent Size Settings window Next create the size manually on the window Long paper If the size is not listed on the Document Size list select Auto Detect Long Paper or select Customize to create a custom document size Setting a Resolution That Suits the Scanning Purpose Advantages and Disadvantages of Increasing the Resolution Resolution indicates the number of pixels smallest area of an image for ea...

Page 56: ...ariety of methods to sort the documents into separate files such as detecting barcodes or characters on the pages You can also register scanning settings for a job to simplify scanning operations See the help for details on Document Capture Pro 1 Place the original 2 Start Document Capture Pro Windows 10 Click the start button and then select All apps Epson Software Document Capture Pro Windows 8 ...

Page 57: ...eed to select the scanner you want to use from the scanners list 3 Click The Scan window is displayed 4 Make the following settings Source Select the source where the original is placed User s Guide Basic Scanning 57 ...

Page 58: ...k pages if there are any in the originals Detailed Settings button Select to use Epson Scan 2 features to adjust scanned images 5 Make sure the feed selector on the scanner is set correctly To scan originals using ADF set the feed selector to ADF To scan a plastic card using the card slot set the feed selector to card 6 Click Scan The scanned document is displayed in Document Capture Pro 7 Check t...

Page 59: ...he on screen instructions The scanned image is saved to a folder attached to an email uploaded to a cloud service and so on depending on the function you selected Related Information Specifications of Originals and Placing Originals on page 24 Document Capture Pro Document Capture on page 18 Setting a Resolution That Suits the Scanning Purpose on page 55 Scanning Using Document Capture Mac OS X Th...

Page 60: ...ture Select Finder Go Applications Epson Software Document Capture Note You may need to select the scanner you want to use from the scanners list 3 Click The Scan Settings window is displayed User s Guide Basic Scanning 60 ...

Page 61: ...ment Capture 7 Check the scanned images and edit them if necessary 8 When you have finished checking the image click one of the destination icons One of the transfer settings windows is displayed depending on the icon you selected Note If you want to upload to a cloud service you need to set up your account with the cloud service in advance If you want to use Evernote as the destination download t...

Page 62: ...nning 1 Place the original 2 Make sure the feed selector on the scanner is set correctly To scan originals using ADF set the feed selector to ADF To scan a plastic card using the card slot set the feed selector to card 3 Press the button Note When using Document Capture Pro Windows or Document Capture Mac OS X the product starts the job that was assigned in the Job Settings window Related Informat...

Page 63: ...In this mode the scanner starts scanning automatically when originals are loaded in the ADF You can also use the card slot to scan plastic cards in Automatic Feeding Mode 1 Start Epson Scan 2 2 Select Automatic Feeding Mode on the Main Settings tab 3 Make other settings for scanning on the Epson Scan 2 main window 4 Click Scan Automatic Feeding Mode starts User s Guide Advanced Scanning 63 ...

Page 64: ...re placing originals 8 After you have scanned all originals press the button on the scanner to close Automatic Feeding Mode Note You can also close Automatic Feeding Mode by pressing Finish on the Automatic Feeding Mode window displayed on your computer You can make timeout settings to finish Automatic Feeding Mode Select Settings on the Document Source list to open the Document Source Settings wi...

Page 65: ...page 67 You can remove the color specified from the scanned image and then save it in grayscale or black and white For example you can erase marks or notes you wrote in the margins with color pen when scanning Color Enhance on page 68 You can enhance the color specified for the scanned image and then save it in grayscale or black and white For example you can enhance letters or lines that are in l...

Page 66: ...ows of holes on the scanned image when scanning originals with punched holes Unsharp Mask You can enhance and sharpen the outlines of the image Note This feature is not available when selecting the Main Settings tab Image Type Black White Descreening You can remove moiré patterns web like shadows that appear when scanning printed paper such as a magazine To check for moiré patterns display the ima...

Page 67: ...letters clear and images smooth when performing black and white scanning for a document that contains images You can adjust the quality of the image part of the original from Brightness and Contrast Note You can only make settings for this feature when selecting the Main Settings tab Image Type Black White To use this feature set the Resolution on the Main Settings tab to 600 dpi or less Dropout Y...

Page 68: ...u can make settings for the color you want to enhance while checking the preview window for Windows only Note This feature is not available when selecting the Main Settings tab Image Type Auto or Color Brightness You can adjust the brightness for the whole image Note This feature is not available depending on the settings on the Main Settings tab Image Type or the settings on the Advanced Settings...

Page 69: ...rger Decrease the threshold the white color area becomes larger Note This feature may not be available depending on the settings on the Main Settings tab Image Type or the settings on the Advanced Settings tab Skip Blank Pages You can skip blank pages if there are any in the originals You can select the amount of blank page detection If you set this to a high level you can skip any originals with ...

Page 70: ...e slant of the original is not corrected Paper Skew Corrects the slant of originals that are fed askew Contents Skew Corrects the slant of the content of the original that was printed at an angle and so on Paper and Contents Skew Corrects the slant of the original that is fed askew as well as the content of the original Note When using this feature areas that are fed askew are corrected using whit...

Page 71: ...2 Stitch Images You can stitch the images on the front and rear when scanning both sides of the original Select the layout for stitching the images Note This feature is available when you have selected Double Sided in Scanning Side Rotate You can rotate the original clockwise and scan it Select the rotation angle depending on the original you want to scan Note If you select Auto and scan the origi...

Page 72: ...s window 10 Check that the language of the original is selected in the Text Language list 11 Click OK to close the Image Format Options window 12 Check the save file name displayed in File Name 13 Select the save folder for the scanned image from the Folder list 14 Click Scan The scanned image is saved as a Searchable PDF Related Information Scanning Using Epson Scan 2 on page 52 Specifications of...

Page 73: ...window opens 7 Select the Office format file you want to save as from the File Type list 8 Click Options to display the Detailed Settings window 9 Make settings for each item and then click OK to close the Detailed Settings window 10 Make other settings if necessary and then click Send or OK The scanned image is saved as an Office format file Related Information Scanning Using Document Capture Pro...

Page 74: ...e select the destination The Batch Save window or the Transfer Settings window is displayed 7 Click File Name Separation Settings 8 Select Apply job separation and then click Separation Settings 9 Select the separation method and the method for specifying the folder name on the Job Separation Settings window and then click OK 10 Make other settings on the File Name Separation Settings window and t...

Page 75: ...ayed 4 Make the scanning settings and then click Scan 5 Check the scanned images and edit them if necessary 6 When you have finished checking the image click the destination icon The Transfer Settings window is displayed 7 Make settings for each item and then click Send The scanned Image is sent to the selected cloud service Related Information Scanning Using Document Capture Pro Windows on page 5...

Page 76: ...ettings of your FTP server The scanned image is sent to your FTP server Related Information Scanning Using Document Capture Pro Windows on page 56 Scanning Using Document Capture Mac OS X on page 59 Specifications of Originals and Placing Originals on page 24 Attaching Scanned Images to an Email You can attach scanned images directly to an email using Document Capture Pro Windows or Document Captu...

Page 77: ...tart Document Capture Pro Windows or Document Capture Mac OS X 3 Click The Scan window is displayed 4 Make the scanning settings and then click Scan 5 Check the scanned images and edit them if necessary 6 When you have finished checking the image click the icon The Print Settings window opens 7 Make settings for each item and then click OK The scanned image is printed from the printer Related Info...

Page 78: ...e scanned image on the tab Destination Select the destination of the scanned image 5 Click OK to close the Job Settings window 6 Click OK on the Job Management window The job is set in the Document Capture Pro or Document Capture Assigning a Job to the Scanner Button You can assign a job to the scanner s button and run the job by pressing the button 1 Start Document Capture Pro Windows or Document...

Page 79: ...the software s help menu 1 Place the business card on the scanner 2 Start Presto BizCard Windows 10 Click the start button and then select All apps NewSoft Presto BizCard Windows 8 1 Windows 8 Enter the application name in the search charm and then select the displayed icon Windows 7 Windows Vista Windows XP Click the start button and then select All Programs or Programs NewSoft Presto BizCard Mac...

Page 80: ...and then scan The business card is scanned and converted into editable text in the Presto BizCard window Related Information Presto BizCard on page 18 Specifications of Originals and Placing Originals on page 24 User s Guide Advanced Scanning 80 ...

Page 81: ...Smart Device on page 84 Making Wi Fi Settings from the Control Panel on page 84 AP Mode Connection Use this connection method when you are not using Wi Fi at home or at the office or when you want to connect the scanner and the smart device directly In this mode the scanner acts as an access point and you can connect up to four devices to the scanner without having to use a standard access point H...

Page 82: ...duct name http epson sn Go to Setup and then click Download in the download and connect part Click or double click the downloaded file to run the installer Follow the on screen instructions Setting up using the software disc only for the models that come with a software disc and users with computers with disc drives Insert the software disc into the computer and then follow the on screen instructi...

Page 83: ... Windows Select the connection type and then click Next Mac OS X Select the connection type Follow the on screen instructions The necessary software is installed User s Guide Network Settings 83 ...

Page 84: ...control panel After connecting the scanner to the network connect to the scanner from the device that you want to use computer smart phone tablet and so on Making Wi Fi Settings by Push Button Setup You can automatically set up a Wi Fi network by pressing a button on the access point If the following conditions are met you can set up by using this method The access point is compatible with WPS Wi ...

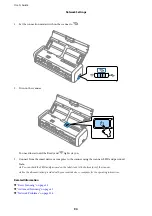
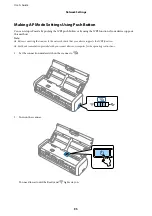
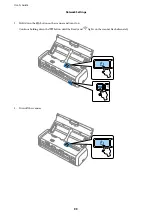
Page 85: ...ait until Ready and lights on the scanner flash simultaneously 3 Hold down the button on the scanner for at least three seconds You need to wait until the Ready and lights on the scanner flash alternately User s Guide Network Settings 85 ...

Page 86: ...or details Connection fails when the light turns on Restart the scanner and access point move them closer together and then try the network settings again Related Information Basic Scanning on page 52 Advanced Scanning on page 63 Network Problems on page 124 Making Wi Fi Settings by PIN Code Setup WPS You can connect to an access point by using a PIN code You can use this method to set up if an ac...

Page 87: ...ton on the scanner and turn it on Continue holding down the button until the Ready and lights on the scanner flash alternately 3 Use your computer to enter the PIN code an eight digit number on the label stuck to the bottom face of the scanner into the access point within two minutes When the Ready and lights on the scanner stay on Wi Fi setup for the scanner is complete User s Guide Network Setti...

Page 88: ...n the scanner When the Ready and lights on the scanner stay on the connection has been established Note Connection fails when the light turns on Restart the scanner and access point move them closer together and then try the network settings again Related Information Basic Scanning on page 52 Advanced Scanning on page 63 Network Problems on page 124 User s Guide Network Settings 88 ...

Page 89: ... connection Note If you are using iOS or Android devices you can use Epson DocumentScan to connect the scanner on Wi Fi network 1 Run EpsonNet Config on your computer Windows 10 Click the start button and then select All apps EpsonNet EpsonNet Config VX EpsonNet Config Windows 8 1 Windows 8 Windows Server 2012 R2 Windows Server 2012 Enter the application name in the search charm and then select th...

Page 90: ...2 Select your scanner from the list and then click Configuration 3 Select Network Interface Network Basic Wireless User s Guide Network Settings 90 ...

Page 91: ...level of your wireless connection WEP Settings WPA Settings Set the password of your wireless connection Note Make additional settings if necessary If you do not know the security settings for the access point see the documentation provided with the access point or contact your network administrator 5 Click Transmit 6 Quit EpsonNet Config Click Device and then click Quit User s Guide Network Setti...

Page 92: ...7 Turn off the scanner 8 Connect your computer to your Wi Fi network 9 Set the connection mode switch on the scanner to User s Guide Network Settings 92 ...

Page 93: ...e to the scanner using the AP mode connection the scanner is connected to the same Wi Fi network SSID as the computer or smart device and communication is established between them Since the computer or smart device is automatically connected to other connectable Wi Fi networks if the scanner is turned off it is not connected to the previous Wi Fi network again if the scanner is turned on Connect t...

Page 94: ...e scanner using the scanner s SSID and password Note You can check the SSID and password on the label stuck to the bottom face of the scanner See the documentation provided with your smart device or computer for the operating instructions Related Information Basic Scanning on page 52 Advanced Scanning on page 63 Network Problems on page 124 User s Guide Network Settings 94 ...

Page 95: ...hod Note Before connecting the scanner to the network check that your device supports the WPS function See the documentation provided with your smart device or computer for the operating instructions 1 Set the connection mode switch on the scanner to 2 Turn on the scanner You need to wait until the Ready and lights stay on User s Guide Network Settings 95 ...

Page 96: ...ithin approximately two minutes Otherwise the standby status for WPS connection is cancelled Note See the documentation provided with your smart device or computer for the operating instructions Related Information Basic Scanning on page 52 Advanced Scanning on page 63 Network Problems on page 124 Checking the Network Status Using Network Light You can check the network connection status using the...

Page 97: ...duct name http epson sn Go to Setup and then click Download in the download and connect part Click or double click the downloaded file to run the installer Follow the on screen instructions Setting up using the software disc only for the models that come with a software disc and users with computers with disc drives Insert the software disc into the computer and then follow the on screen instructi...

Page 98: ...to connect the scanner to your computer Restoring the Network Settings from the Control Panel You can restore all network settings to their defaults 1 Set the connection mode switch on the scanner to User s Guide Network Settings 98 ...

Page 99: ...2 Hold down the button on the scanner and turn it on Continue holding down the button until the Ready and lights on the scanner flash alternately 3 Turn off the scanner User s Guide Network Settings 99 ...

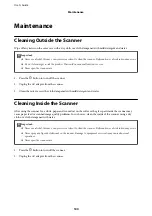
Page 100: ...ampened with mild detergent and water Cleaning Inside the Scanner After using the scanner for a while paper and room dust on the roller or the glass part inside the scanner may cause paper feed or scanned image quality problems In such cases clean the inside of the scanner using a dry cloth or a cloth dampened with water cImportant Never use alcohol thinner or any corrosive solvent to clean the sc...

Page 101: ...er and glass surface at the bottom inside of the scanner cover using a soft cloth cImportant Do not place too much force on the glass surface Do not use a brush or a hard tool Any scratches on the glass may affect the scan quality Do not spray cleaner directly onto the glass surface User s Guide Maintenance 101 ...

Page 102: ...5 Hold the hooks on both sides of the separation pad and then remove it 6 Wipe off any stains on the separation pad using a soft cloth User s Guide Maintenance 102 ...

Page 103: ...7 Put the separation pad into the groove in the body to install it 8 Remove the cover of the pickup roller User s Guide Maintenance 103 ...

Page 104: ...Remove the pickup roller 10 Wipe off any stains on the pickup roller using a soft cloth 11 Slide the pickup roller to the left and insert it into the metallic axis in the body User s Guide Maintenance 104 ...

Page 105: ...ile opening the scanner cover The rollers on the bottom and the output slot move momentarily and then the scanner enters cleaning mode The rollers rotate a bit each time you press the button Press the button to move the rollers and then wipe the surface of the rollers with a soft cloth Repeat this steps several times User s Guide Maintenance 105 ...

Page 106: ...Pad Codes on page 19 Replacing Consumables The pickup roller and the separation pad need to be replaced when the number of scans exceeds the life cycle of the roller or the pad When a replacement message is displayed on your computer follow the steps below to replace it and reset the scan number using Epson 2 Utility A pickup roller B separation pad Replacing the Pickup Roller 1 Press the P button...

Page 107: ...3 Pull the edge of the scanner cover firmly at the d mark to open it 4 Remove the cover of the pickup roller User s Guide Maintenance 107 ...

Page 108: ...spose of the used pickup roller following the rules and regulations of your local authority Do not disassemble them 6 Slide the new pickup roller to the left and insert it into the metallic axis in the body User s Guide Maintenance 108 ...

Page 109: ...o close 8 Press the edge of the scanner cover firmly at the d mark to close it 9 Plug in the AC adapter and then turn on the scanner 10 Reset the scan number using Epson Scan 2 Utility Replacing the Separation Pad 1 Press the P button to turn off the scanner 2 Unplug the AC adapter from the scanner User s Guide Maintenance 109 ...

Page 110: ... the d mark to open it 4 Hold the hooks on both sides of the separation pad and then remove it Note Dispose of the used separation pad following the rules and regulations of your local authority Do not disassemble them User s Guide Maintenance 110 ...

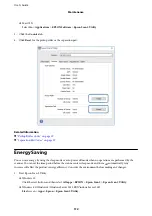
Page 111: ...he pickup roller or the separation pad 1 Turn on the scanner 2 Start Epson Scan 2 Utility Windows 10 Click the start button and then select All apps EPSON Epson Scan 2 Epson Scan 2 Utility Windows 8 1 Windows 8 Windows Server 2012 R2 Windows Server 2012 Start screen Apps Epson Epson Scan 2 Utility Windows 7 Windows Vista Windows XP Windows Server 2008 R2 Windows Server 2008 Windows Server 2003 R2 ...

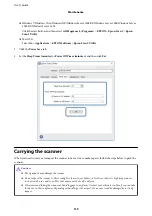
Page 112: ... when no operations are performed by the scanner You can set the time period before the scanner enters sleep mode and turns off automatically Any increase will affect the product s energy efficiency Consider the environment before making any changes 1 Start Epson Scan 2 Utility Windows 10 Click the start button and then select All apps EPSON Epson Scan 2 Epson Scan 2 Utility Windows 8 1 Windows 8 ...

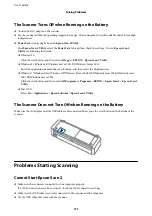
Page 113: ...e scanner When you need to carry or transport the scanner to move it or to make repairs follow the steps below to pack the scanner Caution Strong impacts may damage the scanner Do not expose the scanner to direct sunlight or leave it near heaters in locations subject to high temperatures such as inside a car and so on The heat may cause the body to deform We recommend taking the scanner as hand lu...

Page 114: ...mprove or add functions by updating the applications and the firmware Make sure you use the latest version of the applications and firmware 1 Make sure that the scanner and the computer are connected and the computer is connected to the internet 2 Start EPSON Software Updater and update the applications or the firmware Note Windows Server operating systems are not supported Windows 10 Click the st...

Page 115: ...pplications Epson Software EPSON Software Updater cImportant Do not turn off the computer or the scanner while updating Note If you cannot find the application you want to update in the list you cannot update using the EPSON Software Updater Check for the latest versions of the applications on your local Epson website http www epson com User s Guide Maintenance 115 ...

Page 116: ... scanner unit may need to be replaced Contact your dealer Related Information Error Indicators on page 16 The Scanner Does Not Turn On Connect the AC adapter to the scanner When using the AC adapter make sure it is securely connected to the scanner and an electrical outlet Also check that the electrical outlet is working correctly Plug another device into the electrical outlet and check that you c...

Page 117: ...layed icon Windows 7 Windows Vista Windows XP Windows Server 2008 R2 Windows Server 2008 Windows Server 2003 R2 Windows Server 2003 Click the start button and then select All Programs or Programs EPSON Epson Scan 2 Epson Scan 2 Utility Mac OS X Select Go Applications Epson Software Epson Scan 2 Utility The Scanner Does not Turn Off when Running on the Battery Make sure the AC adapter and the USB c...

Page 118: ...g it because Document Capture Pro and Document Capture do not support scanning from the button over a wireless connection To start scanning by pressing the button launch Epson Scan 2 on your computer before scanning Related Information Scanning Using a Scanner Button on page 61 Paper Feeding Problems Multiple Originals Are Fed If multiple originals are fed open the scanner cover and remove the ori...

Page 119: ...o remove it Note If the AC adapter is disconnected while scanning the scanner stops and an error is displayed Do not disconnect the AC adapter when scanning 1 Remove all originals remaining in the input tray 2 Pull the edge of the scanner cover firmly at the d mark to open it User s Guide Solving Problems 119 ...

Page 120: ...d If you want to increase the scanning speed connect the AC adapter to the scanner If the scanner is running on the battery and the battery level is low scanning speed is reduced Connect the AC adapter to the scanner When the resolution is high scanning may take some time Computers with USB 3 0 SuperSpeed or USB 2 0 Hi Speed ports can scan faster than those with USB 1 1 ports If you are using a US...

Page 121: ...he Advanced Settings tab and then Image Option Text Enhancement In Epson Scan 2 when Image Type on the Main Settings tab is set to Black White adjust the Threshold on the Advanced Settings tab When you increase the Threshold black becomes stronger If the resolution is low try increasing the resolution and then scanning Straight Lines Appear when Scanning from ADF Clean the ADF Straight lines may a...

Page 122: ...ty 2 Select the Adjustments tab 3 Use Expansion Contraction to adjust the expansion ratio for scanned images 4 Click Set to apply the settings to the scanner Offset Appears in the Background of Images Images on the back of the original may appear in the scanned image In Epson Scan 2 select the Advanced Settings tab and then adjust the Brightness This feature may not be available depending on the s...

Page 123: ...to scan is not on the list select Customize and then create the size manually Text is Not Recognized Correctly when Saving as a Searchable PDF On the Image Format Options window in Epson Scan 2 check that Text Language is set correctly on the Text tab Check that the original is placed straight Use an original with clear text Text recognition may decline for the following types of originals Origina...

Page 124: ...8 1 Windows 8 Windows Server 2012 R2 Windows Server 2012 Enter the application name in the search charm and then select the displayed icon Windows 7 Windows Vista Windows XP Windows Server 2008 R2 Windows Server 2008 Windows Server 2003 R2 Windows Server 2003 Click the start button and then select All Programs or Programs EPSON Epson Scan 2 Epson Scan 2 Utility Mac OS X Select Go Applications Epso...

Page 125: ...same time you may not be able to use the scanner from the computer or smart device depending on the settings of the access points Connect the computer or smart device to the same access point as the scanner You may not be able to connect to the access point when the access point has multiple SSIDs and devices are connected to different SSIDs on the same access point Connect the computer or smart d...

Page 126: ... scanner and the computer or smart device even if they are connected to the same network disable the privacy separator on the access point See the manual provided with the access point for details Related Information Checking the SSID Connected to the Scanner on page 126 Checking the SSID for the Computer on page 127 Checking the SSID Connected to the Scanner You can check the connected SSID on Ep...

Page 127: ...anner Turn off the devices you want to connect to the network Wait for about 10 seconds and then turn on the devices in the following order access point computer or smart device and then scanner Move the scanner and computer or smart device closer to the access point to help with radio wave communication and then try to make network settings again Try accessing any website from your computer to ma...

Page 128: ... setup is complete Re set the USB connection following the steps in Changing the Connection Method to a Computer in this manual Related Information Changing the Connection Method to a Computer on page 97 Uninstalling and Installing Applications Uninstalling Your Applications You may need to uninstall and then reinstall your applications to solve certain problems or if you upgrade your operating sy...

Page 129: ...indows Server 2003 R2 Windows Server 2003 Click Change Remove or Remove Note If the User Account Control window is displayed click Continue 7 Follow the on screen instructions Note A message may be displayed prompting you to restart your computer If it is displayed make sure I want to restart my computer now is selected and then click Finish Uninstalling Your Applications for Mac OS X Note Make su...

Page 130: ...tion you want to uninstall and then drag it to the trash icon Installing Your Applications Follow the steps below to install the necessary applications Note Log on to your computer as an administrator Enter the administrator password if the computer prompts you When reinstalling applications you need to uninstall them first 1 Quit all running applications 2 When installing Epson Scan 2 disconnect ...

Page 131: ...Min 89 70 mm 3 5 2 75 inches Paper input Face down loading ADF Face up loading Card Slot Paper output Face down ejection ADF Face up ejection Card Slot Paper capacity Thickness of the originals stack under 2 mm 0 07 in 64 g m2 25 sheets 80 g m2 20 sheets 128 g m2 12 sheets The loading capacity varies depending on the paper type Color Depth Color 48 bits per pixel internal 16 bits per pixel per col...

Page 132: ...less Security WEP 64 128bit WPA2 PSK AES 1 3 1 Not supported for IEEE 802 11b 2 AP mode connection and Wi Fi connection can be used at the same time 3 Complies with WPA2 standards with support for WPA WPA2 Personal Dimensional Specifications Dimensions Width 288 mm 11 3 inches Depth 88 5 mm 3 5 inches Height 67 mm 2 6 inches Weight Approx 1 3 kg 2 9 lb Without protruding parts Electrical Specifica...

Page 133: ...Model A491H AC 100 to 240 V A492E AC 220 to 240 V Rated Input Current 0 6 A Rated Frequency Range 50 to 60 Hz Rated Output Power Supply Voltage DC 5 V Rated Output Current 3 A Battery Specifications Type Li ion Rated Voltage 3 6 V Rated Capacity 2090mAh Charging Time AC Adapter Approx 3 hours USB 3 0 Port Approx 4 hours USB 2 0 Port Approx 20 hours These values are measured under the condition tha...

Page 134: ...4 bit Windows 8 1 32 bit 64 bit Windows 8 32 bit 64 bit Windows 7 32 bit 64 bit Windows Vista 32 bit 64 bit Windows XP Professional x64 Edition Service Pack 2 Windows XP 32 bit Service Pack 3 Windows Server 2012 R2 Windows Server 2012 Windows Server 2008 R2 Windows Server 2008 32 bit 64 bit Windows Server 2003 R2 32 bit 64 bit Windows Server 2003 32 bit 64 bit Service Pack 2 Mac OS X 1 2 Mac OS X ...

Page 135: ... maximum shielding Equipment or its transmit antenna that is installed outdoors is subject to licensing This equipment complies with FCC IC radiation exposure limits set forth for an uncontrolled environment and meets the FCC radio frequency RF Exposure Guidelines in Supplement C to OET65 and RSS 102 of the IC radio frequency RF Exposure rules This equipment should be installed and operated so tha...

Page 136: ...ements resulting from a non recommended modification of the product Standards and Approvals for Australian Models Product EMC AS NZS CISPR22 Class B Epson hereby declares that the following equipment Models are in compliance with the essential requirements and other relevant provisions of AS NZS4268 J391A Epson cannot accept responsibility for any failure to satisfy the protection requirements res...

Page 137: ...r product Epson support will be able to help you much more quickly if you give them the following information Product serial number The serial number label is usually on the back of the product Product model Product software version Click About Version Info or a similar button in the product software Brand and model of your computer Your computer operating system name and version Names and version...

Page 138: ...tralia World Wide Web pages Worth taking your modem here for the occasional surf The site provides a download area for drivers Epson contact points new product information and technical support e mail Epson Helpdesk Phone 1300 361 054 Epson Helpdesk is provided as a final backup to make sure our clients have access to advice Operators on the Helpdesk can aid you in installing configuring and opera...

Page 139: ...epair service and warranty Help for Users in Thailand Contacts for information support and services are World Wide Web http www epson co th Information on product specifications drivers for download Frequently Asked Questions FAQ and e mail are available Epson Hotline Phone 66 2685 9899 Email support eth epson co th Our Hotline team can help you with the following over the phone Sales enquiries an...

Page 140: ...AKARTA ESS Jakarta MG DUA RUKO MANGGA DUA MALL NO 48 JL ARTERI MANGGA DUA JAKARTA UTARA DKI 6221 62301104 jkt technical1 epson indonesia co id NORTH SUMATERA ESC Medan Kompleks Graha Niaga Jl Bambu II No A 4 Medan 20114 6261 42066090 42066091 mdn technical epson indonesia co id WEST JAWA ESC Bandung JL CIHAMPELAS NO 48A BANDUNG JABAR 40116 6222 4207033 bdg technical epson indonesia co id DI YOGYAK...

Page 141: ...sssmg support epson indonesia co id EAST KALIMANTAN ESC SAMARINDA Jl KH Wahid Hasyim M Yamin Kel Sempaja Selatan Kec Samarinda Utara Samarinda Kalimantan Timur samping kantor pos 62541 7272904 escsmd support epson indonesia co id SOUTH SUMATERA ESC PALEMBANG Jl H M Rasyid Nawawi no 249 kelurahan 9 ilir Palembang Sumsel 62711 311330 escplg support epson indonesia co id EAST JAVA ESC JEMBER Jl Pangl...

Page 142: ...s for information support and services are World Wide Web http www epson com my Information on product specifications drivers for download Frequently Asked Questions FAQ Sales Enquiries questions through e mail Epson Call Centre Phone 60 1800 8 17349 Sales enquiries and product information Product usage questions or problems Enquiries on repair services and warranty Head Office Phone 603 56288288 ...

Page 143: ...mbers and e mail address below World Wide Web http www epson com ph Information on product specifications drivers for download Frequently Asked Questions FAQ and E mail Enquiries are available Epson Philippines Customer Care Toll Free PLDT 1800 1069 37766 Toll Free Digital 1800 3 0037766 Metro Manila 632 441 9030 Web Site http customercare epson com ph E mail customercare epc epson som ph Our Cust...

Reviews: