❏
A
Make basic scanning settings.
❏
Source
: Select the source where the original is placed. Select double-sided to scan both sides of the
originals.
❏
Document Size
: Select the size of the original you placed.
❏
Image Type
: Select the color you want to use to save the scanned image.
❏
Rotation
: Select the rotation angle depending on the original you want to scan.
❏
Resolution
: Select the resolution.
❏
Text Enhancement
: Select to make blurred letters in the original clear and sharp.
❏
Correct Document Skew
: Select to correct the slant of the original.
❏
Skip Blank Page
: Select to skip blank pages if there are any in the originals.
❏
Detailed Settings
button: Select to use Epson Scan 2 features to adjust scanned images such as
Remove
Background
or
Auto Area Segmentation
. Change the scan operation and click
Save
to return to the
Document Capture Pro screen.
“Scanning Using Epson Scan 2” on page 109
❏
B
Change the settings as necessary.
Select
Show the preview while scanning
to display images while scanning.
Select
Show the confirmation dialog after scanning
to display a confirmation message asking if you want
to continue scanning after completing a scan.
When you have finished making scanning settings, click
Next
or the
2. Save
tab.
6.
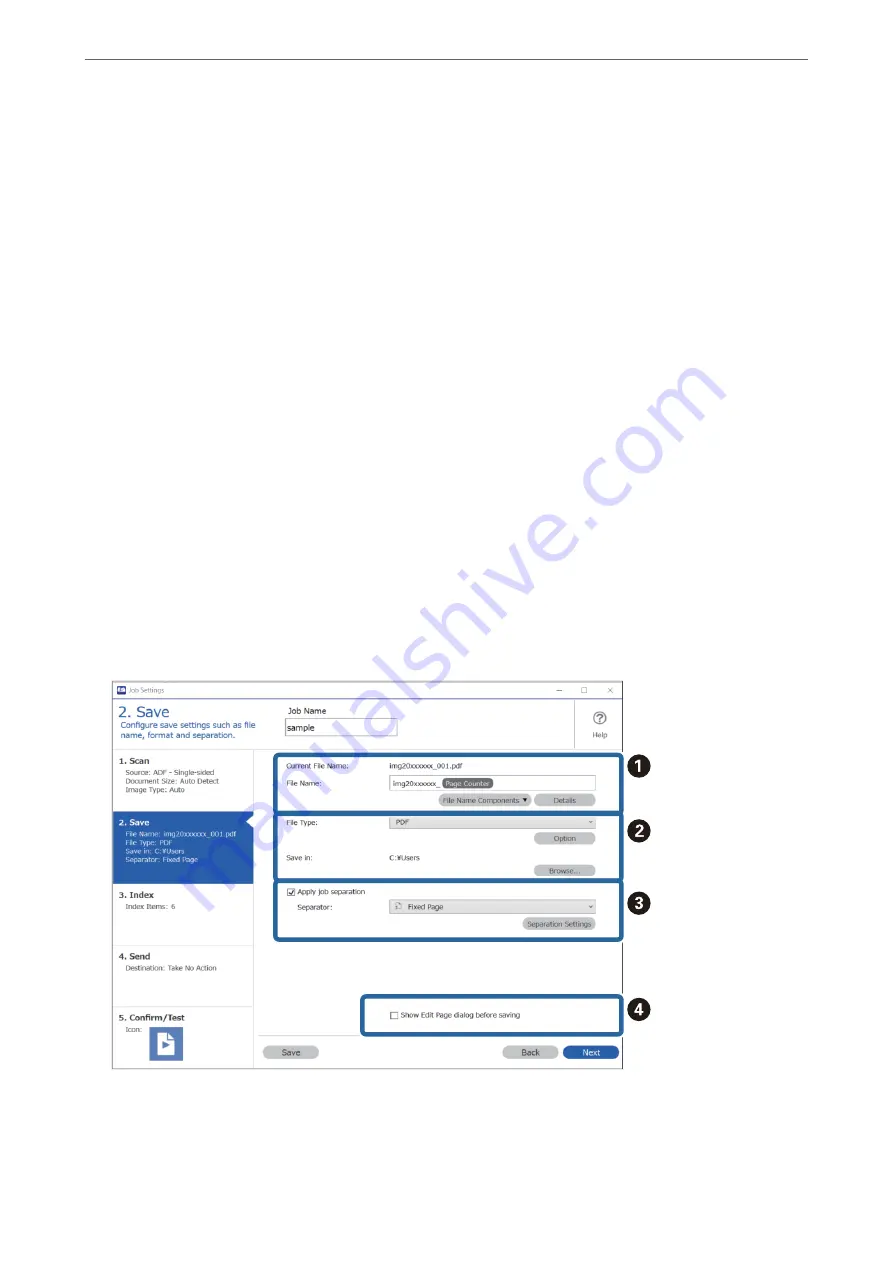
On the
2. Save
tab, you can make settings for saving the scan results.
❏
A
Set the name of the file.
❏
B
Set the file save format and location.
>
>
Scanning Using Document Capture Pro (Windows)
99


