Installing the Touch Unit
114
i
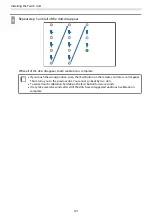
If only one projector is installed, touch (
) displayed on the screen with your finger and
check if (
) is displayed in the same position
Touch all four (
) to confirm.
Screen
Status
Adjustment has been performed correctly if the lo‐
cation you touch with your finger is the same place
as where (
) is displayed.
If (
) is displayed in a different location to the
point you touched, select
Up
once using the control
panel or the remote control. Next, touch (
)
again with your finger to confirm.
Repeat until (
) is displayed in the correct posi‐
tion.
Adjustment is complete when (
) appears in the correct position for all four (
) positions.
Go to "Calibrating the touch operation position"
j
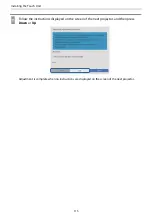
When multiple projectors are installed, on the next projector, select
Installation
>
Touch
Unit
>
Touch Unit Adjustment Guide
The following screen is displayed on the next projector.
Summary of Contents for ELPHD02
Page 1: ...Installation Guide ...
Page 18: ...Introduction 17 Max 5m Max 5m ...
Page 29: ...Installing the Wall mount 28 Horizontal slide 45 45 Forward backward slide 0 383 ...
Page 77: ...Installing the Control Pad 76 For Canadian Users ...
Page 79: ...Installing the Control Pad 78 ...
Page 96: ...Installing the Touch Unit 95 Wavelength 932 to 952 nm ...
Page 99: ...Installing the Touch Unit 98 Adjustment range 79 5 140 5 15 76 ...
Page 138: ...Setting the Projector 137 c Select EDID from the Signal I O menu d Select 3240x1080 60Hz ...


