Installing the Touch Unit
117
b
Check the message displayed and take the necessary action
Screen
Solution
Follow the on-screen instructions to adjust the
angle of the laser, and then perform auto adjust‐
ment again. For details, see "Adjusting the angle
of the laser"
.
Check the following after removing the markers
from the projection surface.
If you see an icon (
) on the projection surface,
check if there are any obstacles at the position of
the icon.
Check if the strong light such as sunlight or fluo‐
rescent light is shining onto the projection sur‐
face or the interactive light receiver.
When you have checked everything, perform
Touch Unit Setup
from the
Installation
menu.
The Touch Unit may be malfunctioning. Contact
your dealer.
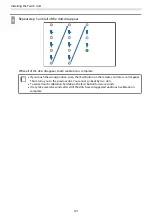
Adjusting the angle of the laser
This section explains how to re-adjust the laser when you see the following screen.
Summary of Contents for ELPHD02
Page 1: ...Installation Guide ...
Page 18: ...Introduction 17 Max 5m Max 5m ...
Page 29: ...Installing the Wall mount 28 Horizontal slide 45 45 Forward backward slide 0 383 ...
Page 77: ...Installing the Control Pad 76 For Canadian Users ...
Page 79: ...Installing the Control Pad 78 ...
Page 96: ...Installing the Touch Unit 95 Wavelength 932 to 952 nm ...
Page 99: ...Installing the Touch Unit 98 Adjustment range 79 5 140 5 15 76 ...
Page 138: ...Setting the Projector 137 c Select EDID from the Signal I O menu d Select 3240x1080 60Hz ...

